Перейти к основному содержанию

Cr-48 Chromebook Network Card Replacement

Выберете то, что вам нужно

  1. Cr-48 Chromebook Network Card Replacement, Battery: шаг 1, изображение 1 из 3 Cr-48 Chromebook Network Card Replacement, Battery: шаг 1, изображение 2 из 3 Cr-48 Chromebook Network Card Replacement, Battery: шаг 1, изображение 3 из 3
    • Slide the switch on the bottom of the laptop until the battery pops out.

    • Once the battery pops out, you can remove it.

  2. Cr-48 Chromebook Network Card Replacement, Remove Rear Rubber Feet: шаг 2, изображение 1 из 2 Cr-48 Chromebook Network Card Replacement, Remove Rear Rubber Feet: шаг 2, изображение 2 из 2
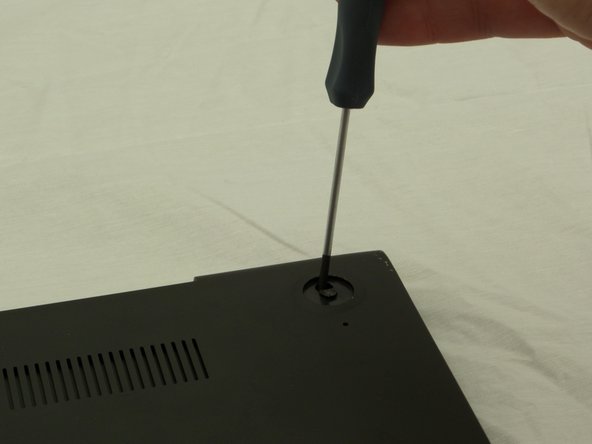
    • Using a pair of tweezers, remove the two rear rubber feet to expose two hidden screws.

  3. Cr-48 Chromebook Network Card Replacement, Remove Screws: шаг 3, изображение 1 из 3 Cr-48 Chromebook Network Card Replacement, Remove Screws: шаг 3, изображение 2 из 3 Cr-48 Chromebook Network Card Replacement, Remove Screws: шаг 3, изображение 3 из 3
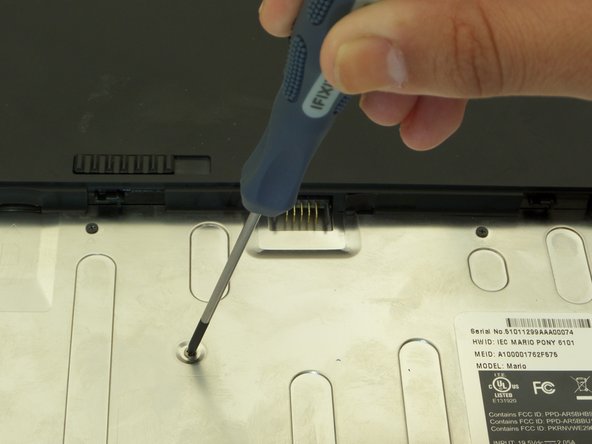
    • Remove ten 3 mm screws in the battery compartment using a Phillips #00 screwdriver.

    • Remove two 4.5 mm screws under the rubber feet using a Phillips #00 screwdriver.

  4. Cr-48 Chromebook Network Card Replacement: шаг 4, изображение 1 из 3 Cr-48 Chromebook Network Card Replacement: шаг 4, изображение 2 из 3 Cr-48 Chromebook Network Card Replacement: шаг 4, изображение 3 из 3
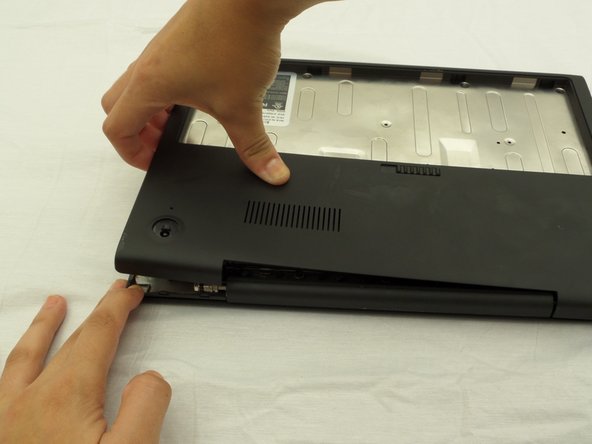
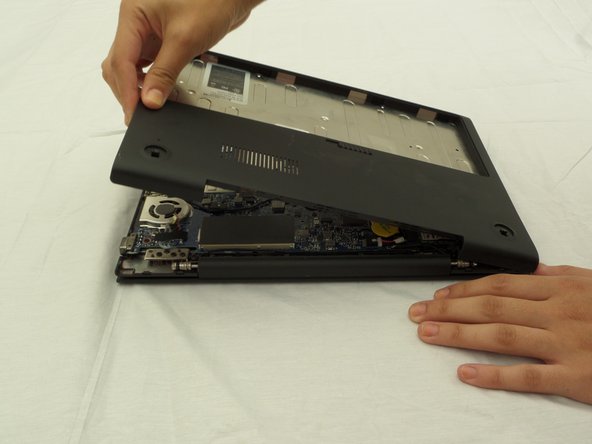
    • Starting where the body of the laptop and the laptop screen meet, pry apart the lower case from the rest of the laptop.

    • The case is easier to remove when separating in a clockwise motion, as seen in the pictures.

  5. Cr-48 Chromebook Network Card Replacement, Identify the Network Card and Remove the Connectors: шаг 5, изображение 1 из 3 Cr-48 Chromebook Network Card Replacement, Identify the Network Card and Remove the Connectors: шаг 5, изображение 2 из 3 Cr-48 Chromebook Network Card Replacement, Identify the Network Card and Remove the Connectors: шаг 5, изображение 3 из 3
    • Once you've removed the lower case, you should see the network card on the corner of the device containing the USB port.

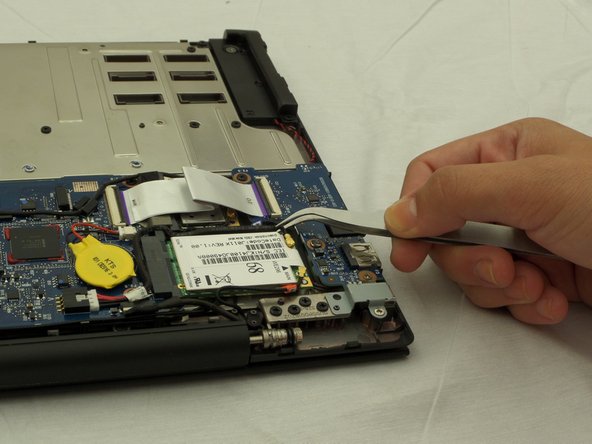
    • Disconnect the Wire connections on the network card using forceps or tweezers.

  6. Cr-48 Chromebook Network Card Replacement, Unscrew and Remove Network Card: шаг 6, изображение 1 из 3 Cr-48 Chromebook Network Card Replacement, Unscrew and Remove Network Card: шаг 6, изображение 2 из 3 Cr-48 Chromebook Network Card Replacement, Unscrew and Remove Network Card: шаг 6, изображение 3 из 3
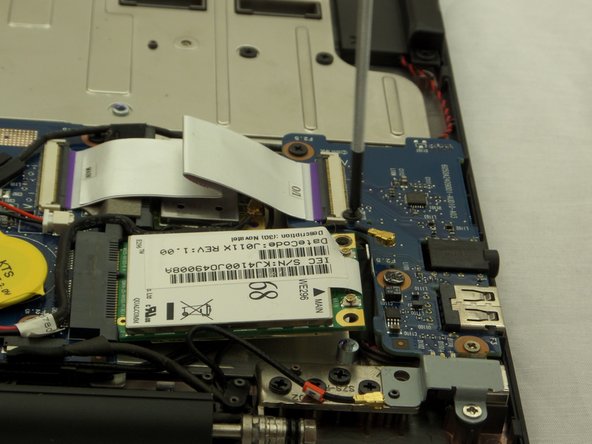
    • Remove Screw securing network card.

    • Size ph#00, approximately 3 mm long.

    • Once the screw is removed, the network card will pop up.

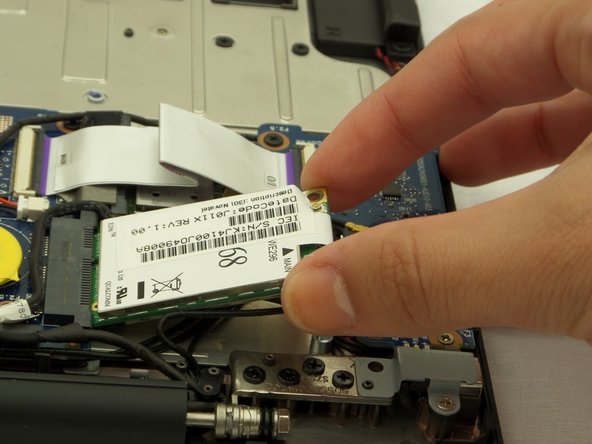
    • Pull the network card to remove it from the device.

Заключение

To reassemble your device, follow these instructions in reverse order.

Robert McLaughlin

Участник с: 09/09/14

462 Репутация

Автор 3 руководств

Команда

CSU Fullerton, Team 2-2, Bruce Fall 2014 Участник CSU Fullerton, Team 2-2, Bruce Fall 2014

CSUF-BRUCE-F14S2G2

3 членов

Автор 10 руководств

Один комментарий

The card identified in the pictures is not a combined Wi-Fi / Cellular card. It is just a 3G cellular card; the WiFi card is the other card tucked under the flat ribbon next to the card pictured in this guide

Jorge Gomes - Ответить

Добавить комментарий

Просмотр статистики:

За последние 24часов: 1

За последние 7 дней: 1

За последние 30 дней: 3

За всё время: 1,010