Перейти к основному содержанию

Crayola Crayon Maker White Plastic Arm Replacement

Выберете то, что вам нужно

  1. Crayola Crayon Maker White Plastic Arm Replacement, Take out the melting tray that is out of place.: шаг 1, изображение 1 из 3 Crayola Crayon Maker White Plastic Arm Replacement, Take out the melting tray that is out of place.: шаг 1, изображение 2 из 3 Crayola Crayon Maker White Plastic Arm Replacement, Take out the melting tray that is out of place.: шаг 1, изображение 3 из 3
    • Press the green arm away from the melting tray. Remove the melting tray.

    • Pop the metal arms out of the green pivot support.

  2. Crayola Crayon Maker White Plastic Arm Replacement, Remove the metal melting tray.: шаг 2, изображение 1 из 3 Crayola Crayon Maker White Plastic Arm Replacement, Remove the metal melting tray.: шаг 2, изображение 2 из 3 Crayola Crayon Maker White Plastic Arm Replacement, Remove the metal melting tray.: шаг 2, изображение 3 из 3
    • Remove the 2 screws (.75cm in length) currently securing the metal melting tray with a Phillips #2 screwdriver.

  3. Crayola Crayon Maker White Plastic Arm Replacement, Remove the light bulb: шаг 3, изображение 1 из 3 Crayola Crayon Maker White Plastic Arm Replacement, Remove the light bulb: шаг 3, изображение 2 из 3 Crayola Crayon Maker White Plastic Arm Replacement, Remove the light bulb: шаг 3, изображение 3 из 3
    • The light bulb should now be revealed. Unscrew the burned out bulb and replace with a new bulb.

  4. Crayola Crayon Maker White Plastic Arm Replacement, Remove the green base from the crayon maker: шаг 4, изображение 1 из 3 Crayola Crayon Maker White Plastic Arm Replacement, Remove the green base from the crayon maker: шаг 4, изображение 2 из 3 Crayola Crayon Maker White Plastic Arm Replacement, Remove the green base from the crayon maker: шаг 4, изображение 3 из 3
    • Flip the crayon maker.

    • Remove six screws (2 cm in length) with a spanner.

    • Remove the green base plate and set it aside.

  5. Crayola Crayon Maker White Plastic Arm Replacement, Locate the Plastic arm: шаг 5, изображение 1 из 3 Crayola Crayon Maker White Plastic Arm Replacement, Locate the Plastic arm: шаг 5, изображение 2 из 3 Crayola Crayon Maker White Plastic Arm Replacement, Locate the Plastic arm: шаг 5, изображение 3 из 3
    • Locate the clear plastic arm inside the control box.

  6. Crayola Crayon Maker White Plastic Arm Replacement, Adjust/Replace the Plastic Arm: шаг 6, изображение 1 из 2 Crayola Crayon Maker White Plastic Arm Replacement, Adjust/Replace the Plastic Arm: шаг 6, изображение 2 из 2
    • If necessary, unscrew the plastic arm with a Phillips #00 Precision screwdriver and readjust the arm until the desired position is reached.

    • If the plastic arm is broken, contact Crayola for replacement parts.

  7. Crayola Crayon Maker White Plastic Arm Replacement, Locate the clear plastic box: шаг 7, изображение 1 из 3 Crayola Crayon Maker White Plastic Arm Replacement, Locate the clear plastic box: шаг 7, изображение 2 из 3 Crayola Crayon Maker White Plastic Arm Replacement, Locate the clear plastic box: шаг 7, изображение 3 из 3
    • Remove the green base from the crayon maker and set aside.

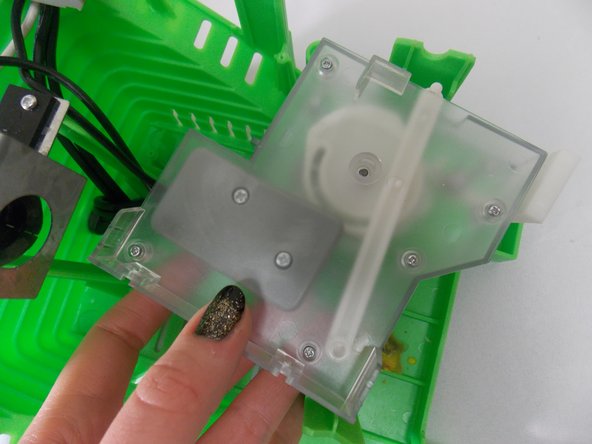
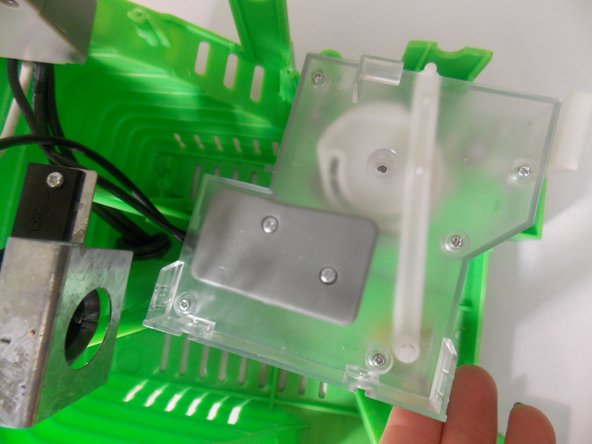
    • Locate the clear box.

  8. Crayola Crayon Maker White Plastic Arm Replacement, Remove clear box.: шаг 8, изображение 1 из 2 Crayola Crayon Maker White Plastic Arm Replacement, Remove clear box.: шаг 8, изображение 2 из 2
    • There are four screws (circled in red) that need to be removed with a Phillips #00 Precision screwdriver.

  9. Crayola Crayon Maker White Plastic Arm Replacement, Open Clear Plastic Box: шаг 9, изображение 1 из 1
    • Remove five screws (1.5 cm in length) using a Phillips #00 Precision screwdriver and open the clear plastic box.

  10. Crayola Crayon Maker White Plastic Arm Replacement, Check placement of white plastic arm.: шаг 10, изображение 1 из 1
    • The plastic arm should be positioned as shown in the figure. Adjust the arm's position if necessary.

    • If the plastic arm is broken, contact Crayola for a replacement arm.

Заключение

To reassemble your device, follow these instructions in reverse order.

Еще один человек закончил это руководство.

Melissa

Участник с: 10/10/14

210 Репутация

Автор 2 руководств

0 Комментариев

Добавить комментарий

Просмотр статистики:

За последние 24часов: 0

За последние 7 дней: 3

За последние 30 дней: 9

За всё время: 698