Эта версия возможно содержит некорректные исправления. Переключить на последнюю проверенную версию.
Выберете то, что вам нужно
-
Этот шаг не переведен. Помогите перевести
-
Turn the laptop so the back is facing up.
-
Use a Phillips #00 screwdriver to remove the seven screws from the bottom cover. These will require a counter-clockwise rotation to remove. A magnet may be helpful to remove screws if they get stuck at the bottom of their inserts.
-
-
Этот шаг не переведен. Помогите перевести
-
Start by pulling up on the lip, highlighted in Red. This will be at the back of the computer.
-
Once the back has been lifted up, begin lifting up at the orange side on the left. This will be right next to the back we just pulled up. The right side should come loose at this time; pull up on it as well
-
Lift and pull on the yellow edge, on the opposite side of the first part we pulled up on. Once this is removed, lift the panel off the computer.
-
-
-
Этот шаг не переведен. Помогите перевести
-
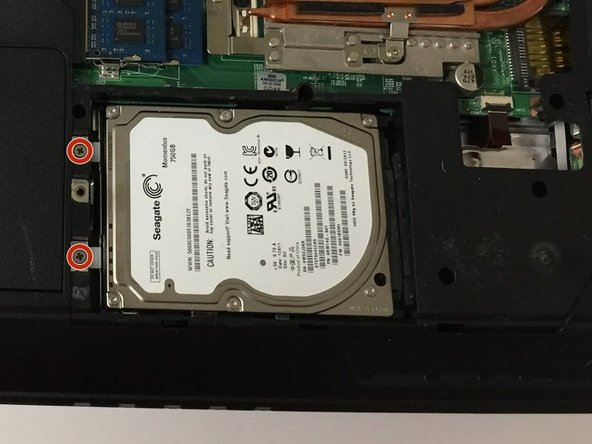
Locate the hard drive on the inside of the computer. First Image shows it outlined in red.
-
Remove the two screws holding the hard drive in place. Keep these on the side.
-
-
Этот шаг не переведен. Помогите перевести
-
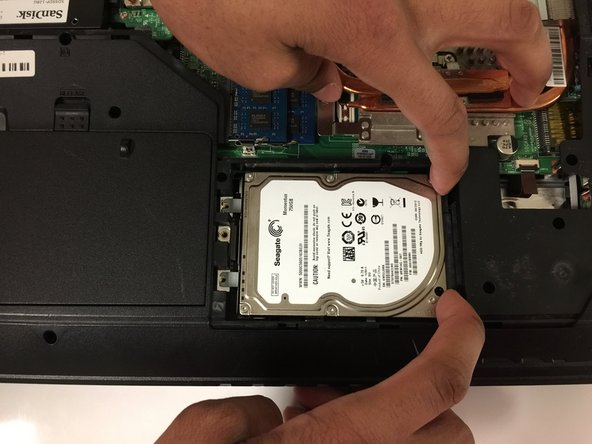
Before we can remove the hard drive, we must first disconnect it from it's connectors. These are on the opposite side of the screws.
-
To disconnect them, we push the hard drive out of the slots. Grip the sides, and push (or pull) towards the screws. The hard drive should move slightly.
-
-
Этот шаг не переведен. Помогите перевести
-
With the hard drive screws removed, and disconnected from the computer - we can remove it.
-
Lift up on the small tag in between the mounts we removed the screws from. You might have to move the hard drive slightly to keep the screw mounts from getting stuck. This is normal.
-


Команда

University of North Texas, Team S2-G7, Thomas Spring 2018 Участник University of North Texas, Team S2-G7, Thomas Spring 2018
UNT-THOMAS-S18S2G7
4 членов
Автор 7 руководств