Введение
If your camera is failing to move in a certain direction one of the two motors inside may be malfunctioning. If this is the case the motor will need to be replaced. The replacement process is pretty simple and doesn't need many tools. It is important to keep track of the small screws, they are easily lost.
Выберете то, что вам нужно
-
-
Remove the four rubber feet on the bottom of the camera with tweezers.
-
Remove the four screws using a Phillips #1 screwdriver.
-
Remove the lower piece of the camera body.
-
-
-
Remove the motherboard and bottom of the camera body.
-
Disconnect the five cables from the motherboard using tweezers.
-
-
-
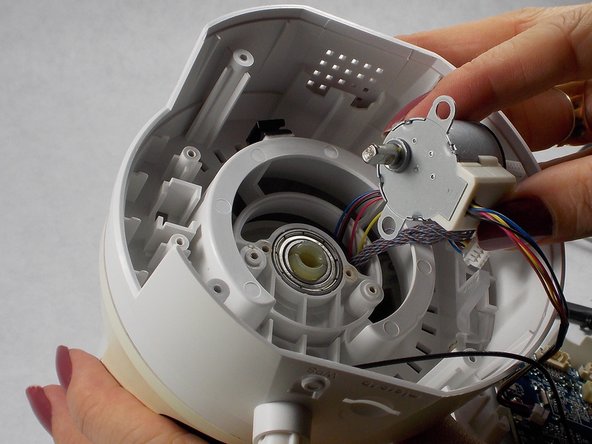
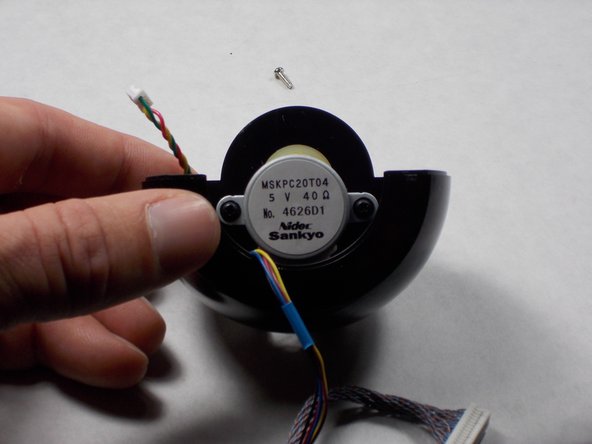
Use a #1 Phillips screwdriver to remove the two 7mm screws holding the motor in place.
-
-
-
-
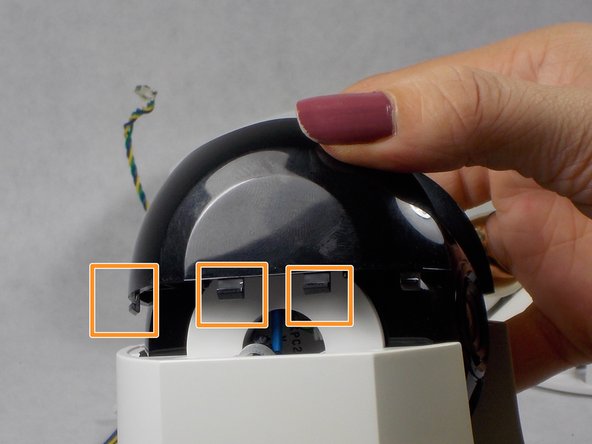
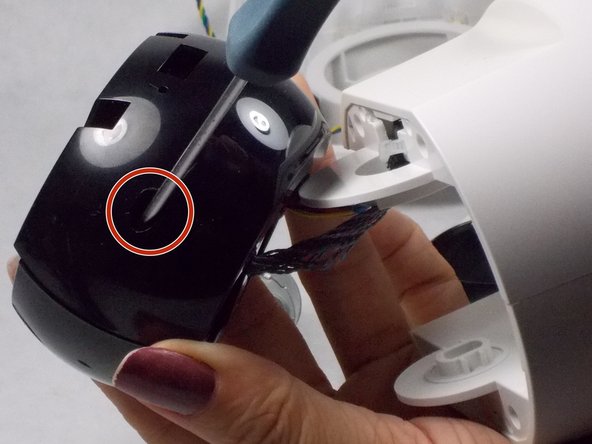
To remove the top of the camera you must push in the black tabs using the spudger. There are 3 tabs per side.
-
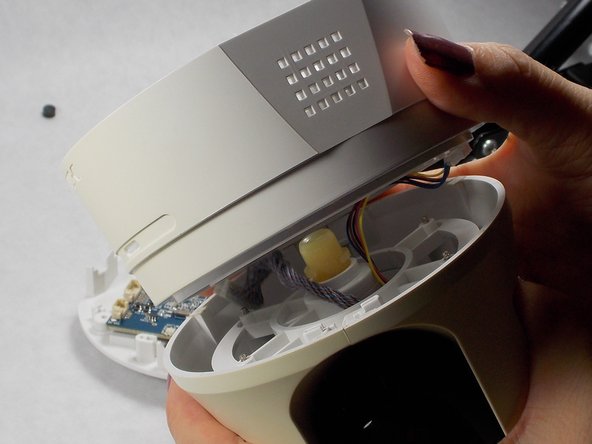
While pushing in the tabs, you can now lift the top black portion of the camera using your hands.
-
-
-
With a little wiggle, the camera module will come free from the body.
-
Unscrew the two 7mm screws on the camera using a #1 Phillips screwdriver.
-
-
-
Unscrew the two 6mm screws holding the motor in place with a #1 Phillips screwdriver.
-


To reassemble your device, follow these instructions in reverse order.
To reassemble your device, follow these instructions in reverse order.
Отменить: Я не выполнил это руководство.
Еще один человек закончил это руководство.
Команда

UMass Dartmouth, Team S2-G5, Peak Fall 2018 Участник UMass Dartmouth, Team S2-G5, Peak Fall 2018
UMASSD-PEAK-F18S2G5
3 членов
Автор 10 руководств
2 Комментариев
Where can I buy new motor?
I do not know, I purchased a “for Parts” camera on e-bay for $15.00 and used the motor from that unit.