Эта версия возможно содержит некорректные исправления. Переключить на последнюю проверенную версию.
Выберете то, что вам нужно
-
Этот шаг не переведен. Помогите перевести
-
Place the projector upside down to access the screws on the bottom.
-
Remove the five 7mm long screws using a #3 Phillips screwdriver at least 2 inches long.
-
-
Этот шаг не переведен. Помогите перевести
-
Flip the projector over and then remove the cover by lifting it up.
-
-
Этот шаг не переведен. Помогите перевести
-
Remove the three 6mm PH2 phillips head screws.
-
Disconnect the ribbon cable by flipping up the latch on the connector and then pull the ribbon out.
-
-
-
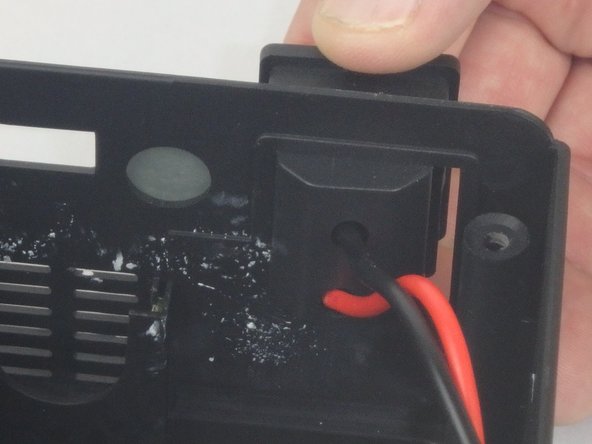
Этот шаг не переведен. Помогите перевести
-
Disconnect the three wire connectors. Grasp both sides of the connector and pull apart.
-
Lift the motherboard up and place it out of the way.
-
-
Этот шаг не переведен. Помогите перевести
-
Remove the five 7mm PH2 phillips head screws on the black plate and lift the plate out.
-
Lift the aluminum heat sink up to remove it from the projector.
-
-
Этот шаг не переведен. Помогите перевести
-
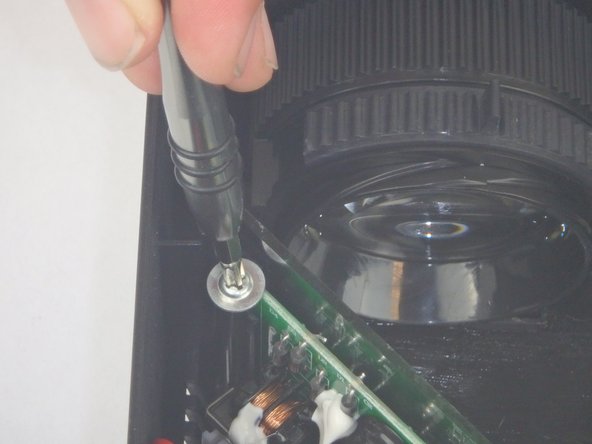
Remove the two 9mm PH2 phillips head screws.
-
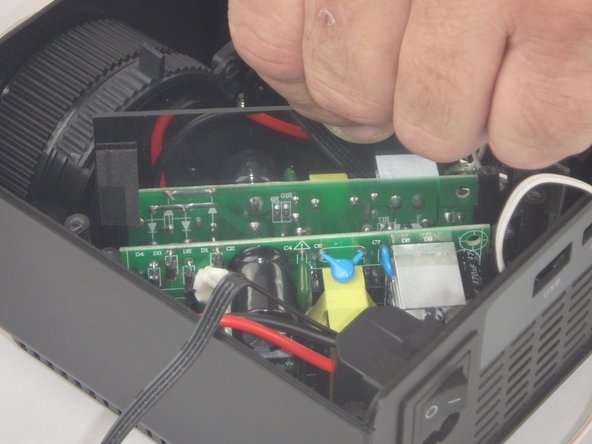
Lift the mirror behind the power supply circuit out to gain access to the circuit board.
-
-
Этот шаг не переведен. Помогите перевести
-
Lift the power supply circuit board out of the projector.
-
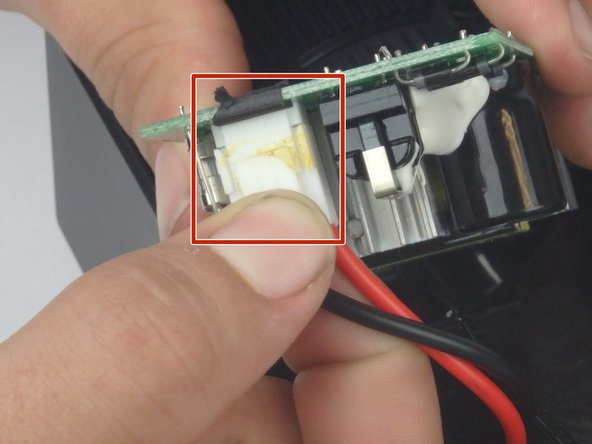
Disconnect the cable connector by pulling the two sides of the connector apart.
-
-
Этот шаг не переведен. Помогите перевести
-
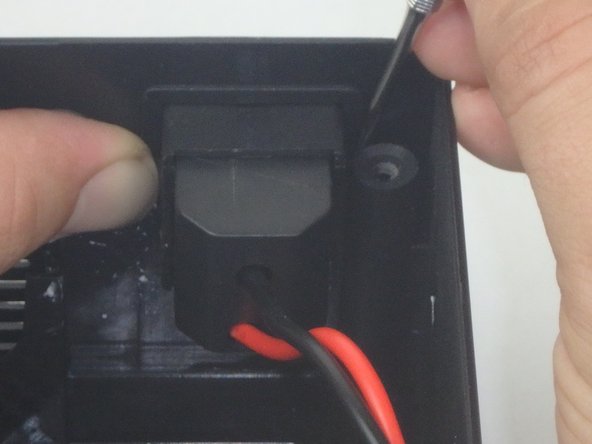
Using the small plastic splunger, press in on the two latches on the sides of the power supply switch, then push it out of the case.
-


Команда

USF Tampa, Team S5-G3, Eyestone Spring 2018 Участник USF Tampa, Team S5-G3, Eyestone Spring 2018
USFT-EYESTONE-S18S5G3
3 членов
Автор 9 руководств