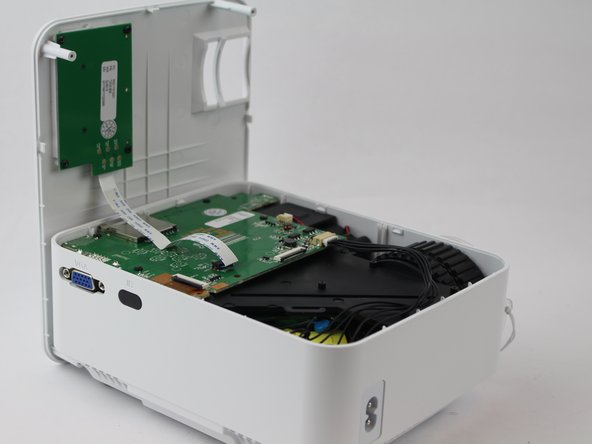
Перейти к основному содержанию

DBPOWER T20 Lens Replacement

Выберете то, что вам нужно

  1. DBPOWER T20 Lens Replacement, DBPOWER T20 Disassembly: шаг 1, изображение 1 из 1
    • Flip the device and lay flat.

  2. DBPOWER T20 Lens Replacement: шаг 2, изображение 1 из 1
    • Remove the four (9 mm) screws with a PH2 screwdriver.

    • Remove the two (7 mm) located with a PH2 screwdriver.

  3. DBPOWER T20 Lens Replacement: шаг 3, изображение 1 из 3 DBPOWER T20 Lens Replacement: шаг 3, изображение 2 из 3 DBPOWER T20 Lens Replacement: шаг 3, изображение 3 из 3
    • Flip the device over and pry the top off with a plastic opening tool.

  4. DBPOWER T20 Lens Replacement: шаг 4, изображение 1 из 1
    • Remove the ribbon cable connecting the motherboard to the button control board by gently pulling it from its connector.

  5. DBPOWER T20 Lens Replacement: шаг 5, изображение 1 из 2 DBPOWER T20 Lens Replacement: шаг 5, изображение 2 из 2
    • Remove four (6 mm) screws connecting the motherboard using a J0 screwdriver.

  6. DBPOWER T20 Lens Replacement: шаг 6, изображение 1 из 3 DBPOWER T20 Lens Replacement: шаг 6, изображение 2 из 3 DBPOWER T20 Lens Replacement: шаг 6, изображение 3 из 3
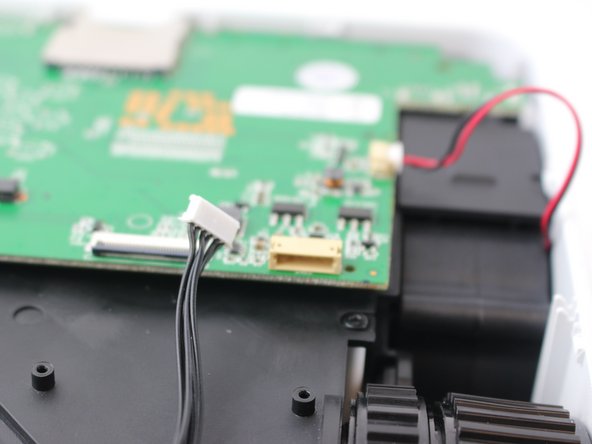
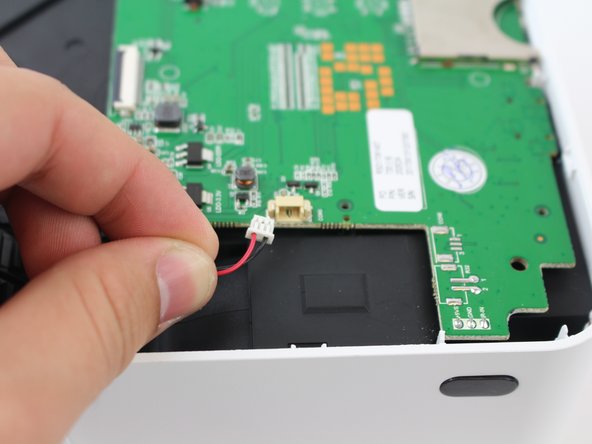
    • Remove the two cables connected to the motherboard: black power cable and the red/black fan cable.

    • the black cable requires more force to remove than the other cables.

  7. DBPOWER T20 Lens Replacement: шаг 7, изображение 1 из 2 DBPOWER T20 Lens Replacement: шаг 7, изображение 2 из 2
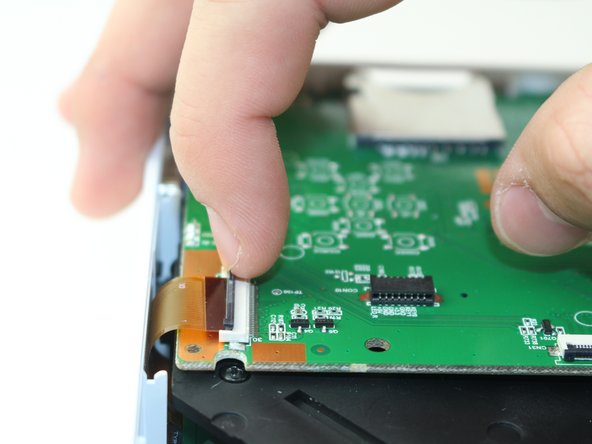
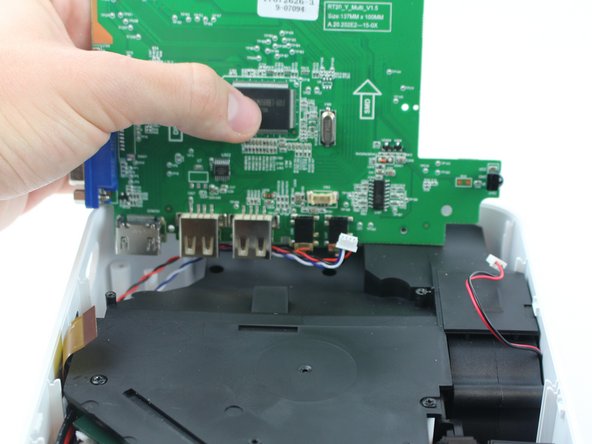
    • Lift the black latch on the ZIF connector and remove the ribbon cable that attaches the digitizer to the motherboard.

  8. DBPOWER T20 Lens Replacement: шаг 8, изображение 1 из 1
    • Raise motherboard by lifting sideways and then up to avoid the ports.

  9. DBPOWER T20 Lens Replacement: шаг 9, изображение 1 из 2 DBPOWER T20 Lens Replacement: шаг 9, изображение 2 из 2
    • Remove wires attaching the piezoelectric speakers to the motherboard.

  10. DBPOWER T20 Lens Replacement: шаг 10, изображение 1 из 2 DBPOWER T20 Lens Replacement: шаг 10, изображение 2 из 2
    • Remove the five screws securing the black plastic cover with a J0 screwdriver.

    • Lift up and out to remove.

  11. DBPOWER T20 Lens Replacement, Lens: шаг 11, изображение 1 из 1
    • The lamp does not need to be removed for this step to be preformed.

  12. DBPOWER T20 Lens Replacement: шаг 12, изображение 1 из 1
    • Detach the keystone adjuster from the lens housing.

    • Lens is on a hinge so it should lift off easily, if it doesn't, adjust by swaying it forward or backward.

  13. DBPOWER T20 Lens Replacement: шаг 13, изображение 1 из 1
    • Remove the rubber foot and warranty sticker found underneath the device.

  14. DBPOWER T20 Lens Replacement: шаг 14, изображение 1 из 2 DBPOWER T20 Lens Replacement: шаг 14, изображение 2 из 2
    • Remove the two screws on the bottom of the device with a J0 screwdriver.

  15. DBPOWER T20 Lens Replacement: шаг 15, изображение 1 из 1
    • Remove the focus-adjustment ring from the lens housing.

Заключение

To reassemble your device, follow these instructions in reverse order.

3 участников успешно повторили данное руководство.

Andrea Espinosa

Участник с: 02/15/18

506 Репутация

Автор 3 руководств

Команда

USF Tampa, Team S16-G2, Boczar Spring 2018 Участник USF Tampa, Team S16-G2, Boczar Spring 2018

USFT-BOCZAR-S18S16G2

5 членов

Автор 5 руководств

3 Комментариев

How does the lens parts go together?

Lay - Ответить

Trying to put my lens back how to install

David Williams - Ответить

Добавить комментарий

Просмотр статистики:

За последние 24часов: 2

За последние 7 дней: 9

За последние 30 дней: 30

За всё время: 2,282