Введение
Replacing the top case on your DJI Phantom drone requires removing all four propellors and threading the magnetometer cable through a small hole in the lower case. You may also need to transfer the GPS board to the replacement top case.
Выберете то, что вам нужно
-
-
Press down on battery door release tab to flip the battery door open.
-
-
-
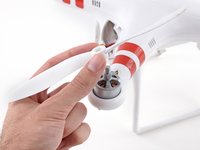
Silver-topped propeller collets unscrew counter-clockwise
-
Black-topped propeller collets unscrew clockwise
-
-
-
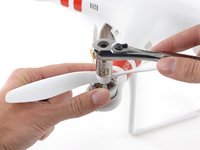
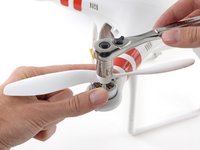
For propellors with silver collets: Use a 12 mm wrench or socket to loosen silver collets in the counter-clockwise direction.
-
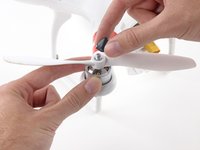
Once free, unscrew and remove the collet.
-
-
-
-
For propellors with black collets: Use a 12 mm wrench or socket to loosen black collets in the clockwise direction.
-
Once free, unscrew and remove the collet.
-
-
-
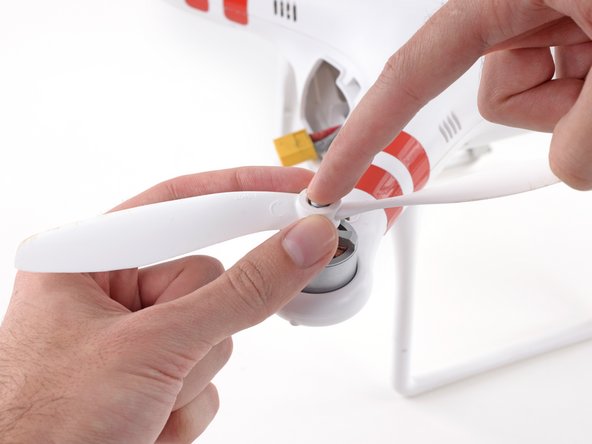
Gently press down the motor shaft and lift the propeller up to remove it.
-
-
-
Remove the following screws from the underside of the drone:
-
Twelve 2.0 mm hex screws
-
Four Phillips #0 screws
-
-
-
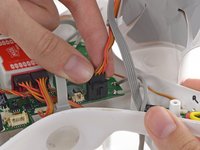
Loosen the cable from the plastic landing gear.
-
Unplug the magnetometer molex connector.
-
-
-
Lift up on the top portion of the shell and set it on its side.
-
-
-
Lift the GPS cable molex connector up out of its socket on the main board.
-
-
-
Gently pull the slack of the magnetometer cable through the case bottom shell.
-
The case top shell should now have enough slack to work on the interior of the Phantom.
-
-
-
Twist the magnetometer cable as shown to prepare for passing it through the case bottom shell.
-
-
-
Gently push the twisted magnetometer cable and molex connector through the hole in the case bottom shell.
-
-
-
Remove the case top shell from the bottom shell.
-
If your new case top shell did not come with a GPS module, you may need to transfer the old one. To do so, gently peel off the large, gray adhesive label and transfer it to the new shell.
-


To reassemble your device, follow these instructions in reverse order.
Отменить: Я не выполнил это руководство.
5 человек успешно провели ремонт по этому руководству.

Команда

Cal Poly, Team 25-89, Amido Spring 2010 Участник Cal Poly, Team 25-89, Amido Spring 2010
CPSU-AMIDO-S10S25G89
4 членов
Автор 59 руководств
1 Комментарий к руководству
Thanks for all the steps which are very helpful. Could you please let us know what toos is needed to remove the GPS module from the top shell?