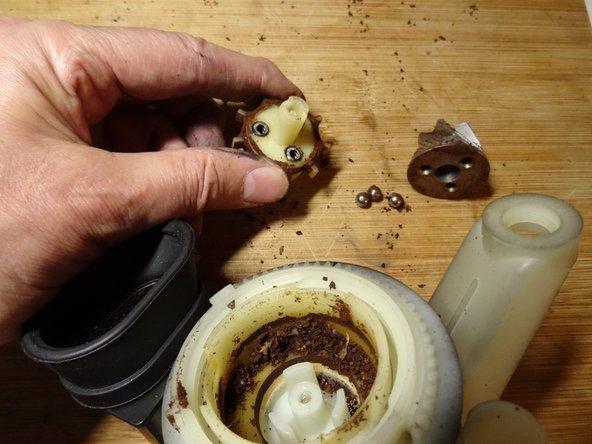
Перейти к основному содержанию

DeLonghi Coffee Maker grindstones replacement

Выберете то, что вам нужно

  1. DeLonghi Coffee Maker grindstones replacement, Grindstones: шаг 1, изображение 1 из 3 DeLonghi Coffee Maker grindstones replacement, Grindstones: шаг 1, изображение 2 из 3 DeLonghi Coffee Maker grindstones replacement, Grindstones: шаг 1, изображение 3 из 3
    • If the bean hopper is still attached, it must be removed.

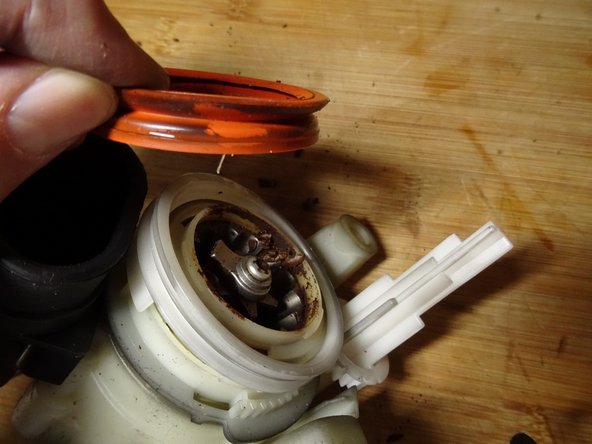
    • Use a pointed tool to remove the cap on the adjustment dial.

  2. DeLonghi Coffee Maker grindstones replacement: шаг 2, изображение 1 из 3 DeLonghi Coffee Maker grindstones replacement: шаг 2, изображение 2 из 3 DeLonghi Coffee Maker grindstones replacement: шаг 2, изображение 3 из 3
    • There is a Phillips screw underneath. Unscrew it.

    • Note the position and pull the dial upwards.

    • Pull the bean container upwards.

    • On some models, there are two more Phillips screws in the bean hopper.

  3. DeLonghi Coffee Maker grindstones replacement: шаг 3, изображение 1 из 3 DeLonghi Coffee Maker grindstones replacement: шаг 3, изображение 2 из 3 DeLonghi Coffee Maker grindstones replacement: шаг 3, изображение 3 из 3
    • Mark the settings of the wheels with a pencil.

    • Use a spatula to loosen the two detents on the sides.

    • Pull off the red silicone seal.

  4. DeLonghi Coffee Maker grindstones replacement: шаг 4, изображение 1 из 3 DeLonghi Coffee Maker grindstones replacement: шаг 4, изображение 2 из 3 DeLonghi Coffee Maker grindstones replacement: шаг 4, изображение 3 из 3
    • Lift off the white plastic ring.

    • Turn the white ring with the ring gear counterclockwise as far as it will go.

    • The grinding ring is free and you can lift it out upwards.

  5. DeLonghi Coffee Maker grindstones replacement: шаг 5, изображение 1 из 1
    • The grinding ring can be completely removed from the plastic holder. To do this, lift the three detents to the side and push the ring out.

    • The ring has three flattened sides. Unfortunately, such a ring is not commercially available anywhere. If it is still good, you may be able to use it in another mill.

  6. DeLonghi Coffee Maker grindstones replacement: шаг 6, изображение 1 из 2 DeLonghi Coffee Maker grindstones replacement: шаг 6, изображение 2 из 2
    • The grinding cone is fastened with a Torx T20 screw with left-hand thread.

    • Unscrew the screw clockwise, i.e. the wrong way round.

    • When assembling, make sure that the screw with its fastening part fits exactly into the intended groove.

  7. DeLonghi Coffee Maker grindstones replacement: шаг 7, изображение 1 из 2 DeLonghi Coffee Maker grindstones replacement: шаг 7, изображение 2 из 2
    • Carefully lift the grinding cone upwards.

    • This grinding cone is the same as on the Jura and can now be replaced.

    • There are three metal balls on springs under the grinding cone. They are stuck in three sleeves in the plastic driver. Make sure that none of these parts get lost.

    • Lift the driver up and out.

    • Now you can clean all parts thoroughly.

    • When reassembling, make sure that the metal balls fit into the corresponding recesses in the cone.

Заключение

Work through the steps in reverse order to reassemble your device.

Еще один человек закончил это руководство.

Особая благодарность этим переводчикам:

de en

100%

oldturkey03помогает нам починить мир! Хотите внести свой вклад?
Начните переводить ›

VauWeh

Участник с: 10/19/15

205 562 Репутация

Автор 252 руководств

Команда

Repair is War on Entropy Участник Repair is War on Entropy

Community

25 членов

Автор 1 154 руководств

0 Комментариев

Добавить комментарий

Просмотр статистики:

За последние 24часов: 5

За последние 7 дней: 17

За последние 30 дней: 52

За всё время: 878