Перейти к основному содержанию

Dell Chromebook 3100 (Touch) Motherboard Replacement

Выберете то, что вам нужно

  1. Dell Chromebook 3100 (Touch) Motherboard Replacement, Detach Bottom Cover: шаг 1, изображение 1 из 2 Dell Chromebook 3100 (Touch) Motherboard Replacement, Detach Bottom Cover: шаг 1, изображение 2 из 2
    • Unscrew the nine PH#0 captive screws on the bottom of the device.

    • Use a pick to run along the outside of the device popping all the clips. Prying should not be necessary.

  2. Dell Chromebook 3100 (Touch) Motherboard Replacement, Motherboard: шаг 2, изображение 1 из 2 Dell Chromebook 3100 (Touch) Motherboard Replacement, Motherboard: шаг 2, изображение 2 из 2
    • Disconnect the daughterboard data cables.

  3. Dell Chromebook 3100 (Touch) Motherboard Replacement: шаг 3, изображение 1 из 2 Dell Chromebook 3100 (Touch) Motherboard Replacement: шаг 3, изображение 2 из 2
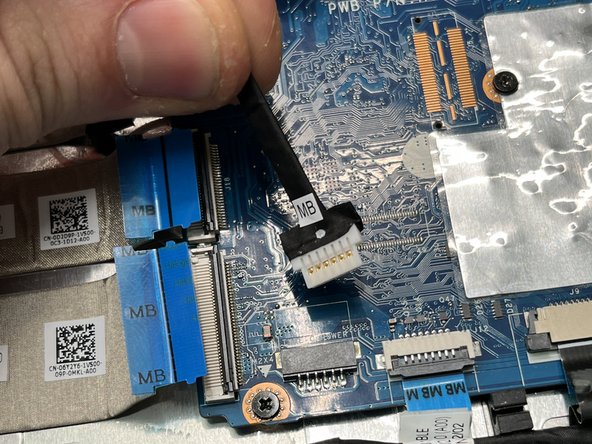
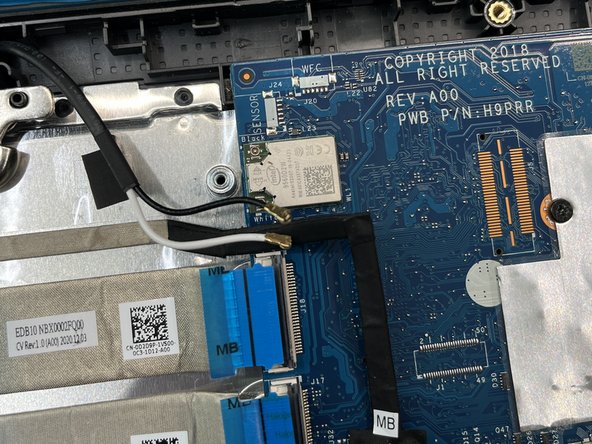
    • Pull the daughterboard power cable out of its socket parallel to the motherboard.

  4. Dell Chromebook 3100 (Touch) Motherboard Replacement: шаг 4, изображение 1 из 2 Dell Chromebook 3100 (Touch) Motherboard Replacement: шаг 4, изображение 2 из 2
    • Remove the M2x3 screw and cover, and disconnect the antenna cables.

    • Note: be careful on reassembly. Antenna connectors can be troublesome and are easy to damage.

  5. Dell Chromebook 3100 (Touch) Motherboard Replacement: шаг 5, изображение 1 из 1
    • Disconnect the touchpad, keyboard, nad speakers where shown.

  6. Dell Chromebook 3100 (Touch) Motherboard Replacement: шаг 6, изображение 1 из 1
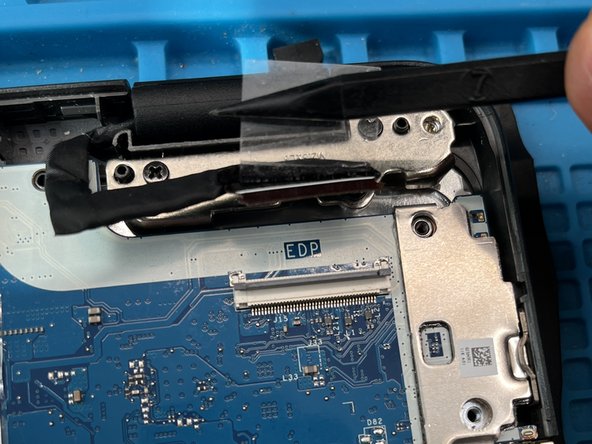
    • Remove the four M2x4 screws, as well as the cover over the LVDS cable (top right).

  7. Dell Chromebook 3100 (Touch) Motherboard Replacement: шаг 7, изображение 1 из 2 Dell Chromebook 3100 (Touch) Motherboard Replacement: шаг 7, изображение 2 из 2
    • Detach the LVDS cable.

    • The cable is held down with adhesive. Don't be shy about pulling it off the motherboard.

  8. Dell Chromebook 3100 (Touch) Motherboard Replacement: шаг 8, изображение 1 из 1
    • Lift the motherboard out from the left side and pull away from the body of the chromebook.

    • During reassembly, it is much easier to insert the motherboard without the IO shield attached. The IO shield is easily inserted after the motherboard is in place.

  9. Dell Chromebook 3100 (Touch) Motherboard Replacement: шаг 9, изображение 1 из 2 Dell Chromebook 3100 (Touch) Motherboard Replacement: шаг 9, изображение 2 из 2
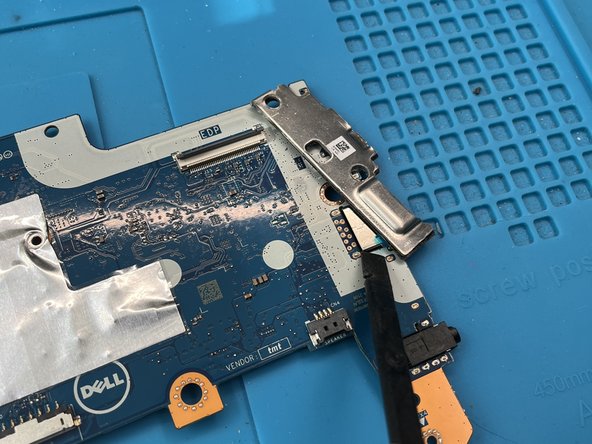
    • Apply lateral force to the IO shield to break the adhesive holding it to the motherboard.

    • Save this IO shield to put on the new motherboard.

  10. Dell Chromebook 3100 (Touch) Motherboard Replacement: шаг 10, изображение 1 из 1
    • During reassembly, make sure to include a thermal pad on the CPU. Usually you can reuse the one from the previous motherboard, but it's best to have access to a new pad in case the old one is not usable.

Заключение

To reassemble your device, follow these instructions in reverse order.

0 Комментариев

Добавить комментарий

Просмотр статистики:

За последние 24часов: 0

За последние 7 дней: 1

За последние 30 дней: 19

За всё время: 487