Перейти к основному содержанию

Dell Inspiron 1100 RAM Replacement

Выберете то, что вам нужно

  1. Dell Inspiron 1100 RAM Replacement, RAM: шаг 1, изображение 1 из 3 Dell Inspiron 1100 RAM Replacement, RAM: шаг 1, изображение 2 из 3 Dell Inspiron 1100 RAM Replacement, RAM: шаг 1, изображение 3 из 3
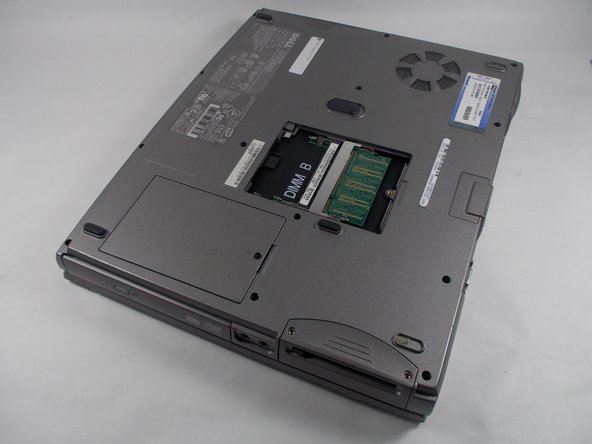
    • Remove the one Phillips #0 screw at the bottom-center of the panel covering the RAM and remove the panel.

    • The screw does not separate from the cover. Be careful when using force to remove the cover as the screw may not be completely unscrewed.

  2. Dell Inspiron 1100 RAM Replacement: шаг 2, изображение 1 из 2 Dell Inspiron 1100 RAM Replacement: шаг 2, изображение 2 из 2
    • Use your hands to pull the two metal tabs away from the RAM.

    • The RAM will rise out when clear of the metal tabs. Do not force it into the up position.

  3. Dell Inspiron 1100 RAM Replacement: шаг 3, изображение 1 из 2 Dell Inspiron 1100 RAM Replacement: шаг 3, изображение 2 из 2
    • Pull out the RAM.

    • Be careful not to touch the metal contacts on the bottom of the RAM as this may damage it.

    • Store the RAM in an anti-static bag or a non-conductive surface, such as a stone or wooden table.

Заключение

To reassemble your device, follow these instructions in reverse order.

3 участников успешно повторили данное руководство.

Alexander Pacheco

Участник с: 10/19/16

610 Репутация

Автор 5 руководств

Команда

UMass Dartmouth, Team 3-3, Isaacson Fall 2016 Участник UMass Dartmouth, Team 3-3, Isaacson Fall 2016

UMASSD-ISAACSON-F16S3G3

3 членов

Автор 9 руководств

0 Комментариев

Добавить комментарий

Просмотр статистики:

За последние 24часов: 0

За последние 7 дней: 0

За последние 30 дней: 2

За всё время: 441