Введение
Is the screen of your Inspiron 14-3452 broken? All you need is a spudger and a screwdriver in order to open up your laptop and replace its screen.
Выберете то, что вам нужно
-
-
Remove the battery by sliding the battery release latch to the left.
-
Pull the entire battery away from the backing.
-
-
-
Remove the two Phillips Head 5 mm #0 screws holding the backing in place.
-
-
-
Locate the blue RAM chip sitting in the RAM bay.
-
Use your fingertips to pry apart the white RAM securing-clips on each side of the memory-module slot until the RAM chip pops up.
-
-
-
Pull the RAM chip away from the memory-module slot.
-
The RAM chip is now fully detached and ready to be replaced.
-
-
-
Remove the ten Phillips Head 5 mm #0 screws from the computer backing.
-
Remove the one Phillips Head 3 mm #0 screw from the computer backing.
-
-
-
-
Remove the Phillips Head 3 mm #0 screw that is holding the wireless card in place.
-
-
-
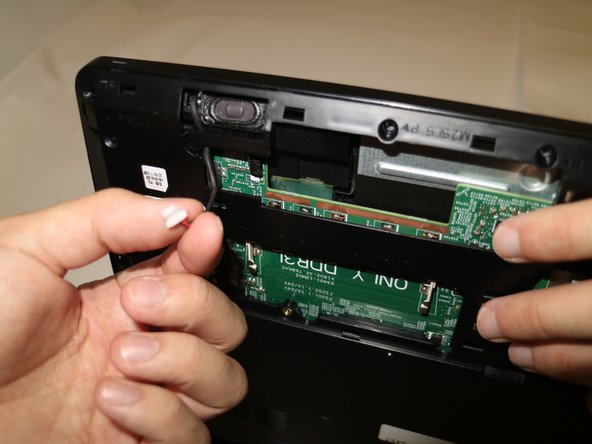
Using your fingertips remove the speaker cable from the motherboard by pulling the white connector away from the socket.
-
-
-
Use the blue Uspudger to pry apart the keyboard assembly from the bottom shell.
-
-
-
Disconnect the keyboard cable from the motherboard by lifting the black latch and pulling the cable out of its socket.
-
-
-
Disconnect the display cable from the motherboard by pulling the tape back and lifting the connector latch.
-
Pull the display cable away from the motherboard.
-
-
-
Remove the power adapter cable from the motherboard by sliding the cable out of its socket.
-
-
-
Turn laptop over to access the screen hinge screws.
-
Remove the two Phillips Head 5 mm #0 screws from the two hinges.
-
-
-
Using your fingertips, gently pry up the inner edges of the display bezel.
-
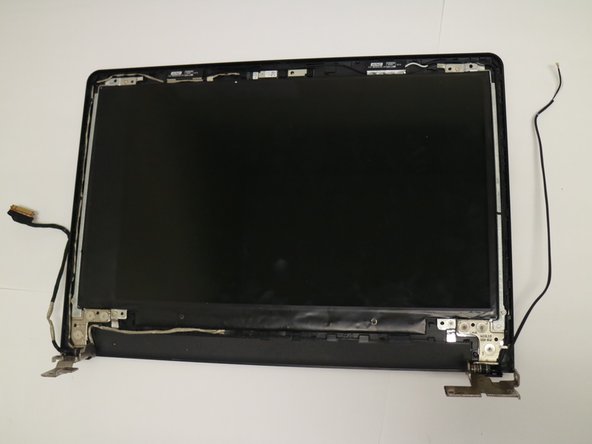
Lift the display bezel off the display assembly.
-
-
-
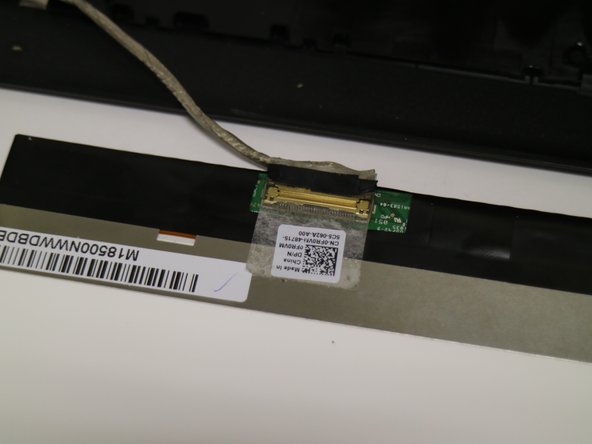
After removing the bezel, locate the tab indicated in the pictures.
-
Lift the tab as shown in the pictures.
-
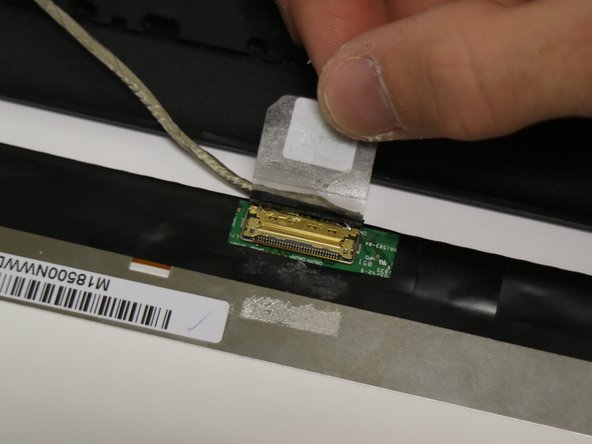
Lift the gold latch securing the display cable to the socket.
-
Pull display cable away from the socket.
-


To reassemble your device, follow these instructions in reverse order.
To reassemble your device, follow these instructions in reverse order.
Команда

Baylor, Team S2-G2, Johnson Spring 2018 Участник Baylor, Team S2-G2, Johnson Spring 2018
BU-JOHNSON-S18S2G2
3 членов
Автор 5 руководств