Перейти к основному содержанию

Dell Inspiron 14z-5423 Keyboard Replacement

Выберете то, что вам нужно

  1. Dell Inspiron 14z-5423 Keyboard Replacement, RAM: шаг 1, изображение 1 из 2 Dell Inspiron 14z-5423 Keyboard Replacement, RAM: шаг 1, изображение 2 из 2
    • Close the display and turn over the computer.

    • Make sure your device is powered down and unplugged before beginning the replacement.

  2. Dell Inspiron 14z-5423 Keyboard Replacement: шаг 2, изображение 1 из 1
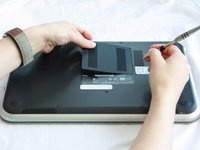
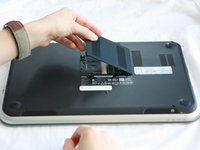
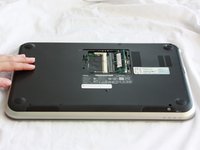
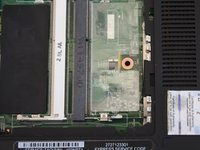
    • Use a J0 bit tipped screwdriver to unscrew the one 6 mm Phillips screw on the RAM cover.

  3. Dell Inspiron 14z-5423 Keyboard Replacement: шаг 3, изображение 1 из 2 Dell Inspiron 14z-5423 Keyboard Replacement: шаг 3, изображение 2 из 2
    • Lightly lift the RAM cover up and at an angle, away from the computer.

  4. Dell Inspiron 14z-5423 Keyboard Replacement: шаг 4, изображение 1 из 2 Dell Inspiron 14z-5423 Keyboard Replacement: шаг 4, изображение 2 из 2
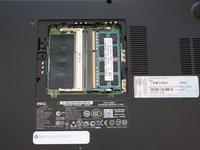
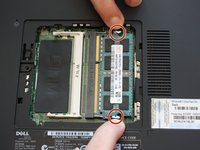
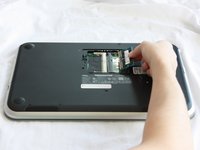
    • Use your fingers to carefully pull the securing clips on the RAM away from each other.

    • The RAM should pop up when the clips are released.

  5. Dell Inspiron 14z-5423 Keyboard Replacement: шаг 5, изображение 1 из 2 Dell Inspiron 14z-5423 Keyboard Replacement: шаг 5, изображение 2 из 2
    • Remove the popped up RAM by pulling it away from the connection.

    • If it does not pop up pry it out in a steady and straight direction.

  6. Dell Inspiron 14z-5423 Keyboard Replacement, Keyboard: шаг 6, изображение 1 из 3 Dell Inspiron 14z-5423 Keyboard Replacement, Keyboard: шаг 6, изображение 2 из 3 Dell Inspiron 14z-5423 Keyboard Replacement, Keyboard: шаг 6, изображение 3 из 3
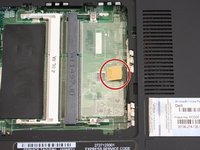
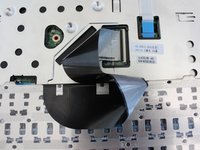
    • Lift the plastic yellow flap on the system board.

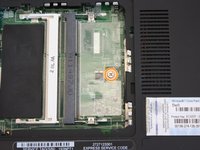
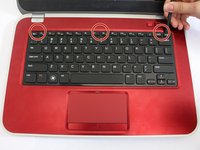
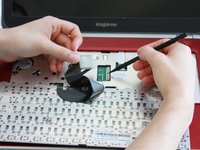
    • Use the J0 Bit screwdriver to remove the one 6 mm Phillips screw in center of the system board that is connected to the keyboard.

  7. Dell Inspiron 14z-5423 Keyboard Replacement: шаг 7, изображение 1 из 1
    • Flip over the computer and open the display.

  8. Dell Inspiron 14z-5423 Keyboard Replacement: шаг 8, изображение 1 из 2 Dell Inspiron 14z-5423 Keyboard Replacement: шаг 8, изображение 2 из 2
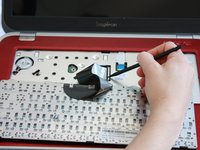
    • Insert a spudger next to the plastic indents located at the top of the keyboard and gently pry to release the securing clips.

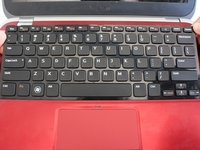
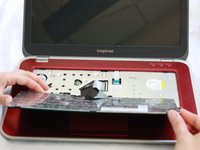
    • Lift the keyboard off of the computer.

    • Be careful not to tear the ribbon that attaches the back of the keyboard to the computer when lifting it.

  9. Dell Inspiron 14z-5423 Keyboard Replacement: шаг 9, изображение 1 из 2 Dell Inspiron 14z-5423 Keyboard Replacement: шаг 9, изображение 2 из 2
    • Flip the keyboard over onto the palm-rest assembly.

  10. Dell Inspiron 14z-5423 Keyboard Replacement: шаг 10, изображение 1 из 3 Dell Inspiron 14z-5423 Keyboard Replacement: шаг 10, изображение 2 из 3 Dell Inspiron 14z-5423 Keyboard Replacement: шаг 10, изображение 3 из 3
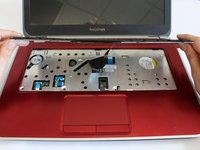
    • Flip the little black securing bar near the base of the ribbon with a spudger to release the ribbon from the computer.

Заключение

To reassemble your device, follow these instructions in reverse order.

2 участников успешно повторили данное руководство.

Marisol

Участник с: 09/12/16

623 Репутация

Автор 4 руководств

Команда

CSU Fullerton, Team 2-2, Bruce Fall 2016 Участник CSU Fullerton, Team 2-2, Bruce Fall 2016

CSUF-BRUCE-F16S2G2

5 членов

Автор 11 руководств

0 Комментариев

Добавить комментарий

Просмотр статистики:

За последние 24часов: 0

За последние 7 дней: 5

За последние 30 дней: 10

За всё время: 1,472