Перейти к основному содержанию

Dell Inspiron 15R Hard Drive Replacement

Выберете то, что вам нужно

  1. Dell Inspiron 15R Hard Drive Replacement, Battery: шаг 1, изображение 1 из 1
    • Turn the device over and locate the battery.

  2. Dell Inspiron 15R Hard Drive Replacement: шаг 2, изображение 1 из 2 Dell Inspiron 15R Hard Drive Replacement: шаг 2, изображение 2 из 2
    • Place thumbs on each latch and push outwards.

  3. Dell Inspiron 15R Hard Drive Replacement: шаг 3, изображение 1 из 1
    • Push and slide the battery away from you.

  4. Dell Inspiron 15R Hard Drive Replacement, Keyboard: шаг 4, изображение 1 из 3 Dell Inspiron 15R Hard Drive Replacement, Keyboard: шаг 4, изображение 2 из 3 Dell Inspiron 15R Hard Drive Replacement, Keyboard: шаг 4, изображение 3 из 3
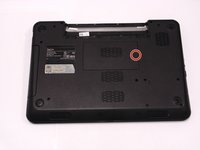
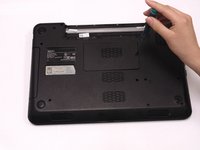
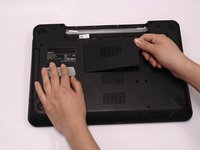
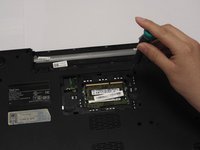
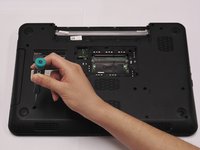
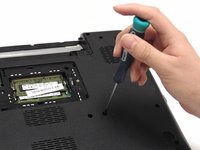
    • Locate the RAM compartment and the screw on the right hand side. Remove the cover.

  5. Dell Inspiron 15R Hard Drive Replacement: шаг 5, изображение 1 из 2 Dell Inspiron 15R Hard Drive Replacement: шаг 5, изображение 2 из 2
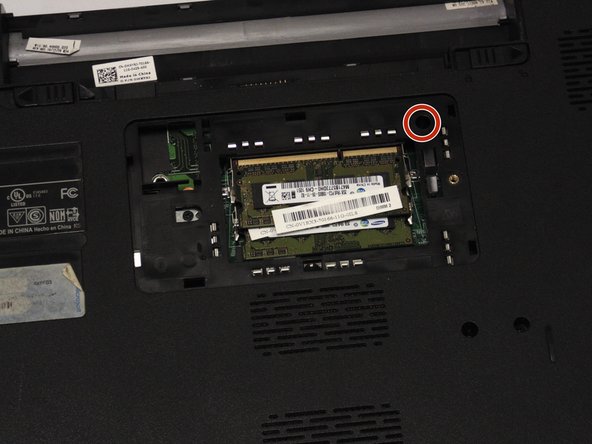
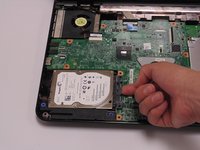
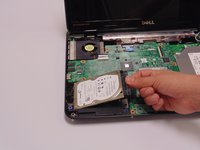
    • Locate and remove the 2.5 mm x 5 mm screw on the upper right hand side of the compartment.

  6. Dell Inspiron 15R Hard Drive Replacement: шаг 6, изображение 1 из 1
    • Turn the device around and open it up.

  7. Dell Inspiron 15R Hard Drive Replacement: шаг 7, изображение 1 из 2 Dell Inspiron 15R Hard Drive Replacement: шаг 7, изображение 2 из 2
    • Using your index finger, push down on the F1 and F7 keys.

  8. Dell Inspiron 15R Hard Drive Replacement: шаг 8, изображение 1 из 2 Dell Inspiron 15R Hard Drive Replacement: шаг 8, изображение 2 из 2
    • Using your index finger, push down on the x icon and Home keys.

  9. Dell Inspiron 15R Hard Drive Replacement: шаг 9, изображение 1 из 3 Dell Inspiron 15R Hard Drive Replacement: шаг 9, изображение 2 из 3 Dell Inspiron 15R Hard Drive Replacement: шаг 9, изображение 3 из 3
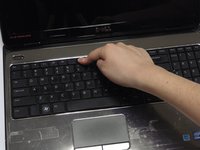
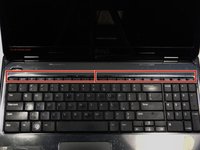
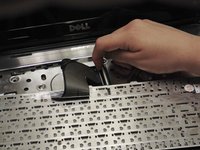
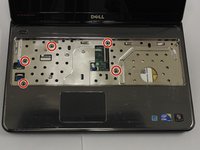
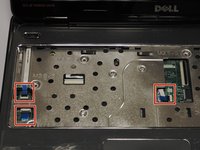
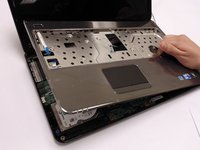
    • Locate the keyboard lining (between the black and silver).

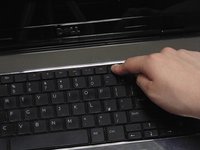
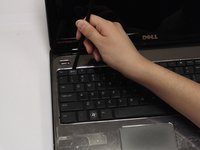
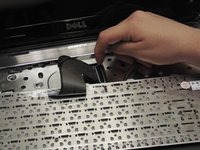
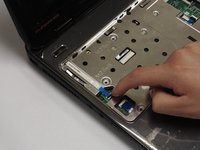
    • Place your spudger between the keyboard lining behind the F1 and F7 keys and pull up.

  10. Dell Inspiron 15R Hard Drive Replacement: шаг 10, изображение 1 из 2 Dell Inspiron 15R Hard Drive Replacement: шаг 10, изображение 2 из 2
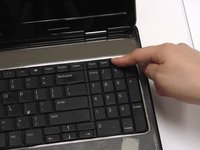
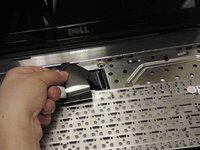
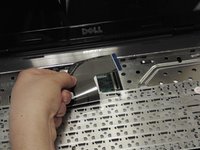
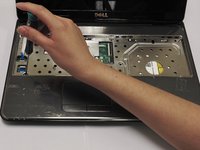
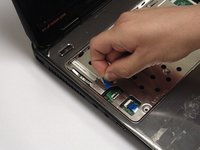
    • Place your spudger between the keyboard lining behind the x icon and Home keys and pull up.

  11. Dell Inspiron 15R Hard Drive Replacement: шаг 11, изображение 1 из 2 Dell Inspiron 15R Hard Drive Replacement: шаг 11, изображение 2 из 2
    • Carefully pull and turn the keyboard over.

  12. Dell Inspiron 15R Hard Drive Replacement: шаг 12, изображение 1 из 2 Dell Inspiron 15R Hard Drive Replacement: шаг 12, изображение 2 из 2
    • Lift the black lever.

  13. Dell Inspiron 15R Hard Drive Replacement: шаг 13, изображение 1 из 2 Dell Inspiron 15R Hard Drive Replacement: шаг 13, изображение 2 из 2
    • Remove the keyboard cable

  14. Dell Inspiron 15R Hard Drive Replacement, Hard Drive: шаг 14, изображение 1 из 2 Dell Inspiron 15R Hard Drive Replacement, Hard Drive: шаг 14, изображение 2 из 2
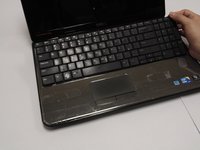
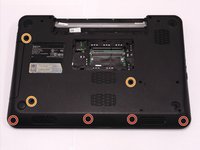
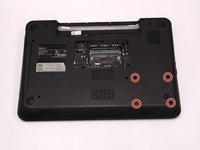
    • Turn laptop over and remove the bottom four screw covers outlined in red.

    • Then remove the three base screws.

  15. Dell Inspiron 15R Hard Drive Replacement: шаг 15, изображение 1 из 2 Dell Inspiron 15R Hard Drive Replacement: шаг 15, изображение 2 из 2
    • Turn laptop over and open it. Locate and remove the five palm rest screws.

  16. Dell Inspiron 15R Hard Drive Replacement: шаг 16, изображение 1 из 3 Dell Inspiron 15R Hard Drive Replacement: шаг 16, изображение 2 из 3 Dell Inspiron 15R Hard Drive Replacement: шаг 16, изображение 3 из 3
    • Locate the palm rest cables. Lift the black levers and unplug the blue cables.

  17. Dell Inspiron 15R Hard Drive Replacement: шаг 17, изображение 1 из 2 Dell Inspiron 15R Hard Drive Replacement: шаг 17, изображение 2 из 2
    • Lift the palm rest until it snaps off.

  18. Dell Inspiron 15R Hard Drive Replacement: шаг 18, изображение 1 из 2 Dell Inspiron 15R Hard Drive Replacement: шаг 18, изображение 2 из 2
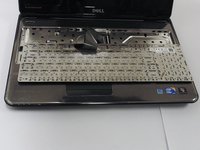
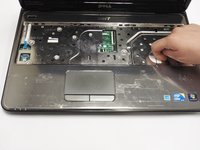
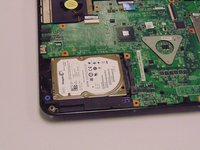
    • Close cover and turn laptop over. Locate and remove the four hard drive screws.

  19. Dell Inspiron 15R Hard Drive Replacement: шаг 19, изображение 1 из 1
    • Turn laptop over and open it.

  20. Dell Inspiron 15R Hard Drive Replacement: шаг 20, изображение 1 из 3 Dell Inspiron 15R Hard Drive Replacement: шаг 20, изображение 2 из 3 Dell Inspiron 15R Hard Drive Replacement: шаг 20, изображение 3 из 3
    • Lift and remove the hard drive.

  21. Dell Inspiron 15R Hard Drive Replacement: шаг 21, изображение 1 из 1
    • Remove the hard drive connector.

Заключение

To reassemble your device, follow these instructions in reverse order.

4 участников успешно повторили данное руководство.

Trixie Gonzalez

Участник с: 02/14/15

843 Репутация

Автор 6 руководств

Команда

San Diego State, Team 2-2, Sheppard Winter 2015 Участник San Diego State, Team 2-2, Sheppard Winter 2015

SDSU-SHEPPARD-W15S2G2

2 членов

Автор 6 руководств

Один комментарий

Shoot! My Dell Inspiron 15R is different. Mine has an almost full length cover (11.6”) by 3” wide on the bottom. The hard drive and memory sticks are under that cover. I’m just not sure what else to remove to replace the drive with an SSD.

Adrian Kocurek - Ответить

Добавить комментарий

Просмотр статистики:

За последние 24часов: 1

За последние 7 дней: 1

За последние 30 дней: 12

За всё время: 7,297