Перейти к основному содержанию

Dell Inspiron 15r 7520 AC/DC Power Jack Plug Socket Replacement

Выберете то, что вам нужно

  1. Dell Inspiron 15r 7520 AC/DC Power Jack Plug Socket Replacement, AC/DC Power Jack Plug Socket: шаг 1, изображение 1 из 3 Dell Inspiron 15r 7520 AC/DC Power Jack Plug Socket Replacement, AC/DC Power Jack Plug Socket: шаг 1, изображение 2 из 3 Dell Inspiron 15r 7520 AC/DC Power Jack Plug Socket Replacement, AC/DC Power Jack Plug Socket: шаг 1, изображение 3 из 3
    • Flip the laptop over with the bottom facing up.

    • Pull the latches away from each other to release the battery.

    • Remove the battery.

  2. Dell Inspiron 15r 7520 AC/DC Power Jack Plug Socket Replacement: шаг 2, изображение 1 из 2 Dell Inspiron 15r 7520 AC/DC Power Jack Plug Socket Replacement: шаг 2, изображение 2 из 2
    • Throughout this guide, be sure to keep all screws in a safe place so they do not get lost. You should also keep them organized so they do not get mixed up.

    • Remove the 4 screws in the battery compartment using a 2.0mm magnetic phillips head screwdriver.

  3. Dell Inspiron 15r 7520 AC/DC Power Jack Plug Socket Replacement: шаг 3, изображение 1 из 2 Dell Inspiron 15r 7520 AC/DC Power Jack Plug Socket Replacement: шаг 3, изображение 2 из 2
    • The screws do not come out of the access door. Do not try to remove them.

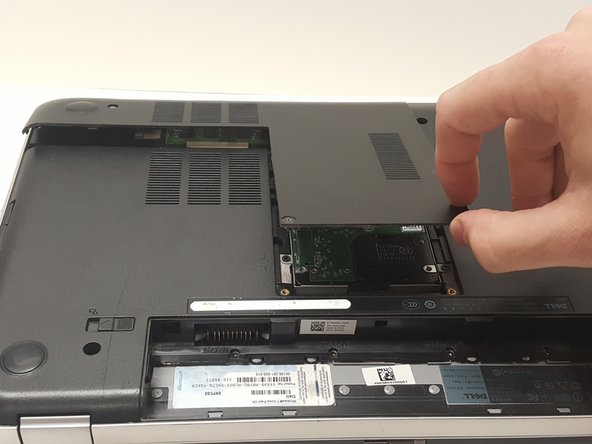
    • Loosen the 3 screws on the access door using the 2.0mm phillips head screwdriver.

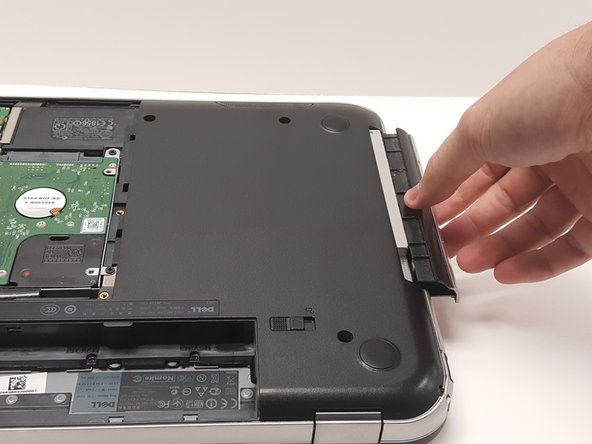
    • Remove the access door.

  4. Dell Inspiron 15r 7520 AC/DC Power Jack Plug Socket Replacement: шаг 4, изображение 1 из 3 Dell Inspiron 15r 7520 AC/DC Power Jack Plug Socket Replacement: шаг 4, изображение 2 из 3 Dell Inspiron 15r 7520 AC/DC Power Jack Plug Socket Replacement: шаг 4, изображение 3 из 3
    • Remove the disk drive screw using the 2.0mm phillips head screwdriver.

    • Remove the disk drive from the laptop.

    • Remove the 2 screws under the disk drive with the 2.0mm phillips head screwdriver.

  5. Dell Inspiron 15r 7520 AC/DC Power Jack Plug Socket Replacement: шаг 5, изображение 1 из 2 Dell Inspiron 15r 7520 AC/DC Power Jack Plug Socket Replacement: шаг 5, изображение 2 из 2
    • Remove the 4 hard drive screws using the 2.0mm phillips head screwdriver.

    • Pull the tab to remove the hard drive from the computer.

  6. Dell Inspiron 15r 7520 AC/DC Power Jack Plug Socket Replacement: шаг 6, изображение 1 из 1
    • Remove the 5 bottom base screws using the 2.0mm phillips head screwdriver.

  7. Dell Inspiron 15r 7520 AC/DC Power Jack Plug Socket Replacement: шаг 7, изображение 1 из 3 Dell Inspiron 15r 7520 AC/DC Power Jack Plug Socket Replacement: шаг 7, изображение 2 из 3 Dell Inspiron 15r 7520 AC/DC Power Jack Plug Socket Replacement: шаг 7, изображение 3 из 3
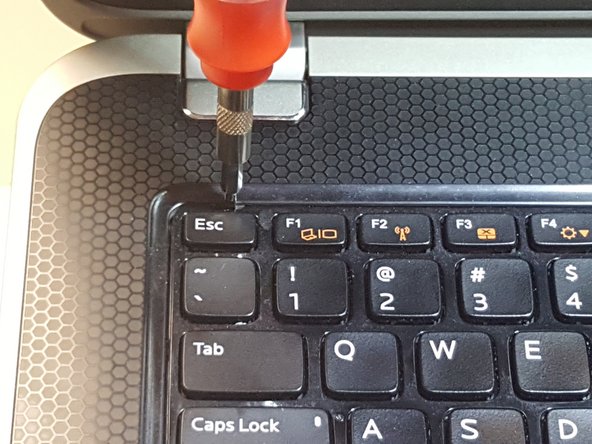
    • Depress the keyboard latches to release the keyboard with the 2.0mm flat head screwdriver.

    • Lift the keyboard up carefully.

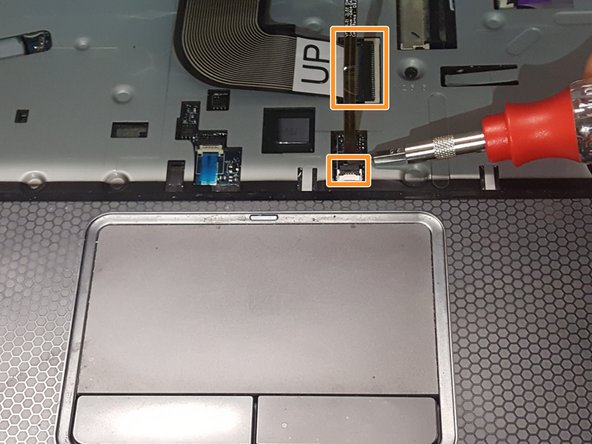
    • Release the two ribbon cables underneath the keyboard.

  8. Dell Inspiron 15r 7520 AC/DC Power Jack Plug Socket Replacement: шаг 8, изображение 1 из 2 Dell Inspiron 15r 7520 AC/DC Power Jack Plug Socket Replacement: шаг 8, изображение 2 из 2
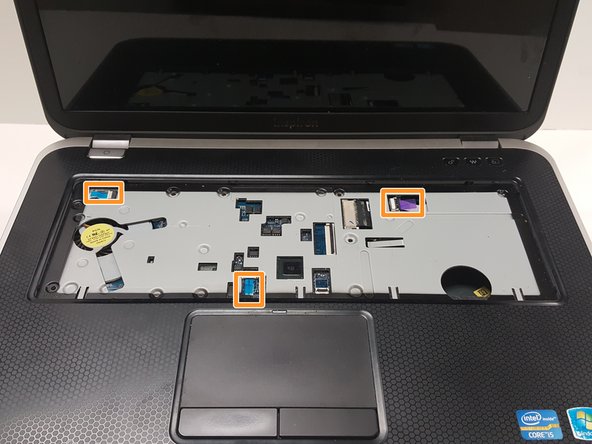
    • Remove the 6 palm rest screws using the 2.0mm phillips head screwdriver.

    • Unplug the 3 ribbon cables.

  9. Dell Inspiron 15r 7520 AC/DC Power Jack Plug Socket Replacement: шаг 9, изображение 1 из 3 Dell Inspiron 15r 7520 AC/DC Power Jack Plug Socket Replacement: шаг 9, изображение 2 из 3 Dell Inspiron 15r 7520 AC/DC Power Jack Plug Socket Replacement: шаг 9, изображение 3 из 3
    • Take your time on this step and be careful to not break the plastic palm rest.

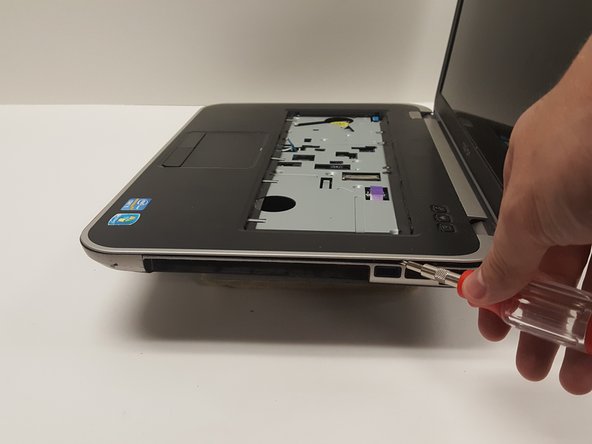
    • Separate the palm rest from the bottom base using the 2.0mm flat head screwdriver as a lever.

    • Unplug the ribbon cable underneath the palm rest.

  10. Dell Inspiron 15r 7520 AC/DC Power Jack Plug Socket Replacement: шаг 10, изображение 1 из 3 Dell Inspiron 15r 7520 AC/DC Power Jack Plug Socket Replacement: шаг 10, изображение 2 из 3 Dell Inspiron 15r 7520 AC/DC Power Jack Plug Socket Replacement: шаг 10, изображение 3 из 3
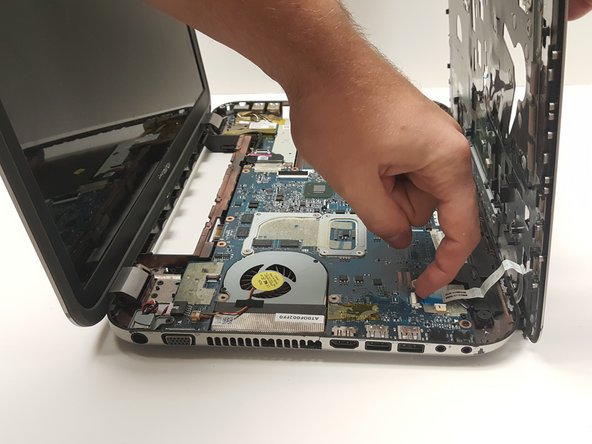
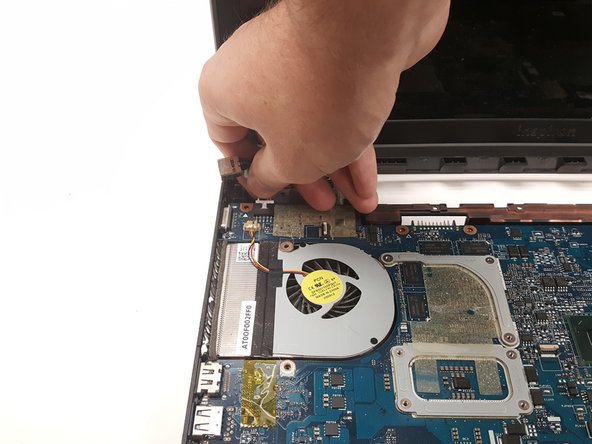
    • Remove the 2 DC jack bracket screws with the 2.0mm phillips head screwdriver and remove the bracket.

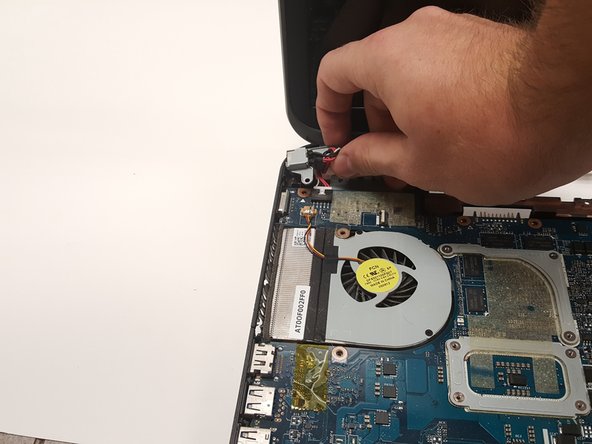
    • Unplug and remove the old DC jack.

Заключение

Follow these instructions in reverse order to reassemble your device.

Allen Van Den Boom

Участник с: 09/29/17

109 Репутация

1 руководство автора

Команда

Michigan Tech, Team S3-G1, Galliah Fall 2017 Участник Michigan Tech, Team S3-G1, Galliah Fall 2017

MTU-GALLIAH-F17S3G1

3 членов

Автор 1 руководств

0 Комментариев

Добавить комментарий

Просмотр статистики:

За последние 24часов: 0

За последние 7 дней: 1

За последние 30 дней: 8

За всё время: 1,415