Введение
If your Dell Inspiron 1721 has a loud fan or is prone to overheating, use this guide to replace the internal fan.
Internal fans circulate cool air to a heat-sink, allowing the CPU to stay at a low temperature, even during stressful performance. Dusty internal fans will restrict airflow in any device.
Before using this guide, verify that the computer is completely shutdown.
Выберете то, что вам нужно
-
-
Slide tabs outward to undo the locks.
-
Grab and pull the battery away from the device to remove.
-
-
-
Pry up on the corner of the hinge cover with an iFixit opening tool.
-
Use the iFixit opening tool along both sides and the front of the hinge cover to release it.
-
Lean the display back as far as it goes and lift up on the hinge cover to remove.
-
-
-
Remove four 3mm Phillips #1 screws from the top of the keyboard.
-
Use an iFixit opening tool to slide the keyboard upwards toward the display.
-
Slide the keyboard until it is clear of the lock tab, and lift it up to remove.
-
-
-
-
Lay the device flat and remove the 17 7mm Phillips #0 screws.
-
Use an iFixit opening tool to separate the back cover.
-
Remove the back cover.
-
-
-
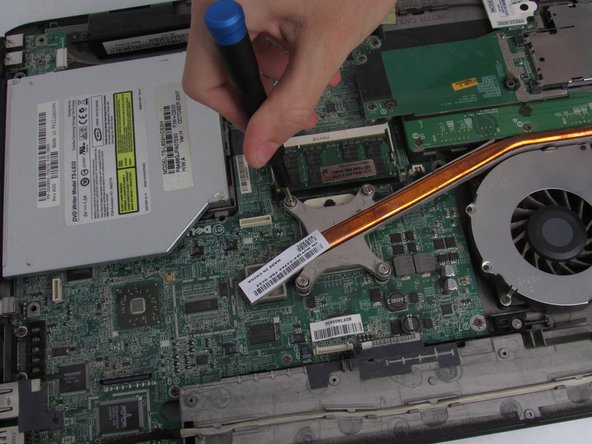
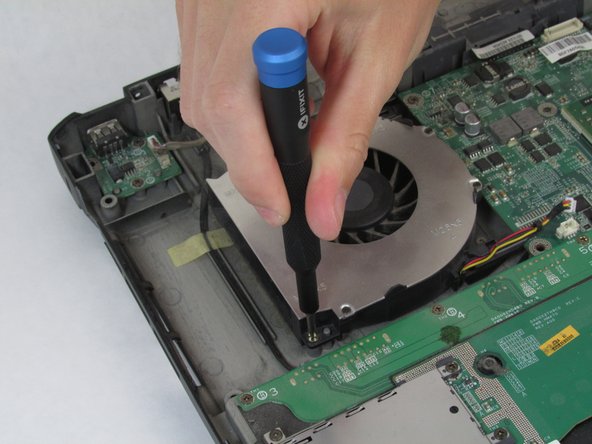
Unscrew the Phillips #0 screws attaching the heat sink to the motherboard.
-
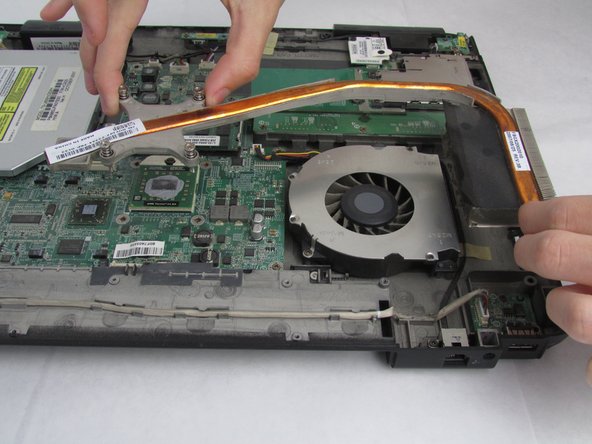
Carefully remove the heat sink from the motherboard.
-
-
-
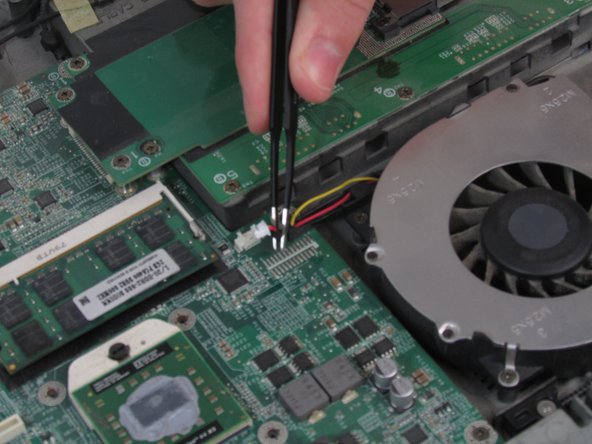
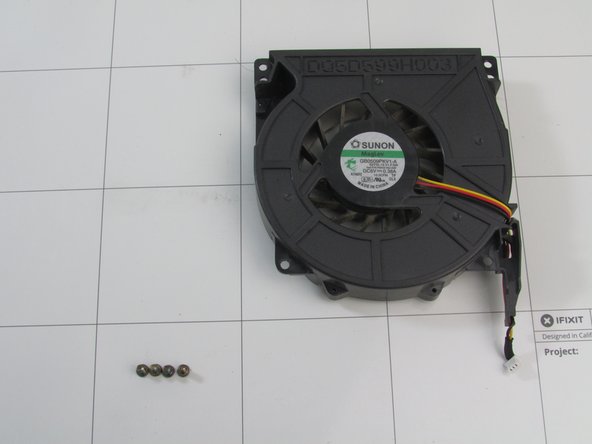
Disconnect the fan power cable from the motherboard using a pair of tweezers.
-


To reassemble your device, follow these instructions in reverse order.
To reassemble your device, follow these instructions in reverse order.
Отменить: Я не выполнил это руководство.
Еще один человек закончил это руководство.
Команда

Embry-Riddle Aeronautical University, Team S8-G5, Salas Fall 2019 Участник Embry-Riddle Aeronautical University, Team S8-G5, Salas Fall 2019
ERAU-SALAS-F19S8G5
4 членов
Автор 9 руководств