Введение
You may want to remove the hard drive to upgrade to a higher capacity drive or if your files have become corrupted and unrecoverable.
Выберете то, что вам нужно
-
-
Place the laptop on a flat stable surface.
-
Flip the laptop over so the underside is visible.
-
-
-
Locate the battery lock switch.
-
Slide the lock switch to the left (away from the lock symbol).
-
Slide the battery out away from the laptop.
-
-
-
-
Remove the two 1mm double wide Phillips #00 screws.
-
Pull the hard drive away from the laptop.
-
-
-
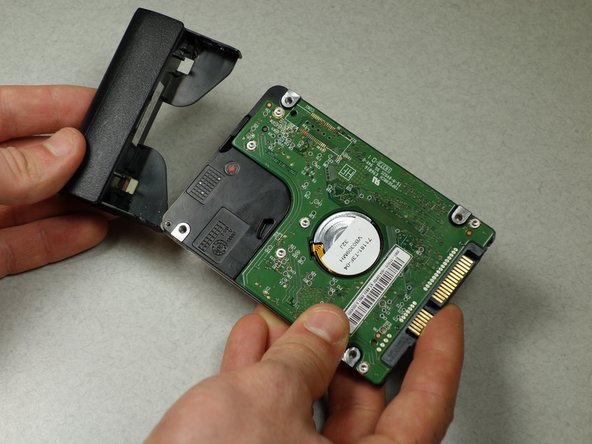
Remove the two #00 1mm screws on both sides of the hard drive.
-
Pull the hard drive cover away from the hard drive and set the cover aside.
-


To reassemble your device, follow these instructions in reverse order.
To reassemble your device, follow these instructions in reverse order.
Отменить: Я не выполнил это руководство.
3 участников успешно повторили данное руководство.
Команда

Cal Poly, Team 6-3, Forte Spring 2014 Участник Cal Poly, Team 6-3, Forte Spring 2014
CPSU-FORTE-S14S6G3
5 членов
Автор 7 руководств