Перейти к основному содержанию

Dell Inspiron 9100 Keyboard Replacement

Выберете то, что вам нужно

  1. Dell Inspiron 9100 Keyboard Replacement, Battery: шаг 1, изображение 1 из 3 Dell Inspiron 9100 Keyboard Replacement, Battery: шаг 1, изображение 2 из 3 Dell Inspiron 9100 Keyboard Replacement, Battery: шаг 1, изображение 3 из 3
    • Unplug the laptop from the power adapter and turn the power off.

    • Failure to unplug laptop before proceeding could result in risk of electric shock!

  2. Dell Inspiron 9100 Keyboard Replacement: шаг 2, изображение 1 из 3 Dell Inspiron 9100 Keyboard Replacement: шаг 2, изображение 2 из 3 Dell Inspiron 9100 Keyboard Replacement: шаг 2, изображение 3 из 3
    • Slide the battery-lock tab and hold.

    • Flip the battery away from the chassis to remove it.

  3. Dell Inspiron 9100 Keyboard Replacement, Keyboard: шаг 3, изображение 1 из 1
    • Turn the laptop around.

  4. Dell Inspiron 9100 Keyboard Replacement: шаг 4, изображение 1 из 3 Dell Inspiron 9100 Keyboard Replacement: шаг 4, изображение 2 из 3 Dell Inspiron 9100 Keyboard Replacement: шаг 4, изображение 3 из 3
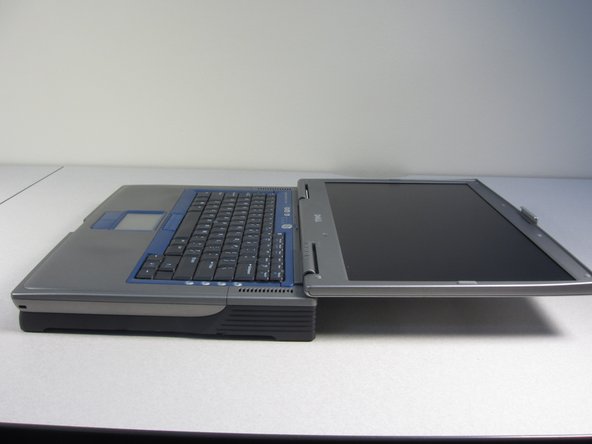
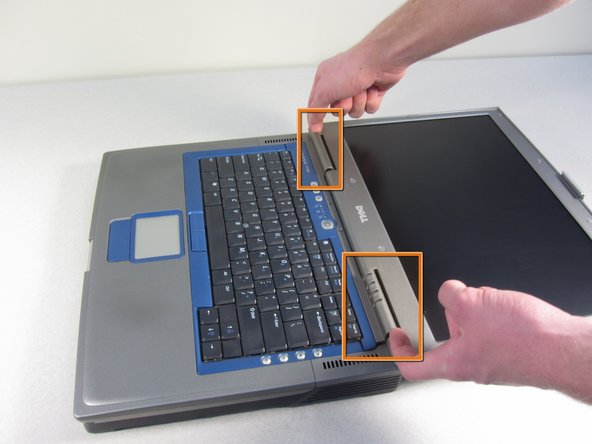
    • Use your fingers to gently pull up on the hinge covers. They will release with an audible snap.

    • Fold the screen back to 180 degrees.

    • Using your index fingers, pull up the hinge cover.

  5. Dell Inspiron 9100 Keyboard Replacement: шаг 5, изображение 1 из 3 Dell Inspiron 9100 Keyboard Replacement: шаг 5, изображение 2 из 3 Dell Inspiron 9100 Keyboard Replacement: шаг 5, изображение 3 из 3
    • After the hinges pop, pull the hinge cover gently.

    • Pull the clear tab on the right side of the laptop up. This tab will disconnect the hinge cover from the laptop.

  6. Dell Inspiron 9100 Keyboard Replacement: шаг 6, изображение 1 из 1
    • Remove the two 3mm screws on the top of the keyboard (nearest to the screen)

  7. Dell Inspiron 9100 Keyboard Replacement: шаг 7, изображение 1 из 3 Dell Inspiron 9100 Keyboard Replacement: шаг 7, изображение 2 из 3 Dell Inspiron 9100 Keyboard Replacement: шаг 7, изображение 3 из 3
    • Tilt the keyboard away from the screen.

    • Pull up on the white tab underneath the keyboard to release the keyboard.

Заключение

To reassemble your device, follow these instructions in reverse order.

Еще один человек закончил это руководство.

Ana

Участник с: 01/11/11

111 Репутация

1 руководство автора

Команда

Cal Poly, Team 13-2, Forte Winter 2011 Участник Cal Poly, Team 13-2, Forte Winter 2011

CPSU-FORTE-W11S13G2

5 членов

Автор 8 руководств

0 Комментариев

Добавить комментарий

Просмотр статистики:

За последние 24часов: 0

За последние 7 дней: 0

За последние 30 дней: 5

За всё время: 3,951