Перейти к основному содержанию

Dell Inspiron n5110 heat sink and thermal paste replacement

Выберете то, что вам нужно

Видео обзор

  1. Dell Inspiron n5110 heat sink and thermal paste replacement, Heat Sink System Cleaning / Thermal Paste Replacing: шаг 1, изображение 1 из 3 Dell Inspiron n5110 heat sink and thermal paste replacement, Heat Sink System Cleaning / Thermal Paste Replacing: шаг 1, изображение 2 из 3 Dell Inspiron n5110 heat sink and thermal paste replacement, Heat Sink System Cleaning / Thermal Paste Replacing: шаг 1, изображение 3 из 3
    • Switch-off the laptop and remove the battery.

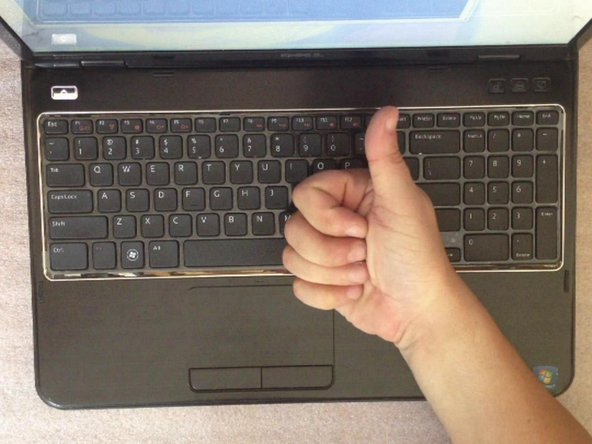
    • To remove the keyboard lift it from one side by using cutter. Now open 4x locking clips at the upper side on the keyboard.

  2. Dell Inspiron n5110 heat sink and thermal paste replacement: шаг 2, изображение 1 из 3 Dell Inspiron n5110 heat sink and thermal paste replacement: шаг 2, изображение 2 из 3 Dell Inspiron n5110 heat sink and thermal paste replacement: шаг 2, изображение 3 из 3
    • Open the keyboard flex cable connector and remove the KB.

    • Open the RAM memory cover.

    • The DVD drive is held by one screw. After unscrewing, you can remove the drive.

  3. Dell Inspiron n5110 heat sink and thermal paste replacement: шаг 3, изображение 1 из 3 Dell Inspiron n5110 heat sink and thermal paste replacement: шаг 3, изображение 2 из 3 Dell Inspiron n5110 heat sink and thermal paste replacement: шаг 3, изображение 3 из 3
    • 12x screws M 2,5x5,0

    • 4x screws M 2,5x5,0

    • Power switch cable connector

    • Mouse pad cable connector

    • Hot keys cable connector

    • After removing all the screws and opening all the connectors, you can remove the upper case.

  4. Dell Inspiron n5110 heat sink and thermal paste replacement: шаг 4, изображение 1 из 3 Dell Inspiron n5110 heat sink and thermal paste replacement: шаг 4, изображение 2 из 3 Dell Inspiron n5110 heat sink and thermal paste replacement: шаг 4, изображение 3 из 3
    • Eject the Card Reader Blanking Plate.

    • Disconnect the LCD display flex cable.

    • Disconnect the WiFi and Bluetooth coaxial cables.

    • The LCD display hings are held by 4x M 2,5x5.0 screws.

    • Now you can remove the LCD display module.

  5. Dell Inspiron n5110 heat sink and thermal paste replacement: шаг 5, изображение 1 из 3 Dell Inspiron n5110 heat sink and thermal paste replacement: шаг 5, изображение 2 из 3 Dell Inspiron n5110 heat sink and thermal paste replacement: шаг 5, изображение 3 из 3
    • Unscrew 5x M2.5x5.0 screws.

    • Disconnect the Loudspeakers cable connector.

    • Remove the Daughter Bluetooth board.

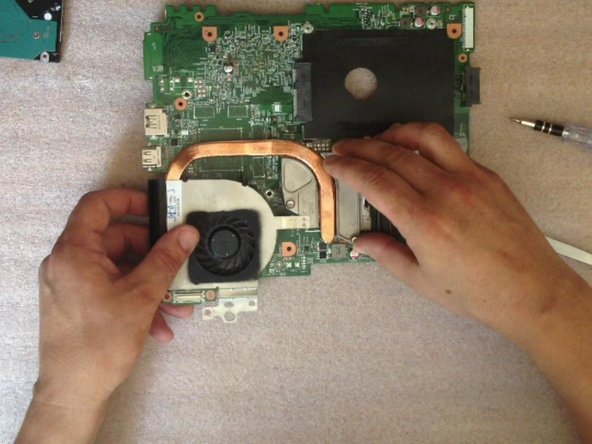
    • Start removing the mother board by lifting from the right side (near to the DVD drive connector).

    • Be careful, there are connectors between mother board and another two additional small boards (charging port board and USB connectors, WiFi card slot board).

  6. Dell Inspiron n5110 heat sink and thermal paste replacement: шаг 6, изображение 1 из 3 Dell Inspiron n5110 heat sink and thermal paste replacement: шаг 6, изображение 2 из 3 Dell Inspiron n5110 heat sink and thermal paste replacement: шаг 6, изображение 3 из 3
    • Remove the Hard Disk drive.

    • Disconnect the Fan cable connector.

  7. Dell Inspiron n5110 heat sink and thermal paste replacement: шаг 7, изображение 1 из 3 Dell Inspiron n5110 heat sink and thermal paste replacement: шаг 7, изображение 2 из 3 Dell Inspiron n5110 heat sink and thermal paste replacement: шаг 7, изображение 3 из 3
    • Remove the Heat Sink system.

    • Clean the cooper contact surface.

  8. Dell Inspiron n5110 heat sink and thermal paste replacement: шаг 8, изображение 1 из 3 Dell Inspiron n5110 heat sink and thermal paste replacement: шаг 8, изображение 2 из 3 Dell Inspiron n5110 heat sink and thermal paste replacement: шаг 8, изображение 3 из 3
    • Disassemble the Heat Sink system to clean the fan and the radiator from inside.

  9. Dell Inspiron n5110 heat sink and thermal paste replacement: шаг 9, изображение 1 из 2 Dell Inspiron n5110 heat sink and thermal paste replacement: шаг 9, изображение 2 из 2
    • Clean the old thermal paste / compose from the CPU.

  10. Dell Inspiron n5110 heat sink and thermal paste replacement: шаг 10, изображение 1 из 3 Dell Inspiron n5110 heat sink and thermal paste replacement: шаг 10, изображение 2 из 3 Dell Inspiron n5110 heat sink and thermal paste replacement: шаг 10, изображение 3 из 3
Заключение

To reassemble your device, follow these instructions in reverse order.

18 участников успешно повторили данное руководство.

ZFix

Участник с: 12/09/13

191 341 Репутация

Автор 330 руководств

Команда

Master Techs Участник Master Techs

Community

322 членов

Автор 2 541 руководств

2 Комментариев

Which thermal paste would you recommend?

PinupSquid - Ответить

Done! It works, now my laptop is as new!

alexmogavero - Ответить

Добавить комментарий

Просмотр статистики:

За последние 24часов: 4

За последние 7 дней: 17

За последние 30 дней: 50

За всё время: 22,144