Введение
If your battery has lost the ability to hold a charge, it will need to be replaced. This tutorial will guide you through replacing the battery of a Dell Latitude 7420 .
Before starting, please ensure the device is turned off and disconnected from any adaptors or charging cables.
Likewise, use an anti-static band or mat when opening computers or handling components.
If the battery is swollen, be sure to take precautions.
Выберете то, что вам нужно
-
-
Remove the eight, 7 mm screws from the back case using a Phillips #0 screwdriver.
-
Use an opening pick or opening tool and work your way around the periphery of the base cover to separate it from the chassis.
-
-
-
Using the Phillips #1 screwdriver, remove the five 5 mm screws securing the battery to the motherboard.
-
-
-
-
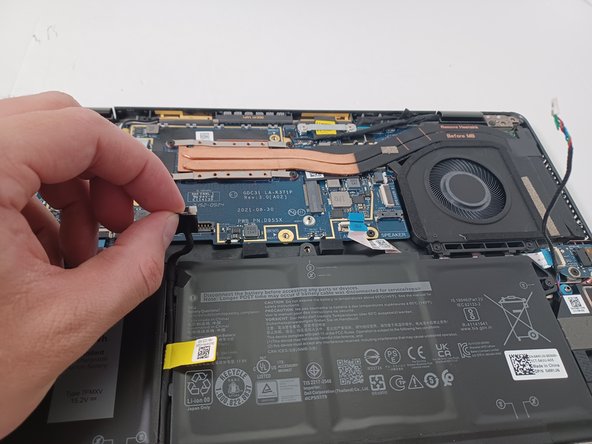
Use a spudger to pry up each side. Then, lift the connector straight up from its socket.
-


To reassemble your device, follow these instructions in reverse order.
To reassemble your device, follow these instructions in reverse order.

Команда

Gateway, Team 1-2, Pee Spring 2023 Участник Gateway, Team 1-2, Pee Spring 2023
GCC-PEE-S23S1G2
4 членов
Автор 6 руководств