Перейти к основному содержанию

Dell Latitude D610 Fan Replacement

Выберете то, что вам нужно

  1. Dell Latitude D610 Fan Replacement, Battery: шаг 1, изображение 1 из 2 Dell Latitude D610 Fan Replacement, Battery: шаг 1, изображение 2 из 2
    • Remove the 3.9 mm Phillips #1 screw from the battery compartment.

  2. Dell Latitude D610 Fan Replacement: шаг 2, изображение 1 из 3 Dell Latitude D610 Fan Replacement: шаг 2, изображение 2 из 3 Dell Latitude D610 Fan Replacement: шаг 2, изображение 3 из 3
    • Locate the laptop battery release button lock

    • Push the battery release in the direction of the arrow, and pull upward.

  3. Dell Latitude D610 Fan Replacement: шаг 3, изображение 1 из 1
    • Remove the battery from its compartment.

  4. Dell Latitude D610 Fan Replacement, Keyboard: шаг 4, изображение 1 из 3 Dell Latitude D610 Fan Replacement, Keyboard: шаг 4, изображение 2 из 3 Dell Latitude D610 Fan Replacement, Keyboard: шаг 4, изображение 3 из 3
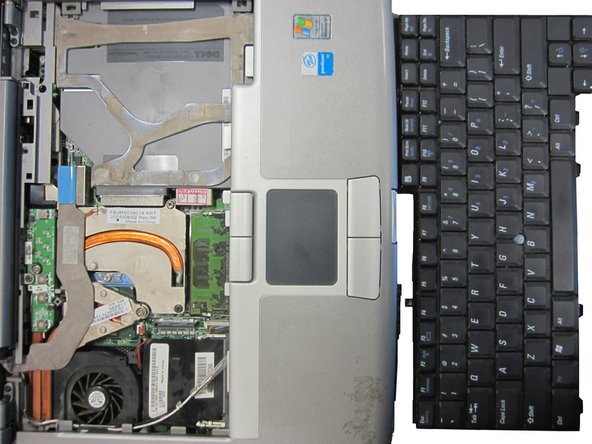
    • Use an opening tool or flat tool to remove the plastic cover above the keyboard.

  5. Dell Latitude D610 Fan Replacement: шаг 5, изображение 1 из 2 Dell Latitude D610 Fan Replacement: шаг 5, изображение 2 из 2
    • Remove the two 3.9mm Philips #1 screws that are holding the keyboard in place.

  6. Dell Latitude D610 Fan Replacement: шаг 6, изображение 1 из 2 Dell Latitude D610 Fan Replacement: шаг 6, изображение 2 из 2
    • Using an opening tool, carefully release the keyboard from the case.

    • Making sure not to tear or damage the wires still connecting it to the laptop.

  7. Dell Latitude D610 Fan Replacement: шаг 7, изображение 1 из 3 Dell Latitude D610 Fan Replacement: шаг 7, изображение 2 из 3 Dell Latitude D610 Fan Replacement: шаг 7, изображение 3 из 3
    • Carfully lift the key board.

    • Lift only about 3 - 4 inches so that the wires holding the keyboard do not get damaged.

    • Pull on the blue tab to unplug the keyboard.

  8. Dell Latitude D610 Fan Replacement, Fan: шаг 8, изображение 1 из 2 Dell Latitude D610 Fan Replacement, Fan: шаг 8, изображение 2 из 2
    • Remove the two 3.9mm Philips #1 screws from the case.

  9. Dell Latitude D610 Fan Replacement: шаг 9, изображение 1 из 2 Dell Latitude D610 Fan Replacement: шаг 9, изображение 2 из 2
    • Remove the sixteen 3.9mm Philips #1 screws from the back.

  10. Dell Latitude D610 Fan Replacement: шаг 10, изображение 1 из 3 Dell Latitude D610 Fan Replacement: шаг 10, изображение 2 из 3 Dell Latitude D610 Fan Replacement: шаг 10, изображение 3 из 3
    • Turn the computer over. Using an opening tool seperate the top cover from the rest of the frame.

    • Do not open the computer too widely or quickly. Doing so will result in damage to the computer.

  11. Dell Latitude D610 Fan Replacement: шаг 11, изображение 1 из 3 Dell Latitude D610 Fan Replacement: шаг 11, изображение 2 из 3 Dell Latitude D610 Fan Replacement: шаг 11, изображение 3 из 3
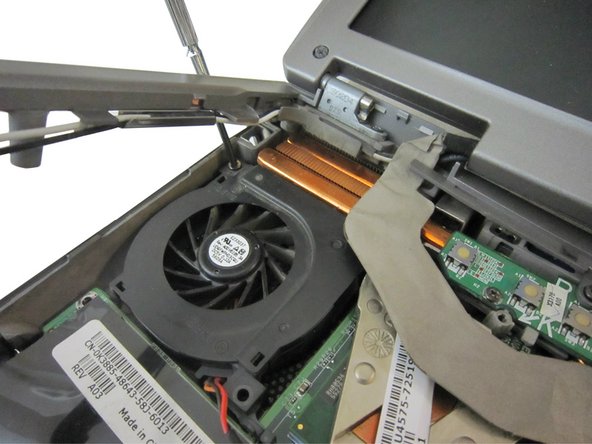
    • Remove the 3.9 mm Philips #1 screw.

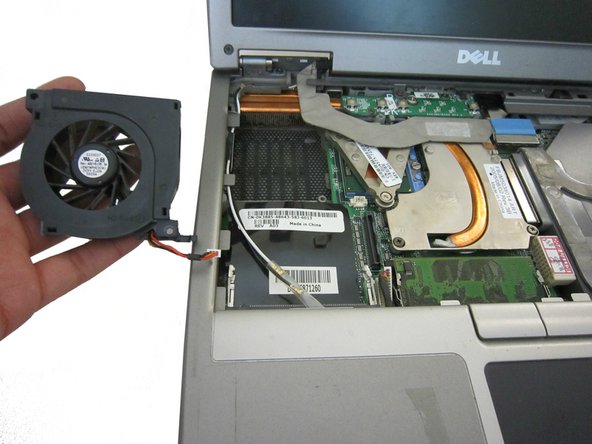
    • Unplug the fan cable.

    • Lift fan out of compartment to remove the fan.

Заключение

To reassemble your device, follow these instructions in reverse order.

2 участников успешно повторили данное руководство.

Jordan Barham

Участник с: 01/26/14

459 Репутация

Автор 3 руководств

Команда

Cal Poly, Team 6-24, Maness Winter 2014 Участник Cal Poly, Team 6-24, Maness Winter 2014

CPSU-MANESS-W14S6G24

4 членов

Автор 5 руководств

0 Комментариев

Добавить комментарий

Просмотр статистики:

За последние 24часов: 0

За последние 7 дней: 2

За последние 30 дней: 8

За всё время: 3,225