Перейти к основному содержанию

Dell Latitude D820 Thermal Paste Replacement

Выберете то, что вам нужно

  1. Dell Latitude D820 Thermal Paste Replacement, Motherboard: шаг 1, изображение 1 из 3 Dell Latitude D820 Thermal Paste Replacement, Motherboard: шаг 1, изображение 2 из 3 Dell Latitude D820 Thermal Paste Replacement, Motherboard: шаг 1, изображение 3 из 3
    • Perform a complete system backup and shutdown the computer.

    • Unplug the charger and remove the battery.

    • Remove the battery by sliding the lock tab and use your other hand to remove the battery.

  2. Dell Latitude D820 Thermal Paste Replacement: шаг 2, изображение 1 из 1
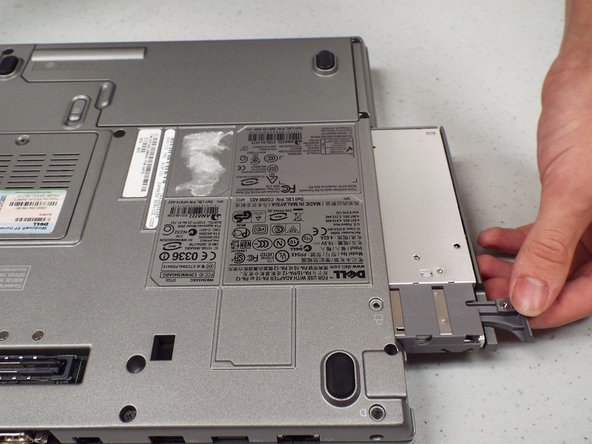
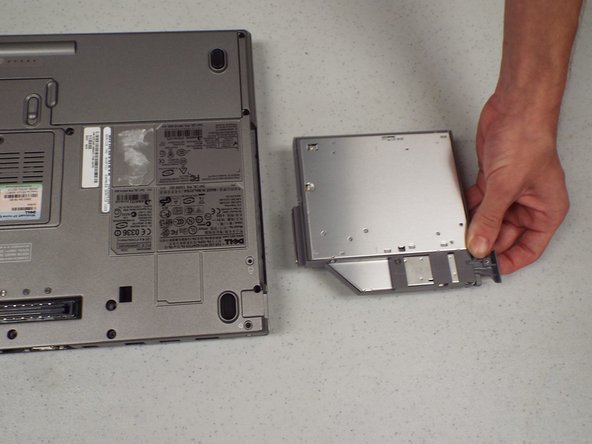
    • Remove the hard drive.

    • Remove three 3.6 mm Phillips screws.

    • Remove the hard drive and set it aside, trying not to touch anything but the grey plastic grip pad. Doing so may cause damage to your hard drive.

  3. Dell Latitude D820 Thermal Paste Replacement: шаг 3, изображение 1 из 3 Dell Latitude D820 Thermal Paste Replacement: шаг 3, изображение 2 из 3 Dell Latitude D820 Thermal Paste Replacement: шаг 3, изображение 3 из 3
    • Remove the CD/DVD drive by pushing on the button under the drive.

    • There may be a little resistance pulling it out.

  4. Dell Latitude D820 Thermal Paste Replacement: шаг 4, изображение 1 из 1
    • Remove the 14 Phillips screws from the bottom of the laptop.

  5. Dell Latitude D820 Thermal Paste Replacement: шаг 5, изображение 1 из 2 Dell Latitude D820 Thermal Paste Replacement: шаг 5, изображение 2 из 2
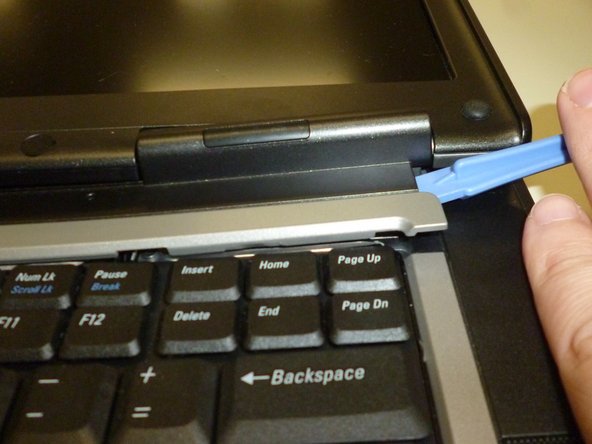
    • Flip the laptop face up, making sure the screen is opened all the way and is flat.

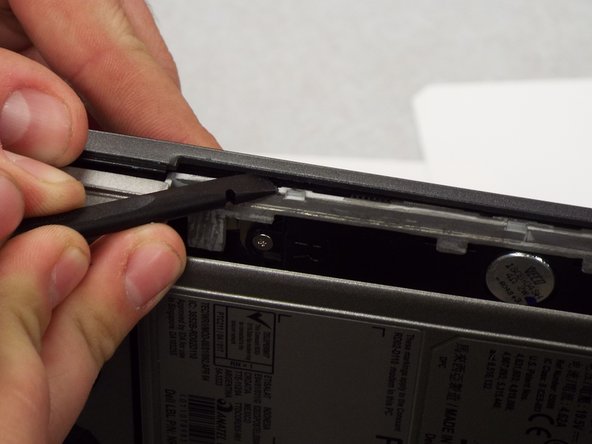
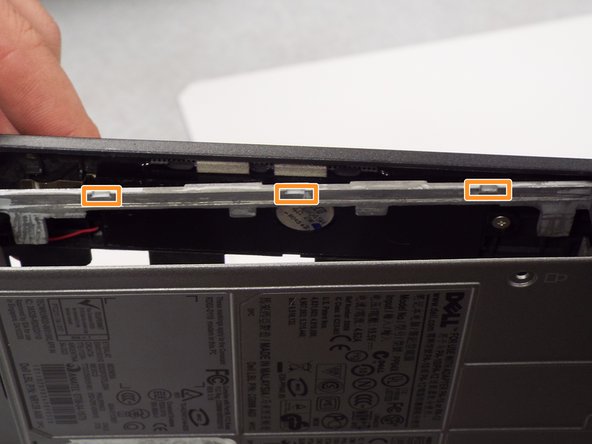
    • Using an opening tool, carefully pry off the keyboard bezel keeping in mind wires are attached so do not pull too far or hard.

  6. Dell Latitude D820 Thermal Paste Replacement: шаг 6, изображение 1 из 2 Dell Latitude D820 Thermal Paste Replacement: шаг 6, изображение 2 из 2
    • Remove the keyboard screws.

    • Flip the keyboard over.

    • There is a ribbon cable (wires) attached to the bottom of the keyboard, so be careful not to tear it.

    • Remove the keyboard.

  7. Dell Latitude D820 Thermal Paste Replacement: шаг 7, изображение 1 из 3 Dell Latitude D820 Thermal Paste Replacement: шаг 7, изображение 2 из 3 Dell Latitude D820 Thermal Paste Replacement: шаг 7, изображение 3 из 3
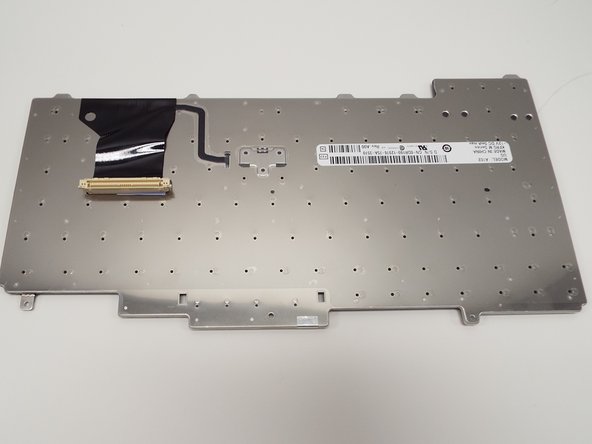
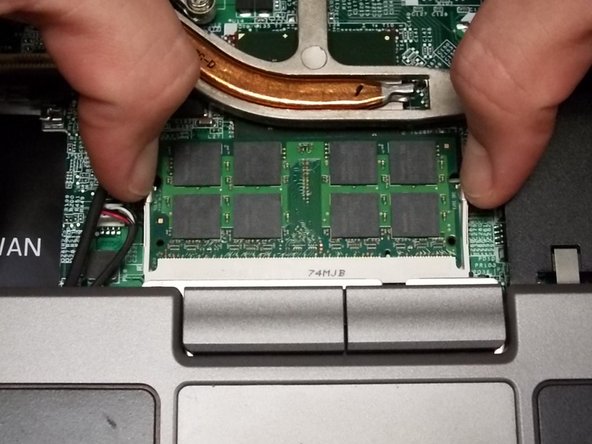
    • Remove the RAM stick under the keyboard by pulling the two tabs away from each other as shown in second picture.

    • Repeat for the second stick of RAM.

  8. Dell Latitude D820 Thermal Paste Replacement: шаг 8, изображение 1 из 1
    • Disconnect the wireless card from the bottom corner.

    • Push the retaining tab and lift the card out.

    • Do this for the ethernet card which is in the same spot.

  9. Dell Latitude D820 Thermal Paste Replacement: шаг 9, изображение 1 из 1
    • Remove the cable that connects the speaker to the frame by pulling straight out.

    • The cable is located to the left of DDR2 DIMM A.

    • Remove the cable that connects the track pad to the frame by pulling straight out.

    • The cable is also located to the left of DDR2 DIMM A.

  10. Dell Latitude D820 Thermal Paste Replacement: шаг 10, изображение 1 из 3 Dell Latitude D820 Thermal Paste Replacement: шаг 10, изображение 2 из 3 Dell Latitude D820 Thermal Paste Replacement: шаг 10, изображение 3 из 3
    • Remove three screws that hold the upper case to the motherboard.

    • Use a spudger to pry the three tabs by the CD-ROM to separate the upper and bottom casing.

  11. Dell Latitude D820 Thermal Paste Replacement: шаг 11, изображение 1 из 3 Dell Latitude D820 Thermal Paste Replacement: шаг 11, изображение 2 из 3 Dell Latitude D820 Thermal Paste Replacement: шаг 11, изображение 3 из 3
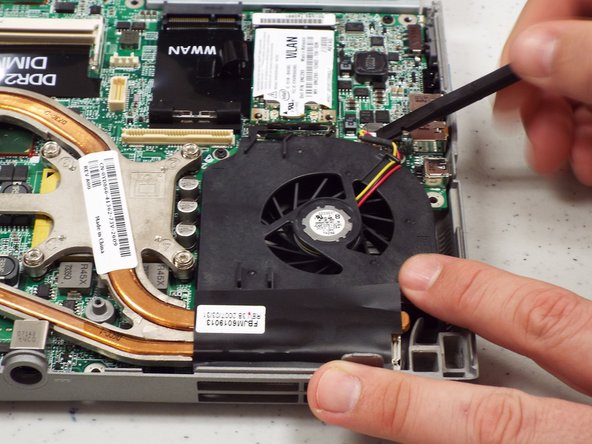
    • Remove two 5.6 mm screws from the fan.

    • Remove the fan power cable.

    • Loosen six captive spring loaded screws from the heat sink.

  12. Dell Latitude D820 Thermal Paste Replacement: шаг 12, изображение 1 из 3 Dell Latitude D820 Thermal Paste Replacement: шаг 12, изображение 2 из 3 Dell Latitude D820 Thermal Paste Replacement: шаг 12, изображение 3 из 3
    • Remove four 3.7 mm screws from around edge of the motherboard.

    • Remove three 3.8 mm screws. One of these is near top left of Dell MCIA. The other is near top left of WWAN. There is one underneath the Black WWAN label.

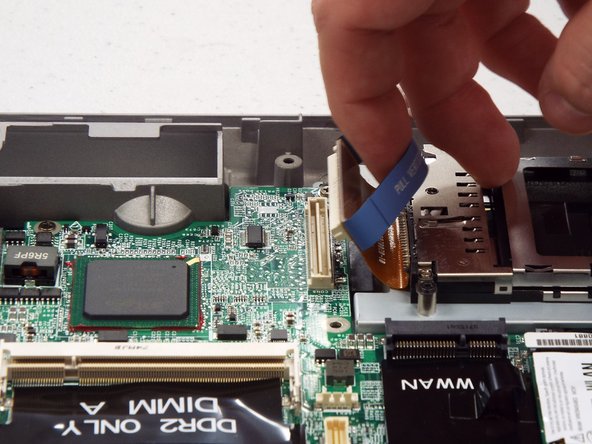
    • Remove the PCMCIA connector from the motherboard.

    • Turn the laptop on the side and remove two female hex screws from the video card and two posts from the serial port using socket driver (3/16 socket).

    • All hex screws are 10.23mm x 2.66mm size.

  13. Dell Latitude D820 Thermal Paste Replacement, Thermal Paste: шаг 13, изображение 1 из 2 Dell Latitude D820 Thermal Paste Replacement, Thermal Paste: шаг 13, изображение 2 из 2
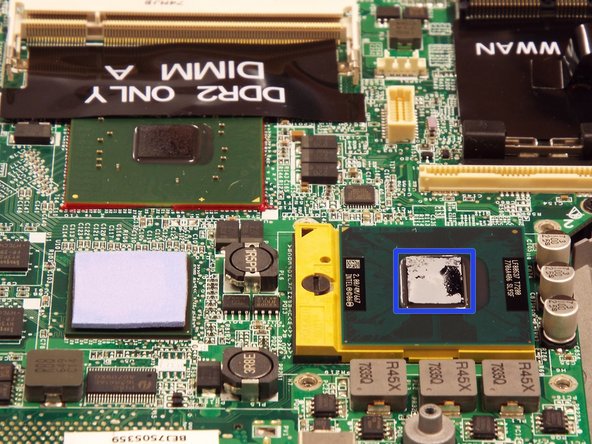
    • Using a lint free cloth and a drop of TimClean or ArctiClean to clean residue from the heat sink.

    • Using a lint free cloth and a drop of TimClean or ArctiClean to clean residue off CPU.

    • Wipe with a clean lint free cloth to remove any residue of cleaner.

    • Do not touch with fingers!

    • Allow to dry completely.

  14. Dell Latitude D820 Thermal Paste Replacement: шаг 14, изображение 1 из 2 Dell Latitude D820 Thermal Paste Replacement: шаг 14, изображение 2 из 2
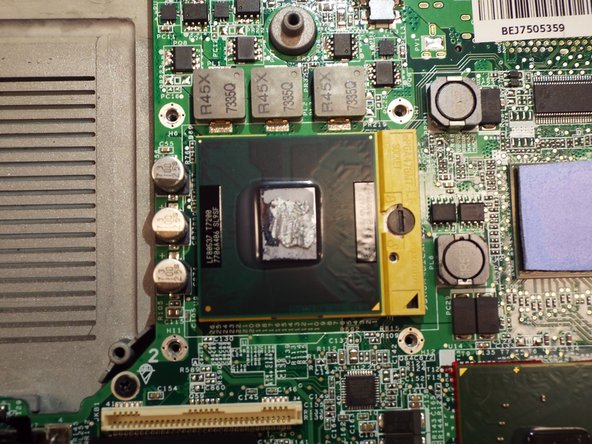
    • Dispense a small amount of thermal paste onto processor.

    • Using your rubber finger stall or spudger spread a thin, even layer over processor.

    • The processor is ready for heat sink installation.

Заключение

To reassemble your device, follow these instructions in reverse order.

3 участников успешно повторили данное руководство.

Henry

Участник с: 09/02/14

1 431 Репутация

Автор 4 руководств

Команда

Pasco Hernando, Team 1-2, Prince Fall 2014 Участник Pasco Hernando, Team 1-2, Prince Fall 2014

PHSC-PRINCE-F14S1G2

10 членов

Автор 7 руководств

0 Комментариев

Добавить комментарий

Просмотр статистики:

За последние 24часов: 0

За последние 7 дней: 0

За последние 30 дней: 2

За всё время: 946