Введение
You can use this guide in order to replace the screen of a Dell Latitude E5450 laptop.
There are so many different types of laptop screens available in the market such as transmissive screens, reflective screens, transflective screens, widescreens, backlit LED displays, and many more. I would recommend buying a laptop screen which prevents eye strain.
Every display panel is made up of a series of dots called pixels. In general, the higher the pixel count, the better the display.
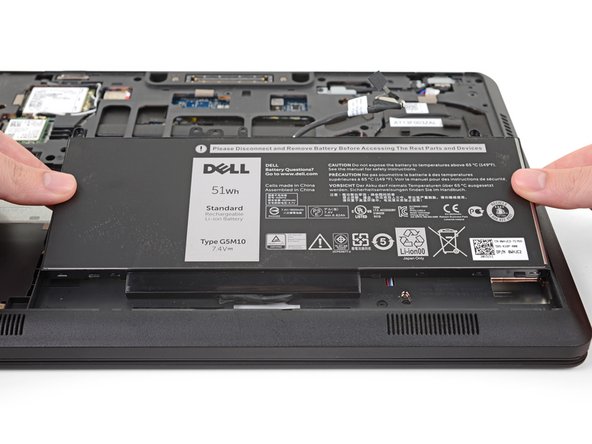
To begin with the screen replacement process, you need a Phillips #0 screwdriver. Before performing any task, you must unplug the laptop from a charger or any other device. Then remove the battery which can help to prevent shock.
Выберете то, что вам нужно
-
-
Remove the six Philips #0 screws from the lower case.
-
-
-
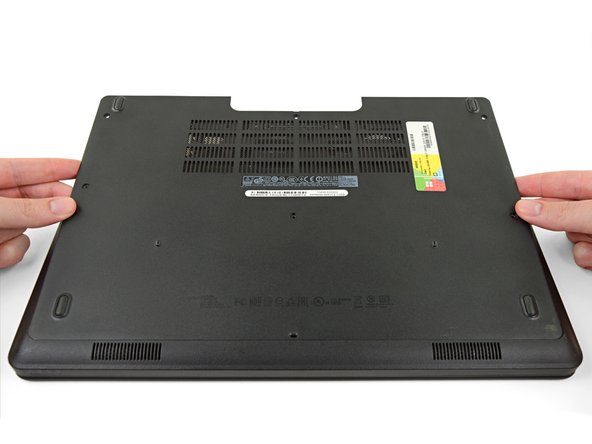
Four clips hold the upper half of the case in place and can be released by prying around them with a spudger.
-
The other six clips along the bottom edge can not be released by prying at them. Instead, they come free by sliding the whole case upward, as shown in step 5 below.
-
-
-
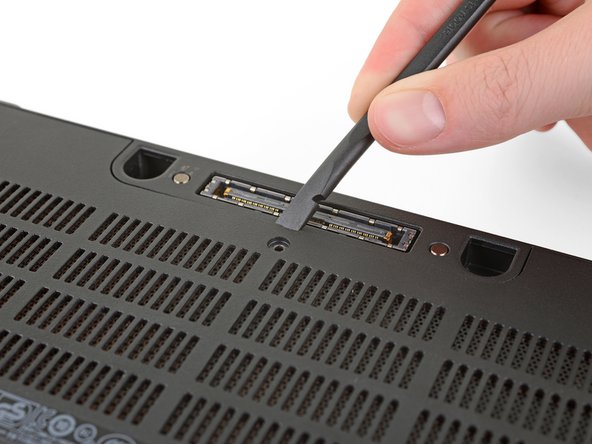
Insert the flat edge of a spudger into the small divot along the top edge of the case, just below the docking station port.
-
Pry up to release the two central clips along the upper edge of the case.
-
-
-
-
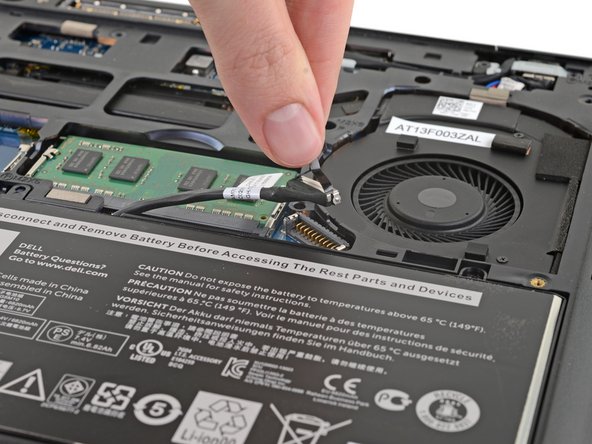
Pull up on the battery connector's pull tab to disconnect the battery.
-
-
-
Remove the three 5.6 mm Philips #0 screws from the top edge of the battery.
-
-
-
Remove the plastic cover surrounding the screen.
-
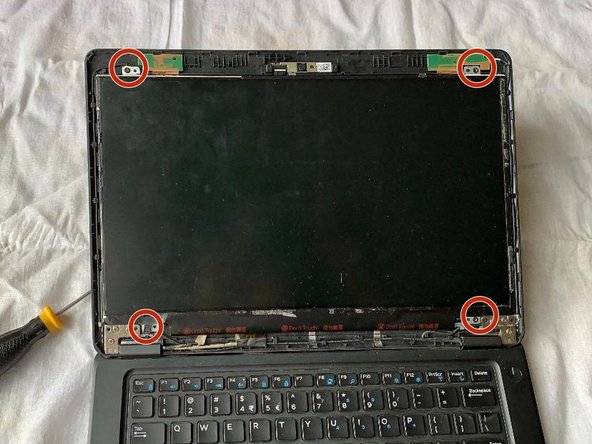
Remove the four Phillips #0 screws from each corner of the laptop.
-
-
-
Carefully put the screen upside down on the keyboard.
-
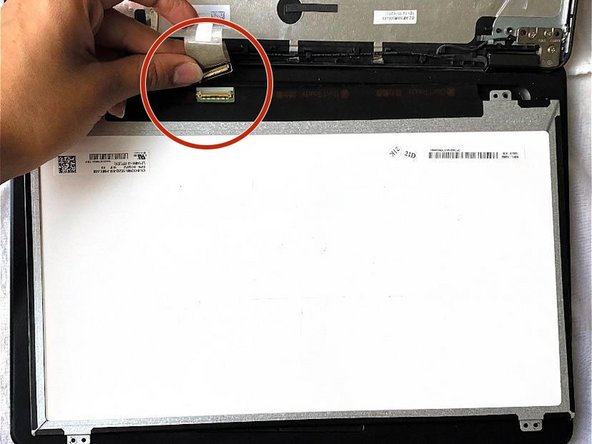
Disconnect the cable with the QR code on the opposite side of the screen.
-


To reassemble your device, follow these instructions in reverse order. If you have removed too much adhesive, then please reapply it and let it dry before you start using the laptop.
To reassemble your device, follow these instructions in reverse order. If you have removed too much adhesive, then please reapply it and let it dry before you start using the laptop.
Отменить: Я не выполнил это руководство.
3 участников успешно повторили данное руководство.

Команда

York University, Team S2-G19, Melo-Thaiss Fall 2020 Участник York University, Team S2-G19, Melo-Thaiss Fall 2020
YORK-MELO-THAISS-F20S2G19
1 член
Автор 1 руководств