Перейти к основному содержанию

Dell Optiplex 745 Small Form Factor Hard Drive Replacement

  1. Dell Optiplex 745 Small Form Factor Hard Drive Replacement, Opening the case: шаг 1, изображение 1 из 2 Dell Optiplex 745 Small Form Factor Hard Drive Replacement, Opening the case: шаг 1, изображение 2 из 2
    • Pull the tab and the lid will pop up.

  2. Dell Optiplex 745 Small Form Factor Hard Drive Replacement: шаг 2, изображение 1 из 2 Dell Optiplex 745 Small Form Factor Hard Drive Replacement: шаг 2, изображение 2 из 2
    • Grab the lid and pull it up and off.

  3. Dell Optiplex 745 Small Form Factor Hard Drive Replacement, Disconnecting the cables: шаг 3, изображение 1 из 2 Dell Optiplex 745 Small Form Factor Hard Drive Replacement, Disconnecting the cables: шаг 3, изображение 2 из 2
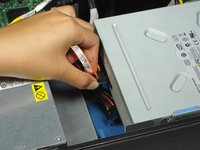
    • Pull out both sets of cables from the side of the optical drive.

    • Both cables are plugged into the drive right next to each other.

  4. Dell Optiplex 745 Small Form Factor Hard Drive Replacement, Removing the optical drive: шаг 4, изображение 1 из 2 Dell Optiplex 745 Small Form Factor Hard Drive Replacement, Removing the optical drive: шаг 4, изображение 2 из 2
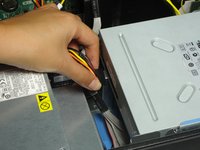
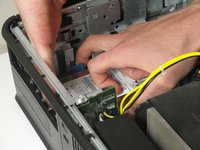
    • Pull the tab up holding the optical drive in place.

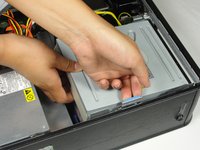
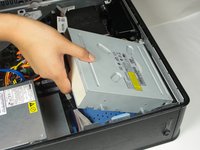
    • Slide the optical drive out.

  5. Dell Optiplex 745 Small Form Factor Hard Drive Replacement, Remove the tray under the optical drive: шаг 5, изображение 1 из 3 Dell Optiplex 745 Small Form Factor Hard Drive Replacement, Remove the tray under the optical drive: шаг 5, изображение 2 из 3 Dell Optiplex 745 Small Form Factor Hard Drive Replacement, Remove the tray under the optical drive: шаг 5, изображение 3 из 3
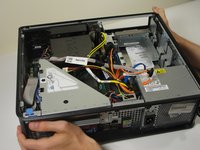
    • Rotate the computer 180 degrees.

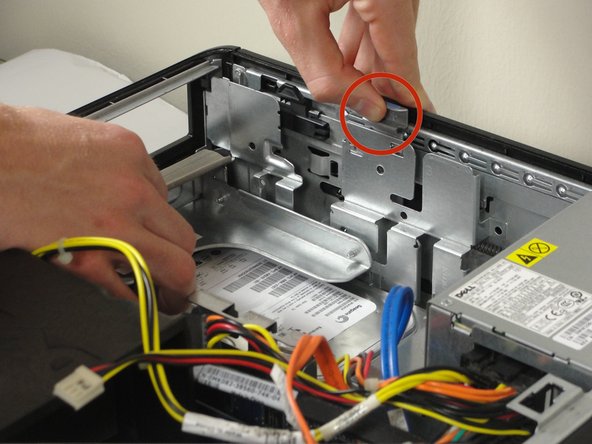
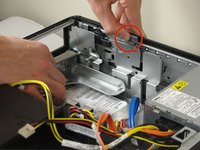
    • Pull the metal tab up.

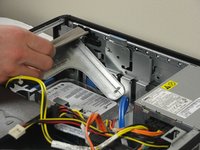
    • Pull the tray away from the case.

  6. Dell Optiplex 745 Small Form Factor Hard Drive Replacement, Remove the hard drive case: шаг 6, изображение 1 из 3 Dell Optiplex 745 Small Form Factor Hard Drive Replacement, Remove the hard drive case: шаг 6, изображение 2 из 3 Dell Optiplex 745 Small Form Factor Hard Drive Replacement, Remove the hard drive case: шаг 6, изображение 3 из 3
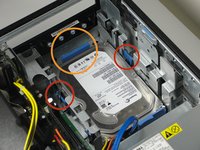
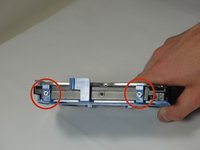
    • Pinch the 2 small blue tabs towards each other.

    • Push the large blue tab into the hard drive and push the hard drive away from the tower wall.

    • Lift the hard drive from the case after it comes loose.

  7. Dell Optiplex 745 Small Form Factor Hard Drive Replacement, Remove the wires: шаг 7, изображение 1 из 2 Dell Optiplex 745 Small Form Factor Hard Drive Replacement, Remove the wires: шаг 7, изображение 2 из 2
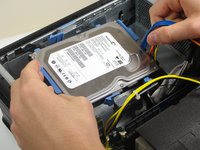
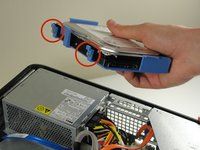
    • Pull out both bundles of wires connected to the hard drive.

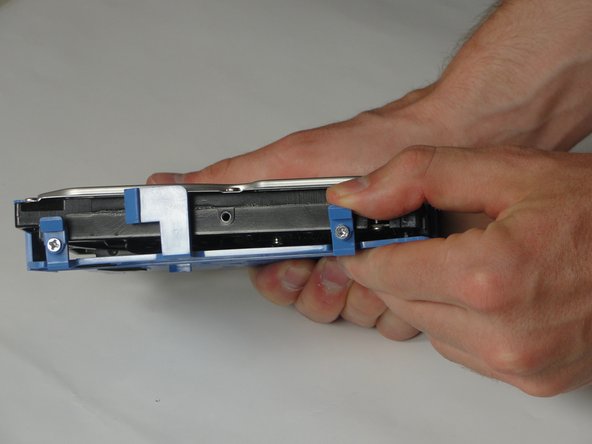
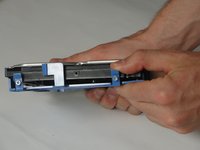
    • Flip the hard drive so that the blue case is facing down, and the marked tabs are facing toward you.

  8. Dell Optiplex 745 Small Form Factor Hard Drive Replacement, Separate the hard drive and case.: шаг 8, изображение 1 из 3 Dell Optiplex 745 Small Form Factor Hard Drive Replacement, Separate the hard drive and case.: шаг 8, изображение 2 из 3 Dell Optiplex 745 Small Form Factor Hard Drive Replacement, Separate the hard drive and case.: шаг 8, изображение 3 из 3
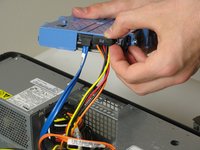
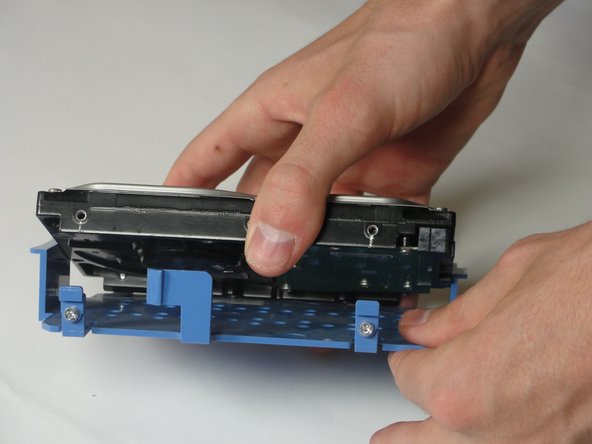
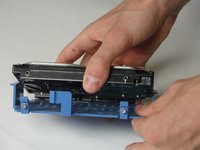
    • Pull the 2 blue tabs away from the hard drive and then pull the hard drive case down.

Заключение

To reassemble your device, follow these instructions in reverse order.

19 участников успешно повторили данное руководство.

Rebecca Harrison

Участник с: 09/29/14

512 Репутация

1 руководство автора

Команда

Cal Poly, Team 13-10, Forte Fall 2014 Участник Cal Poly, Team 13-10, Forte Fall 2014

CPSU-FORTE-F14S13G10

6 членов

Автор 12 руководств

0 Комментариев

Добавить комментарий

Просмотр статистики:

За последние 24часов: 2

За последние 7 дней: 10

За последние 30 дней: 53

За всё время: 8,984