Выберете то, что вам нужно
-
-
Slide and click the battery latch release.
-
Slide the battery out of the battery bay.
-
-
-
Loosen the eight captive screws on the base cover and lift the cover off the computer at an angle as shown in the figure.
-
-
-
-
Remove the four screws securing the hard drive assembly to the computer base.
-
Pull the blue pull-tab on the cable attached to the system board to disconnect the cable.
-
Pull the black pull-tab to lift the hard drive assembly out of the computer.
-
-
-
Pull the interposer to detach it from the hard drive.
-
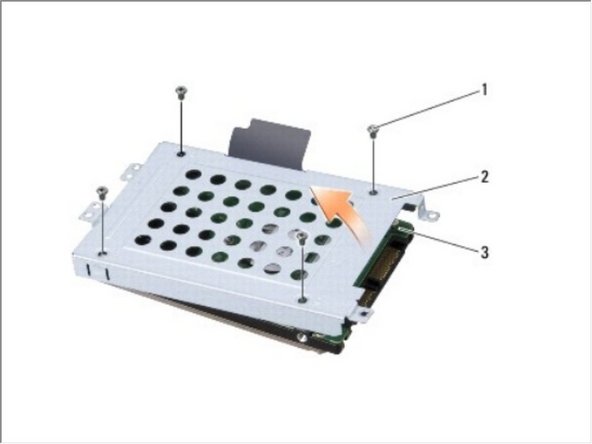
Remove the four M3 x 3-mm screws securing the hard drive cage to the hard drive.
-
Lift the hard drive cage off the hard drive.
-
To reassemble your device, follow these instructions in reverse order.
To reassemble your device, follow these instructions in reverse order.
Отменить: Я не выполнил это руководство.
Еще один человек закончил это руководство.


