Перейти к основному содержанию

Dell XPS 15 9510 Hinges Replacement

Выберете то, что вам нужно

  1. Dell XPS 15 9510 Hinges Replacement, Lower Case: шаг 1, изображение 1 из 1
    • Make sure the laptop is powered off and unplug all cables before beginning any repair.

    • Remove eight 3 mm screws from the underside of the case using a T5 Torx screwdriver.

  2. Dell XPS 15 9510 Hinges Replacement: шаг 2, изображение 1 из 1
    • The metal case of the XPS 15 9510 is extremely sharp, so be careful not to run your fingers along the edge when disassembling the laptop.

    • Wedge the case apart with a nylon spudger.

    • If the plastic one isn't possible to insert, use the metal spudger to carefully create a small gap first.

    • Slide spudger along each side of the laptop

  3. Dell XPS 15 9510 Hinges Replacement: шаг 3, изображение 1 из 1
    • The metal case of the XPS 15 9510 is extremely sharp, so be careful not to run your fingers along the edge when disassembling the laptop.

    • Lift the back panel of the laptop off and set it aside.

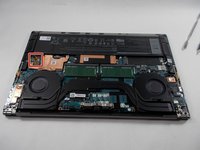
  4. Dell XPS 15 9510 Hinges Replacement, Battery: шаг 4, изображение 1 из 2 Dell XPS 15 9510 Hinges Replacement, Battery: шаг 4, изображение 2 из 2
    • Using the small battery pull tab, disconnect the battery connector from the motherboard.

  5. Dell XPS 15 9510 Hinges Replacement: шаг 5, изображение 1 из 1
    • Remove eight 2.5 mm from around the perimeter of the battery using a Phillips #0 screwdriver.

  6. Dell XPS 15 9510 Hinges Replacement: шаг 6, изображение 1 из 2 Dell XPS 15 9510 Hinges Replacement: шаг 6, изображение 2 из 2
    • There are many delicate components in the vicinity of the battery, so be extremely careful removing it

    • Remove the old battery from the laptop.

  7. Dell XPS 15 9510 Hinges Replacement, Display Assembly: шаг 7, изображение 1 из 1
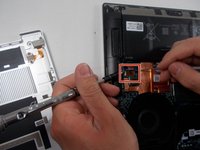
    • Remove the four screws (eight total) from each display hinge using a Phillips #00 screwdriver.

  8. Dell XPS 15 9510 Hinges Replacement: шаг 8, изображение 1 из 1
    • Remove five screws that connect the display using a Phillips #00 screwdriver.

  9. Dell XPS 15 9510 Hinges Replacement: шаг 9, изображение 1 из 1
    • Carefully remove the display from the Dell XPS 15 9510.

  10. Dell XPS 15 9510 Hinges Replacement, Hinges: шаг 10, изображение 1 из 2 Dell XPS 15 9510 Hinges Replacement, Hinges: шаг 10, изображение 2 из 2
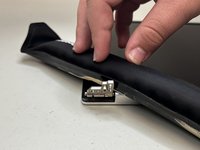
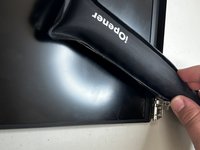
    • Heat the iOpener in the microwave for 30 seconds.

    • Place the iOpener on top of the laptop where the hinge is connected. Leave it there until the glue holding it in place melts.

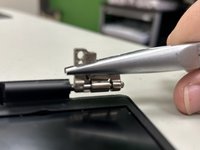
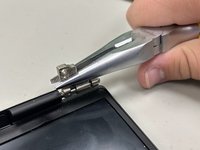
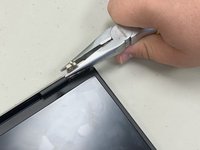
  11. Dell XPS 15 9510 Hinges Replacement: шаг 11, изображение 1 из 3 Dell XPS 15 9510 Hinges Replacement: шаг 11, изображение 2 из 3 Dell XPS 15 9510 Hinges Replacement: шаг 11, изображение 3 из 3
    • Pull out the hinges using a pair of needle nose pliers.

Заключение

To reassemble your device, follow these instructions in reverse order.

Haley H.

Участник с: 09/23/24

85 Репутация

1 руководство автора

Команду

University of North Texas, Team 3-5, Coppersmith Fall 2024 Участник University of North Texas, Team 3-5, Coppersmith Fall 2024

UNT-COPPERSMITH-F24S3G5

4 членов

Автор 5 руководств

0Комментарии к руководству

Добавить комментарий

Статистика просмотров:

За последние 24 час(ов): 1

За последние 7 дней: 11

За последние 30 дней: 39

За всё время: 79