Введение
Replacing the circuit board can also be used as a way to fix broken ports.
Выберете то, что вам нужно
-
-
With a J00 Philips head screwdriver, unscrew the two 4mm black screws located at the bottom of the device.
-
-
-
Using a plastic opening tool, begin softly prying open device by first inserting it in between the front and back panels.
-
Continue prying the edges while moving around the device's perimeter until the back can be easily removed.
-
-
-
-
Using a plastic opening tool, gently pry up the three Zero Insertion Force Connectors (ZIF)
-
-
-
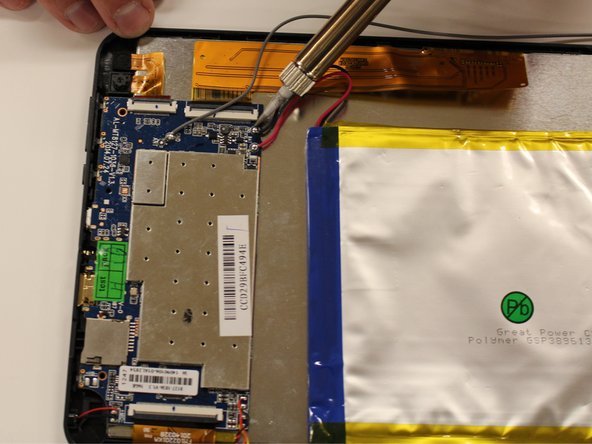
Using a Soldering station, desolder all 9 wires connected to the motherboard.
-
Start with the red and black positive and negative wires connected to the battery (2 wires).
-
Then move to the yellow and red twisted wires and black and red twisted wires connected to the speakers (4 wires).
-
Now desolder the single grey wire connected to the antenna (1 wire).
-
Lastly remove the black and red wires connected to the microphone (2 wires).
-
-
-
Using a J00 Philips screwdriver, unscrew the three black 4mm screws from the motherboard.
-


To reassemble your device, follow these instructions in reverse order.
To reassemble your device, follow these instructions in reverse order.
Отменить: Я не выполнил это руководство.
2 участников успешно повторили данное руководство.
Команда

Eastern Washington University, Team 1-5, Matresse Fall 2015 Участник Eastern Washington University, Team 1-5, Matresse Fall 2015
EWU-MATRESSE-F15S1G5
4 членов
Автор 10 руководств
2 Комментариев
How can I remove the CMOS battery?
I NEED dl1010q MOTHER BOARD