Введение
The following guide will show you how to replace the charging port for the Digitac Jazz Ultratab C725.
Выберете то, что вам нужно
-
-
Locate the four 3.5 mm Phillips head screws holding the silver back plate and the screen together. There are 2 screws on the top and another 2 screws on the bottom.
-
Remove all four screws with the Phillips #00 screwdriver.
-
-
-
Flip your device so that the long side without the buttons is facing you.
-
Insert the plastic opening tool between the silver back plate and the screen. From the corner of the device on either side, pry the seam of the device about 1 inch.
-
With the plastic opening tool, pry the screen apart from the back plate.
-
Keep prying the screen apart from the back plate until they are separated.
-
With the plastic opening tool, if necessary, pry apart the remaining seams of the device.
-
-
-
-
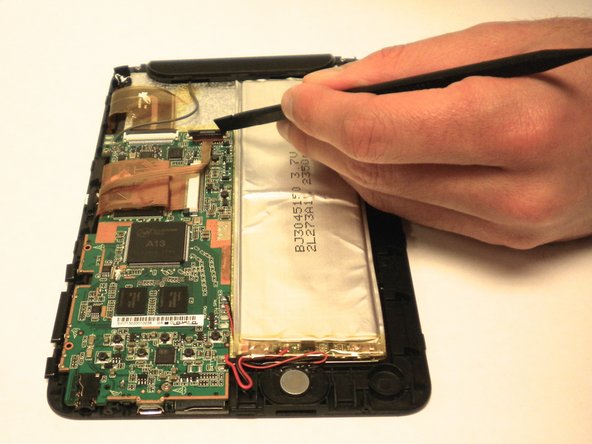
Locate the 3 black clips on the motherboard that hold the data cables./
-
Using the Spudger, pry the black clips up to a 90 degree angle./
-
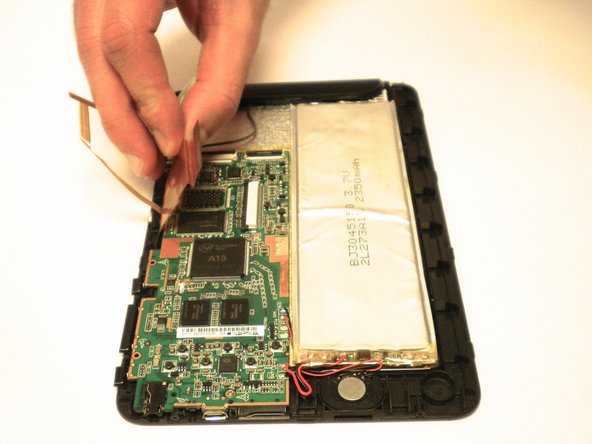
Pull the data cables out once the clips are up to a 90 degree angle.
-
Repeat this for all 3 clips.
-
-
-
Locate the two 4.0 mm Phillips head screws that are holding the motherboard in place.
-
Use the Phillips #00 screwdriver to remove both of the screws.
-
-
-
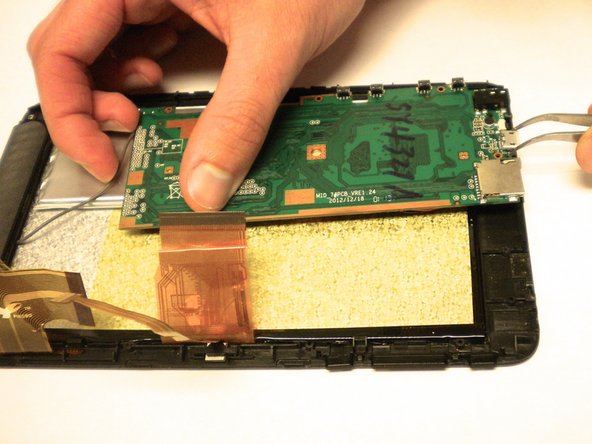
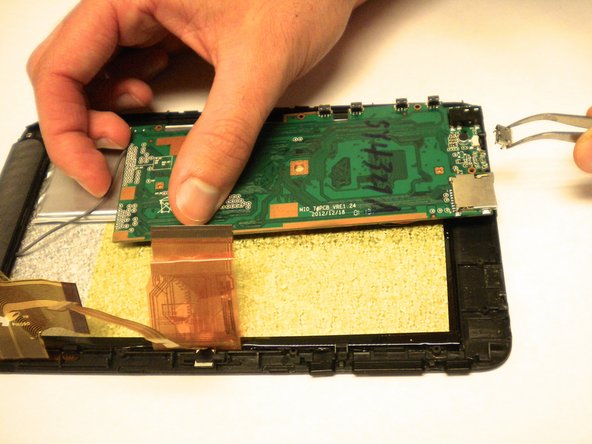
The motherboard should now be loose.
-
To gain access to the charging port, flip the motherboard over.
-
Use the tweezers to pull the charging port off of the motherboard.
-


To reassemble your device, follow these instructions in reverse order.
To reassemble your device, follow these instructions in reverse order.
Отменить: Я не выполнил это руководство.
Еще один человек закончил это руководство.
Команда

USF Tampa, Team 11-6, Blackwell Winter 2015 Участник USF Tampa, Team 11-6, Blackwell Winter 2015
USFT-BLACKWELL-W15S11G6
2 членов
Автор 5 руководств