Эта версия возможно содержит некорректные исправления. Переключить на последнюю проверенную версию.
Выберете то, что вам нужно
Видео обзор
-
Этот шаг не переведен. Помогите перевести
-
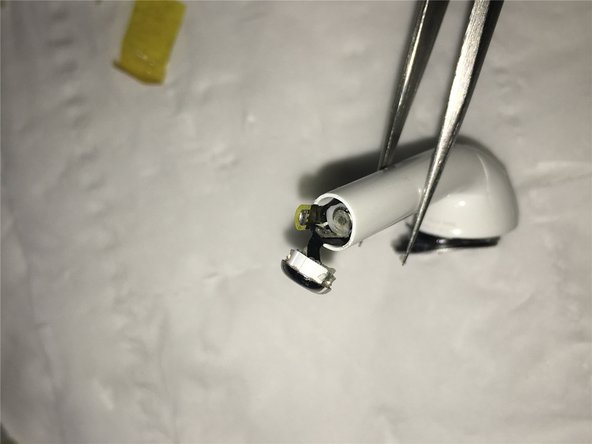
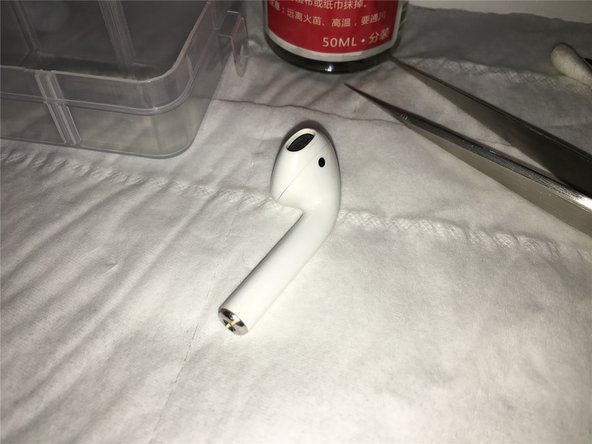
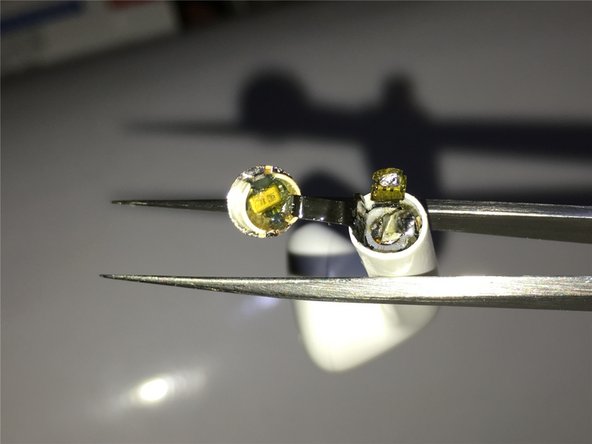
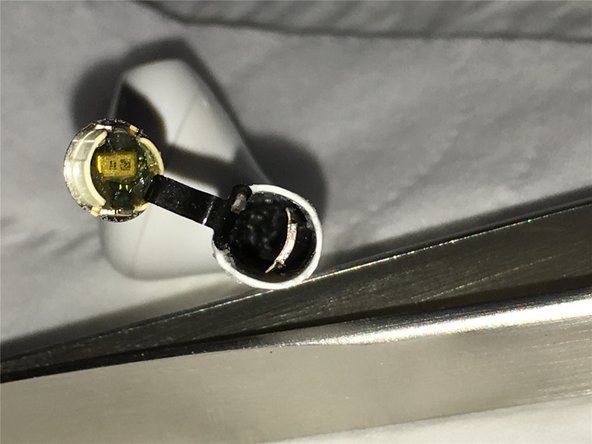
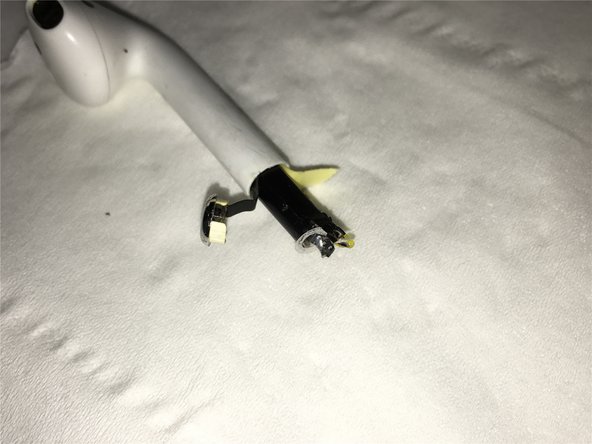
This is the first part of the process of replacing the battery with the damaged airpods, mainly to see the internal structural details close-up, to prepare for the complete disassembly below.
-
-
Этот шаг не переведен. Помогите перевести
-
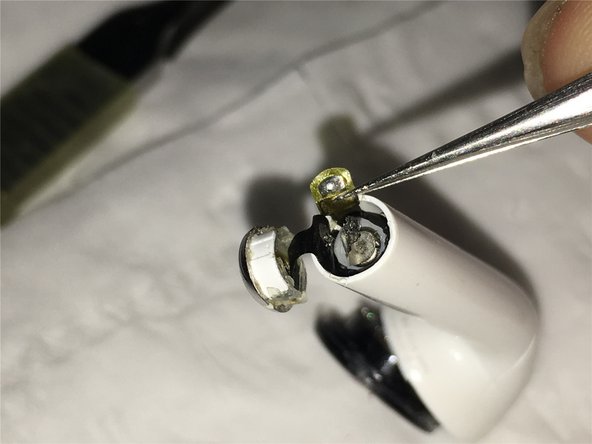
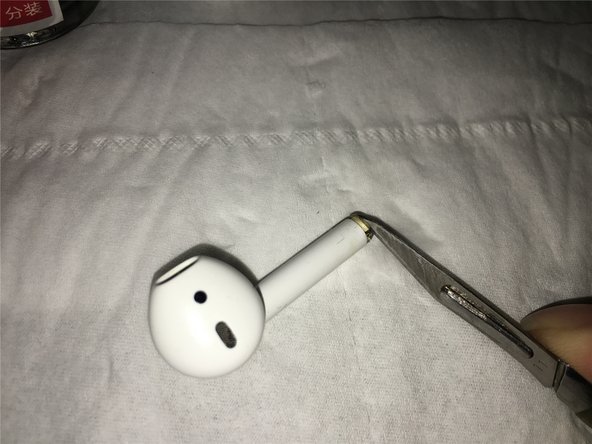
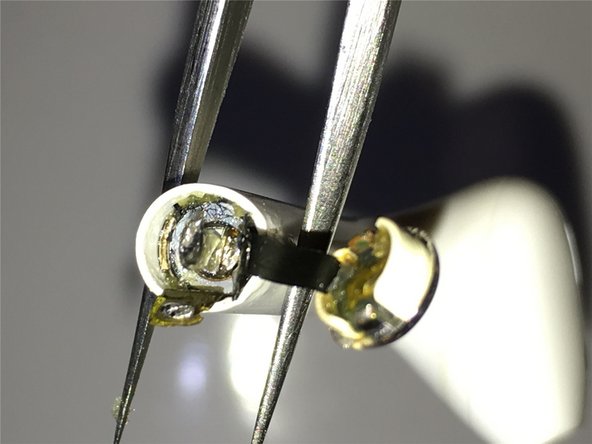
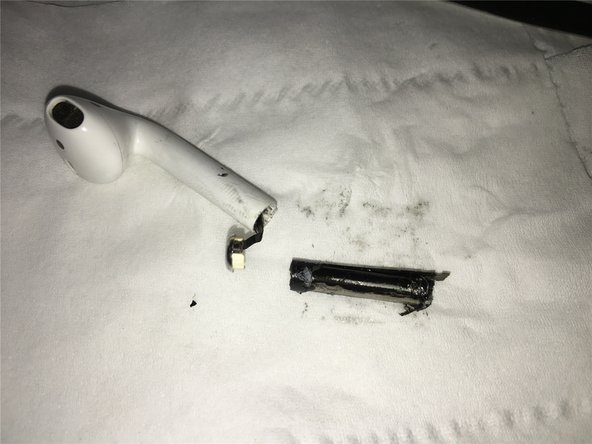
This part is to disassemble the details of the charging contact parts at the bottom of the battery.
-
-
Этот шаг не переведен. Помогите перевести
-
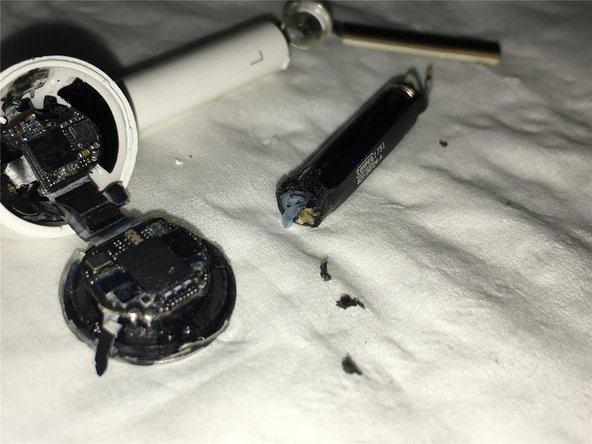
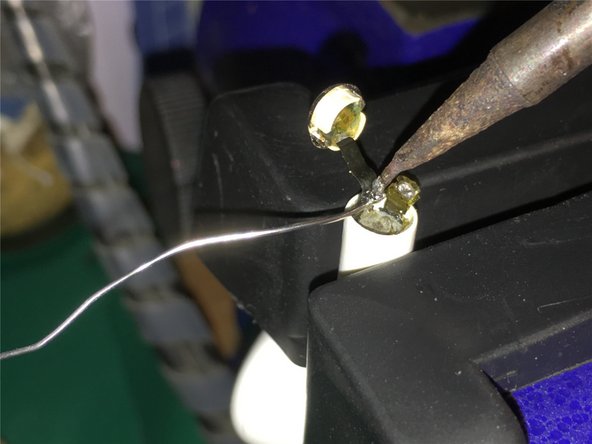
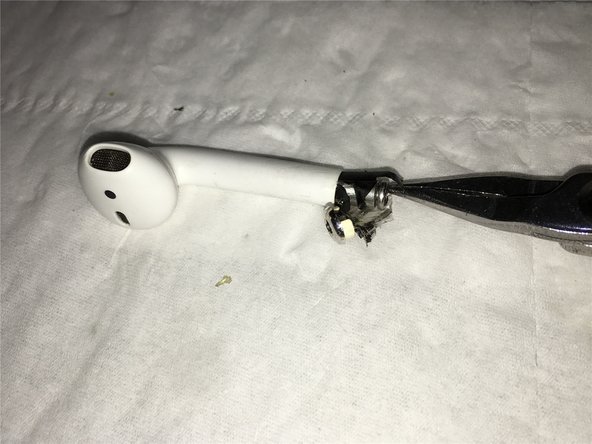
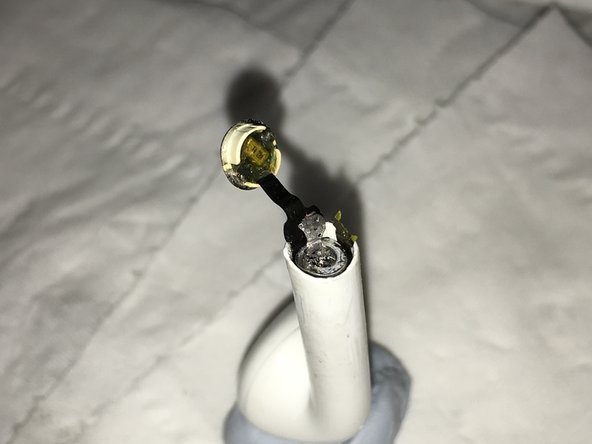
It can be seen that when the first attempt to practice disassembling the battery, the signal antenna components have been pulled out, resulting in damage to the antenna components.
-
-
Этот шаг не переведен. Помогите перевести
-
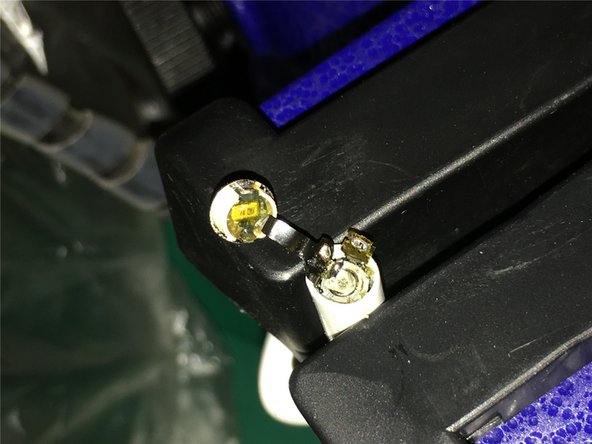
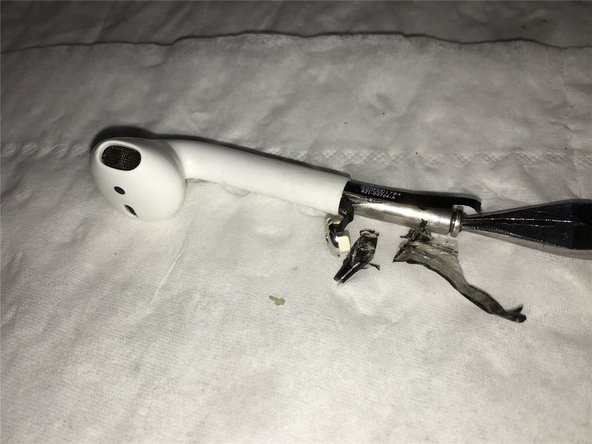
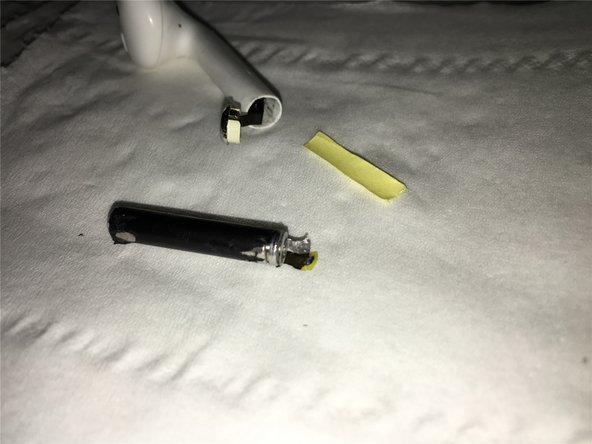
Here you can see that the negative pole of the battery is connected from the top to the bottom of the charge, and the inside of the antenna part is glued to the battery.
-
-
Этот шаг не переведен. Помогите перевести
-
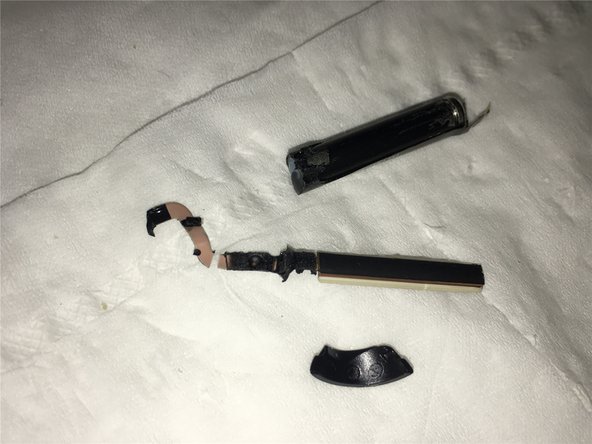
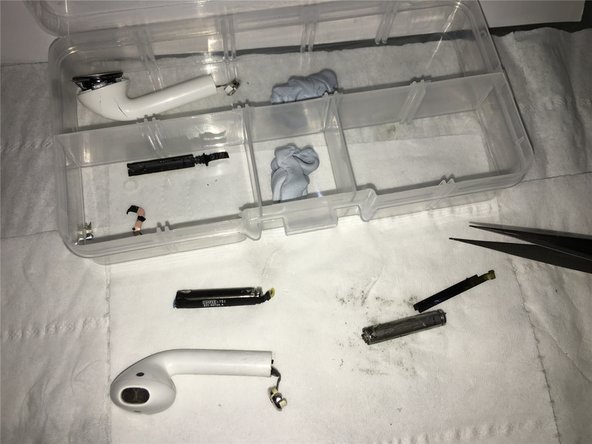
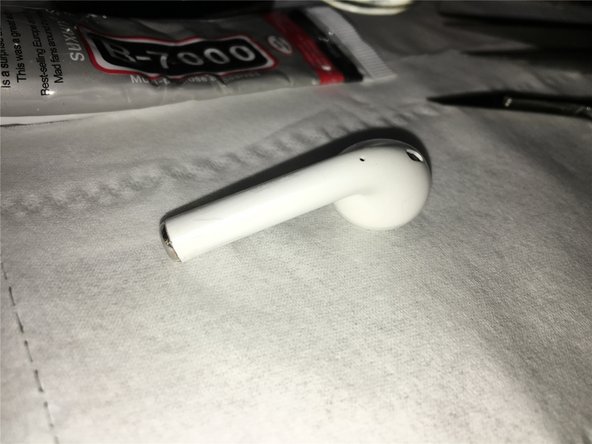
Close-up of the original parts of the airpods after the disassembly of the battery, for the complete disassembly of the bottom to make reference
-
-
Этот шаг не переведен. Помогите перевести
-
Well, start the official airpods battery replacement and disassembly. After heating, use a scalpel to slide open the bottom charging microphone unit.
-
-
-
Этот шаг не переведен. Помогите перевести
-
After taking out, pay attention to the internal measurement microphone cable, don't break it, gently open it and drop it into the debonding agent.
-
-
Этот шаг не переведен. Помогите перевести
-
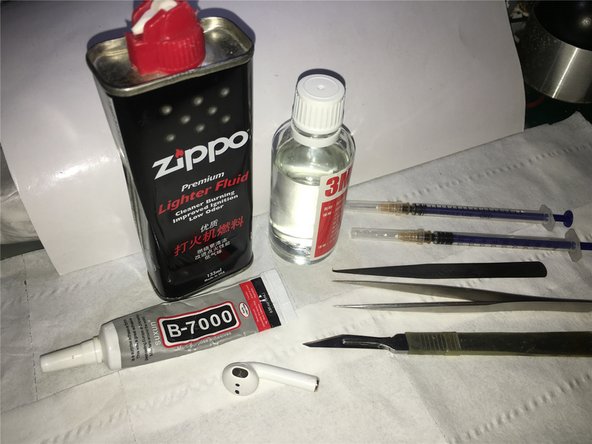
At the same time, the fuel for the Zippo lighter is prepared for the next foaming dissolution, and then the inner glue is cleaned.
-
-
Этот шаг не переведен. Помогите перевести
-
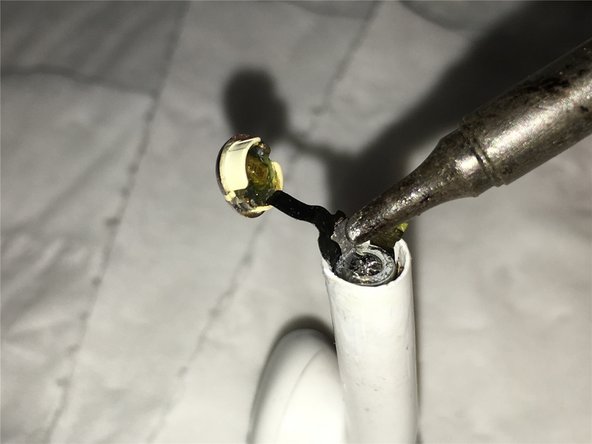
Prepare the required disassembly and soldering tools, fix the airpods, add a small amount of solder for faster heat conduction, and more convenient to remove the bottom battery cable at the bottom.
-
-
Этот шаг не переведен. Помогите перевести
-
The following is a close-up of the part after removing the negative pole of the battery.
-
-
Этот шаг не переведен. Помогите перевести
-
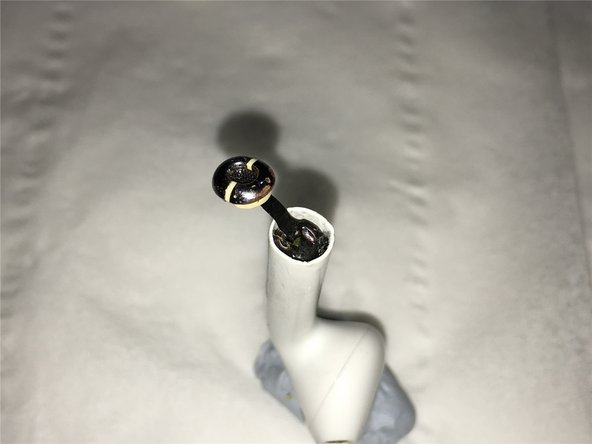
Change direction, continue to tilt the lower cable, and solder the battery positive with a soldering iron.
-
-
Этот шаг не переведен. Помогите перевести
-
Use a syringe to inject the glue around the outside of the battery, waiting for the rubber foam to soften
-
-
Этот шаг не переведен. Помогите перевести
-
Use a pair of tweezers to shake the antenna on the outside of the battery to the left and right, then drop the debonding agent, and finally insert a thin plastic piece into the middle of the battery and the inside of the antenna, up and down, to loosen the battery and the antenna.
-
-
Этот шаг не переведен. Помогите перевести
-
Finally, heat the upper part around the outer casing of the earphone with a heat gun to soften the filling rubber on the inside. After heating, drip the sol and Zippo again. Finally, use the hook and pliers to slowly pull the battery out.
-
-
Этот шаг не переведен. Помогите перевести
-
Finally finally the battery is perfectly removed, you can see the bottom of the charging and microphone parts cable and antenna cable in the airpods
-
-
Этот шаг не переведен. Помогите перевести
-
Be prepared to replace the battery removed from the previously damaged airpods, and prepare the sticker on the back of the adhesive to cut the appropriate size.
-
-
Этот шаг не переведен. Помогите перевести
-
Insert the cut piece of paper into the middle of the battery cable and the antenna cable to facilitate the battery insertion and to reduce friction.
-
-
Этот шаг не переведен. Помогите перевести
-
Then use the damaged battery core that was removed before, press the loaded battery down, and finally solder the positive electrode of the battery. Be careful not to solder for a long time, and solder it quickly, otherwise it will damage the battery.
-
-
Этот шаг не переведен. Помогите перевести
-
Finally, the negative electrode of the battery is welded and stabilized with B-7000 glue, but to be more stable, it is recommended to use ab glue or epoxy glue.
-
-
Этот шаг не переведен. Помогите перевести
-
Fix the glued airpods with the fixing clips, wait for the glue to solidify, or increase the temperature to accelerate the glue fixed line.
-
-
Этот шаг не переведен. Помогите перевести
-
Install and test charging, played some music, checked Bluetooth signal connection is stable, and finally verified that it can be used for at least three hours.
-


Отменить: Я не выполнил это руководство.
17 участников успешно повторили данное руководство.

10 Комментариев
Where I buy the battery for replacement, and how under what name?
I'm using a damaged headset, but the battery is good, and I took it out for repair. If you want a brand new original, it is only available in certain channels in China.
Deng lei -
Where can i buy an airpods battery…???
My location is Bangladesh,Asia.
Can i buy airpods battery in online???
You can try AliExpress:
Hola amigo, excelente el tutorial, sabes donde puedo comprar la batería? he buscado en canales de china pero no encuentro… mil gracias, espero tu respuesta.