Эта версия возможно содержит некорректные исправления. Переключить на последнюю проверенную версию.
Выберете то, что вам нужно
-
Этот шаг не переведен. Помогите перевести
-
Remove one 5mm phillips screw located under the identification sticker. You will need to remove the sticker or make a hole to get to the screw.
-
-
-
Этот шаг не переведен. Помогите перевести
-
Remove the metal case from the top case of the AirPort, there are no screws holding it on.
-
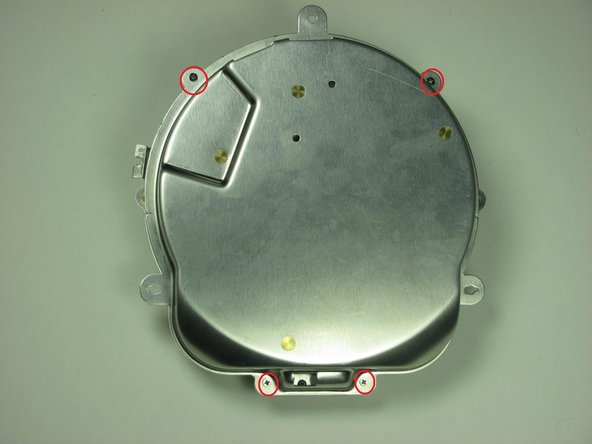
Remove the four screws from the metal casing.
-


Отменить: Я не выполнил это руководство.
3 участников успешно повторили данное руководство.
Команда

Cal Poly, Team 17-15, Regan Fall 2011 Участник Cal Poly, Team 17-15, Regan Fall 2011
CPSU-REGAN-F11S17G15
3 членов
Автор 13 руководств
Один комментарий
Whoa, who’d have thought there was a hidden 5mm phillips under the serial number that does the trick? I’ve had this little beauty hanging around for decades, and my six year old started using it as a flying saucer with his lego creations, and it took me three months of pandemic before I picked up my screwdrivers and tried to take it apart so that he could really use it. For now it’s just empty, and he closes some figures in it with a rubber band and flies it around. Someday I’ll get that dremel i’ve wanted and make him some sort of hatch and latch for it, maybe add some lego baseplate bits to it or something, it can join the rebel alliance for reals.