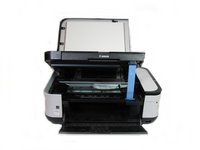
Перейти к основному содержанию

Disassembling Canon Pixma MP480 Rear and Side Panel

Выберете то, что вам нужно

  1. Disassembling Canon Pixma MP480 Rear and Side Panel, Rear and Side Panel: шаг 1, изображение 1 из 2 Disassembling Canon Pixma MP480 Rear and Side Panel, Rear and Side Panel: шаг 1, изображение 2 из 2
    • Remove the two 7.9 mm screws using a Phillips #1 screwdriver.

  2. Disassembling Canon Pixma MP480 Rear and Side Panel: шаг 2, изображение 1 из 1
    • Lift up the back cover to remove it.

    • You may need to lift firmly as it requires quite a bit of force.

  3. Disassembling Canon Pixma MP480 Rear and Side Panel: шаг 3, изображение 1 из 1
    • Open the front tray.

  4. Disassembling Canon Pixma MP480 Rear and Side Panel: шаг 4, изображение 1 из 2 Disassembling Canon Pixma MP480 Rear and Side Panel: шаг 4, изображение 2 из 2
    • Open the scanner compartment.

    • Make sure the blue lever locks into place to keep the compartment open.

  5. Disassembling Canon Pixma MP480 Rear and Side Panel: шаг 5, изображение 1 из 2 Disassembling Canon Pixma MP480 Rear and Side Panel: шаг 5, изображение 2 из 2
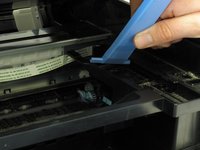
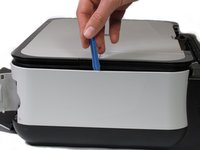
    • Remove the blue lever from its slot by pushing it back and twisting clockwise.

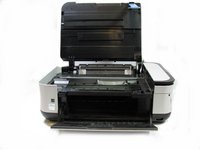
    • Close the scanner compartment and cover.
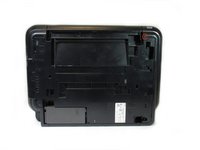
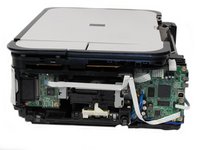
  6. Disassembling Canon Pixma MP480 Rear and Side Panel: шаг 6, изображение 1 из 2 Disassembling Canon Pixma MP480 Rear and Side Panel: шаг 6, изображение 2 из 2
    • Pry open the side cover with the plastic opening tool.

  7. Disassembling Canon Pixma MP480 Rear and Side Panel: шаг 7, изображение 1 из 2 Disassembling Canon Pixma MP480 Rear and Side Panel: шаг 7, изображение 2 из 2
    • Flip the printer over so that you are facing the bottom of the printer.

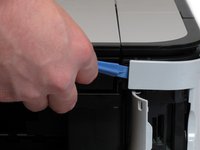
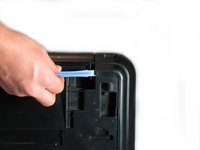
    • Use the plastic opening tool to remove the corner of the side panel from the plastic pin.

  8. Disassembling Canon Pixma MP480 Rear and Side Panel: шаг 8, изображение 1 из 2 Disassembling Canon Pixma MP480 Rear and Side Panel: шаг 8, изображение 2 из 2
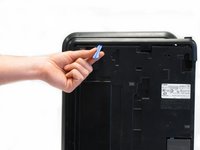
    • Use the plastic opening tool to loosen the side panel from the bottom of the printer.

Заключение

To reassemble your device, follow these instructions in reverse order.

6 участников успешно повторили данное руководство.

Kevin Cole

Участник с: 01/17/13

116 Репутация

1 руководство автора

Команда

Cal Poly, Team 19-41, Regan Winter 2013 Участник Cal Poly, Team 19-41, Regan Winter 2013

CPSU-REGAN-W13S19G41

4 членов

Автор 6 руководств

2 Комментариев

Добавить комментарий

Просмотр статистики:

За последние 24часов: 0

За последние 7 дней: 1

За последние 30 дней: 14

За всё время: 21,120