Эта версия возможно содержит некорректные исправления. Переключить на последнюю проверенную версию.
Выберете то, что вам нужно
-
Этот шаг не переведен. Помогите перевести
-
Rotate the printer 90 degrees counter clockwise so that the side panel next to control panel is facing you.
-
Remove the two T10 12mm Torx screws from the left side panel.
-
-
Этот шаг не переведен. Помогите перевести
-
Firmly pull the the back of the side panel until it separates from the body of the printer.
-
Rotate the side panel upwards while pulling it towards yourself to remove the panel.
-
-
Этот шаг не переведен. Помогите перевести
-
Rotate the printer 90 degrees clockwise.
-
Grasp the paper tray and rotate it down.
-
Insert your fingers into the slot in the printer door and pull to rotate the gate down.
-
-
Этот шаг не переведен. Помогите перевести
-
Rotate the printer 90 degrees clockwise.
-
Remove the two T10 12 mm Torx screws.
-
Grasp both sides of the side panel and pull it forward to remove the panel.
-
-
Этот шаг не переведен. Помогите перевести
-
Rotate the printer 90 degrees counter clockwise.
-
Lift the scanner lid to expose the scanner glass.
-
-
Этот шаг не переведен. Помогите перевести
-
Rotate the printer 90 degrees counter clockwise.
-
Inside the printer is a small white tab. Press it inward with a spudger until a pop is heard.
-
Remove the front panel by grasping its front and pulling away from the printer.
-
-
Этот шаг не переведен. Помогите перевести
-
Rotate the printer 90 degrees clockwise.
-
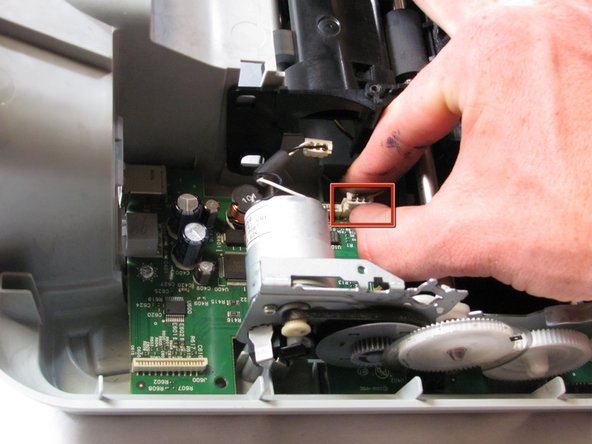
Remove the cable connecting the top panel of the printer to the power button assembly.
-
-
Этот шаг не переведен. Помогите перевести
-
Carefully lift the top panel of the printer away from the printer body.
-
-
Этот шаг не переведен. Помогите перевести
-
Set aside the top panel of the printer.
-
Remove the two T10 12 mm Torx screws from the top front of the printer
-
-
Этот шаг не переведен. Помогите перевести
-
Rotate the Printer 90 degrees counter clockwise.
-
Remove the scanner cable from the main circuit board.
-
-
Этот шаг не переведен. Помогите перевести
-
Rotate the printer 90 degrees clockwise.
-
Using both hands, lift the scanner tray from the body of the printer.
-
-
-
Этот шаг не переведен. Помогите перевести
-
Remove the power button circuit board from the support frame by pinching the left side, and pulling forward and to the left simultaneously.
-
Push up on the tab holding the secondary control circuit board with the spudger and pull it forward to remove it.
-
-
Этот шаг не переведен. Помогите перевести
-
Remove the two T10 12 mm Torx screws.
-
Lift the support frame off of the printer body with both hands.
-
-
Этот шаг не переведен. Помогите перевести
-
Remove the printer door and paper tray by putting them in the closed position and not laying flat then rotating them upwards lift the left side up.
-
-
Этот шаг не переведен. Помогите перевести
-
Remove both of the ink cartridges by grabbing the front of the ink cartridge and pulling down.
-
-
Этот шаг не переведен. Помогите перевести
-
Remove the T10 6 mm Torx screw on the left side of the track assembly.
-
Remove the T10 12 mm Torx screw on the left side of the track assembly.
-
-
Этот шаг не переведен. Помогите перевести
-
Gently push the ink cartridge carriage to the left side of the printer.
-
-
Этот шаг не переведен. Помогите перевести
-
Remove the two T10 12 mm Torx screws.
-
Remove the two T10 6 mm Torx screws.
-
-
Этот шаг не переведен. Помогите перевести
-
Rotate the printer 90 degrees counter clockwise.
-
Remove the cable connecting the ink cartridge carriage to the main circuit board.
-
-
Этот шаг не переведен. Помогите перевести
-
Carefully remove the connector holding the drive motor wires to the main circuit board.
-
-
Этот шаг не переведен. Помогите перевести
-
Slide the ink cartridge carriage all the way to the right side of the printer.
-
Using both hands, carefully lift the ink cartridge track off of the main body of the printer.
-
-
Этот шаг не переведен. Помогите перевести
-
Set aside the ink cartridge carriage.
-
Remove the three T10 12mm Torx screws holding the paper guide to the printer body.
-
Lift the paper guide directly up to remove it and set it aside.
-
-
Этот шаг не переведен. Помогите перевести
-
Remove the five T10 12mm Torx screws from the roller holder.
-
-
Этот шаг не переведен. Помогите перевести
-
Remove the plastic gear cover by pulling it away from the printer body and lifting it up.
-
-
Этот шаг не переведен. Помогите перевести
-
Remove the metal tab by rotating it away from the body of the printer and pulling up.
-
Remove the brush by grasping it firmly by the base and lift straight up.
-
-
Этот шаг не переведен. Помогите перевести
-
Remove the connector holding the feed roller motor to the logic board by pulling it strait up
-
Remove the T10 12mm Torx screw on the roller panel.
-
-
Этот шаг не переведен. Помогите перевести
-
Disconnect the page sensor from the logic board by pulling straight up on the connector.
-
-
Этот шаг не переведен. Помогите перевести
-
Rotate the printer 180 degrees and turn it up on to the front side, so that the back of the printer is facing up and the bottom facing you.
-
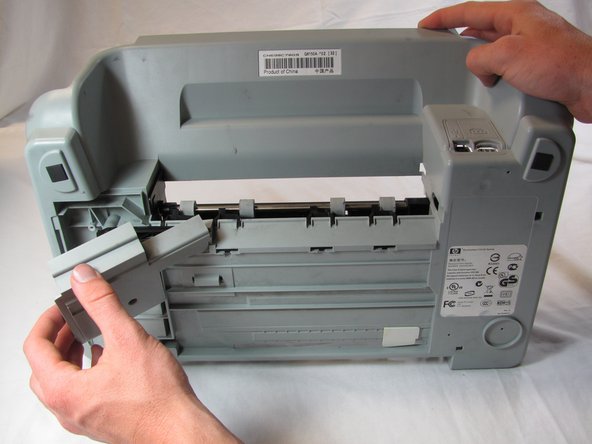
Push in the tab on the left side of the back panel and pull outward to remove the back panel.
-
-
Этот шаг не переведен. Помогите перевести
-
Tilt the printer up until the bottom of the printer can be seen.
-
Remove the T10 12mm Torx screw from the bottom panel.
-
Grasp the top edge of the bottom panel and pull to remove it.
-
-
Этот шаг не переведен. Помогите перевести
-
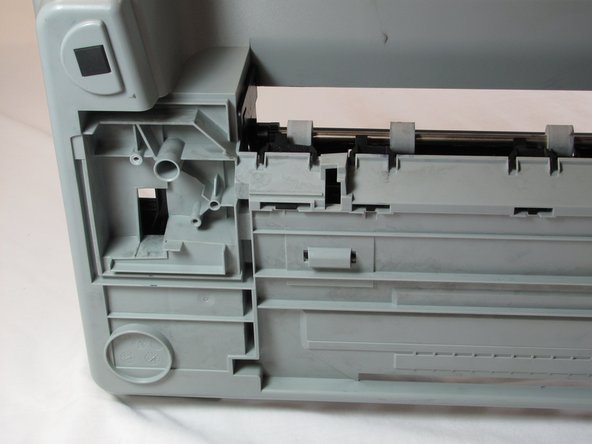
Remove the black plastic cross member from the bottom of the printer.
-
-
Этот шаг не переведен. Помогите перевести
-
Turn the printer back down so that it is sitting on the bottom panel and rotate the printer 180 degrees.
-
-
Этот шаг не переведен. Помогите перевести
-
Remove the printer head cleaner by lifting the front of the printer head cleaner above the track and slide it forward.
-
-
Этот шаг не переведен. Помогите перевести
-
Grasp the left side of the feed roller assembly and pull towards the front of the printer and up to free the metal tab from the slot.
-


Отменить: Я не выполнил это руководство.
20 участников успешно повторили данное руководство.
Команда

Cal Poly, Team 20-30, Maness Fall 2011 Участник Cal Poly, Team 20-30, Maness Fall 2011
CPSU-MANESS-F11S20G30
4 членов
Автор 25 руководств
7 Комментариев
m ayuda este tipo d informacion muchas gracias saludos n-n
The HP Photosmart c4580 has enough in common with this model that this guide enabled me to get into the head cleaner reservoir and remove the years of accumulated ink gumming up the works - thanks!