Введение
I have described how to open and fully disassemble an laptop Toshiba Satellite P885 (more exact, P855-339). The info is for any Toshiba Satellite P855 or P850.
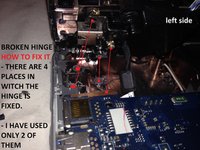
also how to repair the hinge (broken, I have dropped the laptop on the floor).
Выберете то, что вам нужно
-
-
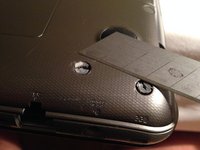
1. remove the plastic/rubber caps
-
2. unscrew the 12 screws.
-
unplug the laptop from power source & remove the batery
-
unscrew the 3 tiny screws behind the battery
-
keep the lid closed till later on
-
-
-
1. WIFI card - Easy to change / replace There are two cables attached to it. Remove them, then unscrew the screw that holds the card in place and lift gently up - DONE.
-
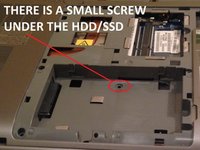
2. HDD / SSD. All you have to do is grab and pull the ribbon (as in photo). There are a few extra steps to change it.
-
-
-
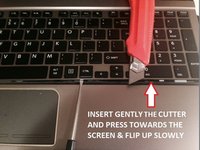
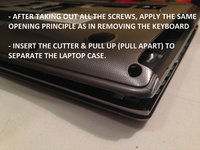
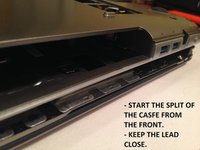
1. Insert gently the cutte (or other sharp tool) and press towards the screen & flip up slowly.
-
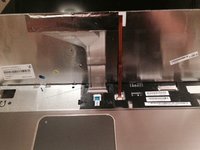
To remove it completely unplug the two connectors.
-
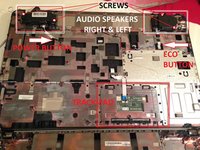
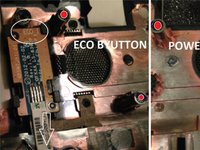
1.ECO Button
-
2. Sound
-
3. Power button
-
4. Mouse pad
-
-
-
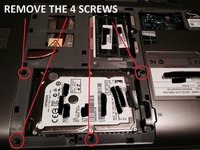
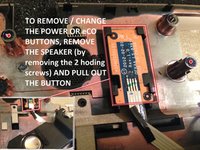
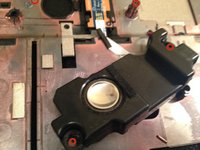
To change / remove the speakers remove the screws.
-
To change / remove the Eco/3D button or power button, yo have to remove first the speakers.
-
-
-
-
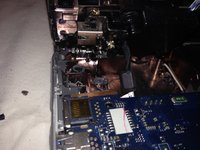
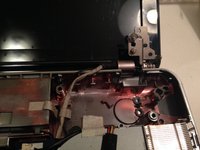
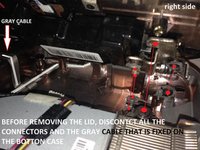
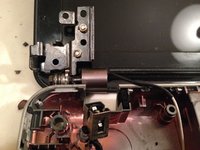
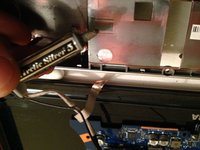
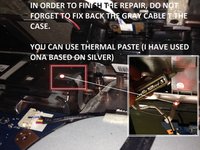
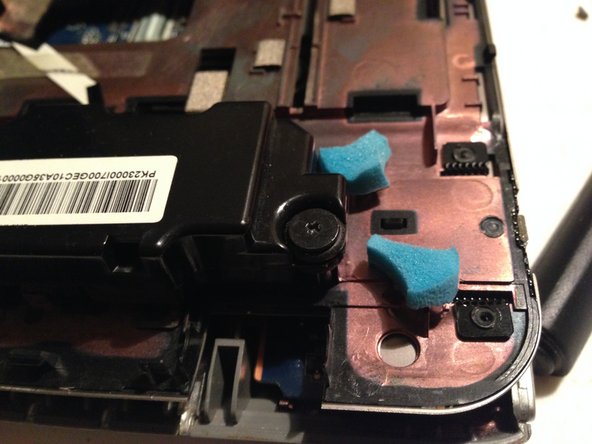
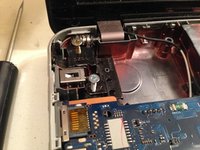
do not forget about the grey cable attached on the bottom side.
-
When reattaching the cable, put some thermal paste on the contact (gray cable)
-
-
-
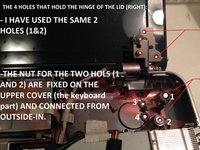
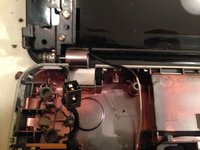
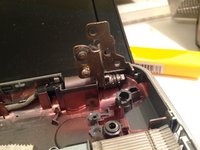
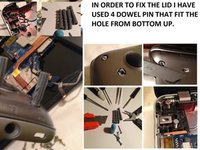
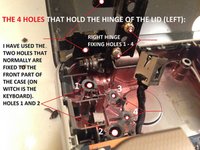
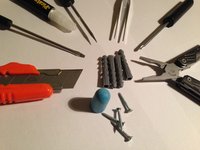
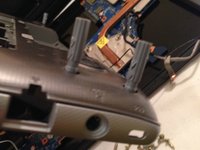
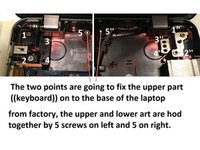
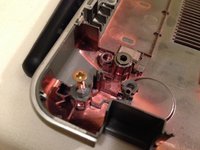
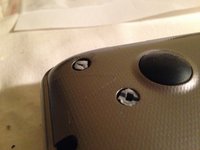
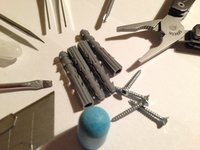
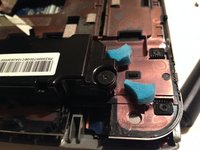
insert the plastic dowel pin from bottom-up and level it inside at the same height with other screw holes
-
-
-
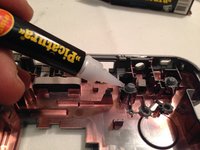
Cut the excess plastic from the dowel pin
-
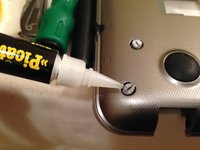
Put some super-glue to fix it in place
-
-
-
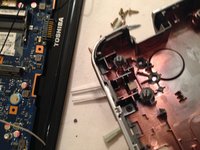
I have glued some foam near the speakers in order to protect the aerea
-
-
-
Glue inside the plastic dowel pin
-
Use thermal paste to fix the gray cable (i have used silver paste)
-


![Disassembling Laptop Toshiba Satellite P855 P850 plus Hinge FIX,, Repairing the broken hinge [detailed photo]: шаг 9, изображение 1 из 3](https://guide-images.cdn.ifixit.com/igi/WZjog2ftITAKEGRY.medium)
![Disassembling Laptop Toshiba Satellite P855 P850 plus Hinge FIX,, Repairing the broken hinge [detailed photo]: шаг 9, изображение 2 из 3](https://guide-images.cdn.ifixit.com/igi/VoWQhpFAlJl31Anl.medium)
![Disassembling Laptop Toshiba Satellite P855 P850 plus Hinge FIX,, Repairing the broken hinge [detailed photo]: шаг 9, изображение 3 из 3](https://guide-images.cdn.ifixit.com/igi/ghUkbhFZN2JLX6St.medium)
![Disassembling Laptop Toshiba Satellite P855 P850 plus Hinge FIX,, Repairing the broken hinge [detailed photo] (2): шаг 10, изображение 1 из 3](https://guide-images.cdn.ifixit.com/igi/iexcOOMyLkIEZH3F.medium)
![Disassembling Laptop Toshiba Satellite P855 P850 plus Hinge FIX,, Repairing the broken hinge [detailed photo] (2): шаг 10, изображение 2 из 3](https://guide-images.cdn.ifixit.com/igi/cx3txpMG13Gl5ClG.medium)
![Disassembling Laptop Toshiba Satellite P855 P850 plus Hinge FIX,, Repairing the broken hinge [detailed photo] (2): шаг 10, изображение 3 из 3](https://guide-images.cdn.ifixit.com/igi/UqZxPJkmOAQtRtsB.medium)


To reassemble your device, follow these instructions in reverse order.
To reassemble your device, follow these instructions in reverse order.
Отменить: Я не выполнил это руководство.
11 человек успешно провели ремонт по этому руководству.
2Комментарии к руководству
I have a slipped HDMI port. At which step would I be able to access that?
My Toshibe C55T-B5349, I want to replace the "lid assembly" which includes the screen and digitizer. Can you give the steps? Thanks