Перейти к основному содержанию
Присоединяйся к сообществу ремонтников - Создай аккаунт

Dopo Double Power 7 Digitizer Replacement

Просмотров: 1 тыс.

Просмотр статистики:

За последние 24 часа:
1
За последние 7 дней:
17
За последние 30 дней:
84
За все время:
1 046
Комментарии: 0

Никто не оставлял комментариев к этой инструкции. Будете ли Вы первым?

Перейти к комментариям инструкции
Завершено: 2

2 пользователей отметили эту инстркукцию как "завершенное". Вы будете следующим?

Избранные: 0

Никто не добавил эту инструкцию в избранное (и не подписался на нее). Будете ли Вы первым?

Необходимое время: 30 минут - 1 час
Сложность: Сложно
Проблема с примечаниями

Примечания в этом руководстве должны быть более качественными. Помогите нам исправить их или написать новые аннотации.

Dopo Double Power 7 Digitizer Replacement

Purchasing a new or used display/digitizer will be necessary if yours is broken.

Выберете то, что Вам нужно

Инструменты

    1. Dopo Double Power 7 Digitizer Replacement, Rear Panel: шаг 1, изображение 1 из 1
      • The rear panel is secured to the front case and can simply be pried apart without damage.

      Спросите у FixBot

      Добавить комментарий

    2. Dopo Double Power 7 Digitizer Replacement: шаг 2, изображение 1 из 1
      • Carefully, wedge the plastic opening tool in-between the seam that separates both halves of the tablet.

      Спросите у FixBot

      Добавить комментарий

    3. Dopo Double Power 7 Digitizer Replacement: шаг 3, изображение 1 из 1
      • Run the plastic opening tool along the seam looking for the clips and lift up on the rear panel.

      Спросите у FixBot

      Добавить комментарий

    4. Dopo Double Power 7 Digitizer Replacement: шаг 4, изображение 1 из 1
      • The rear panel should come completely off.

      Спросите у FixBot

      Добавить комментарий

    1. Dopo Double Power 7 Digitizer Replacement, Camera: шаг 5, изображение 1 из 1
      • Remove any black static tape that may be covering the motherboard.

      Спросите у FixBot

      Добавить комментарий

    2. Dopo Double Power 7 Digitizer Replacement: шаг 6, изображение 1 из 2 Dopo Double Power 7 Digitizer Replacement: шаг 6, изображение 2 из 2
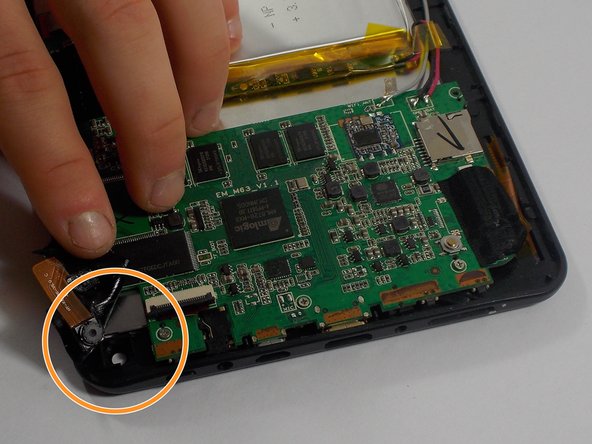
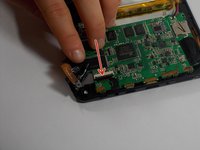
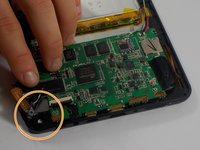
      • The camera is taped in place.

      • Use the flat end of a spudger to disconnect the front-facing camera cable from its socket on the motherboard.

      • Our cable had previously been cut but yours can be disconnected by lifting up on the black section of the socket, as shown by the arrow, and pulling the cable out.

      • Simply, pull back the tape and remove the camera.

      Спросите у FixBot

      Добавить комментарий

    1. Dopo Double Power 7 Digitizer Replacement, Digitizer: шаг 7, изображение 1 из 2 Dopo Double Power 7 Digitizer Replacement, Digitizer: шаг 7, изображение 2 из 2
      Инструмент, используемый на этом этапе:
      Tweezers
      $4.99
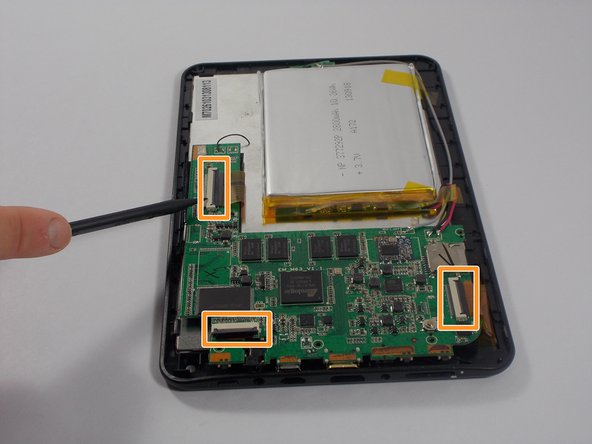
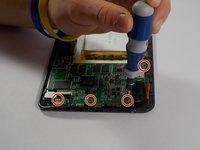
      • Use a Phillips Head Screwdriver size 0.

      • Remove the four screws holding the motherboard inplace.

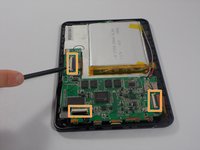
      • Using the flat end of a spudger or tweezers, remove the three cables connected to the motherboard.

      • The cables can be disconnected by lifting up on the black section of the socket.

      • Once the lever is lifted, pull out the cable by gently tugging on it.

      Спросите у FixBot

      Добавить комментарий

    2. Dopo Double Power 7 Digitizer Replacement: шаг 8, изображение 1 из 1
      • Using wire cutters, cut only the gray wire.

      Спросите у FixBot

      Добавить комментарий

    3. Dopo Double Power 7 Digitizer Replacement: шаг 9, изображение 1 из 1
      • Using a metal spudger, carefully pry the battery away from the digitizer.

      • Be careful not to damage the battery.

      • At this point, the battery and the motherboard will still be connected although it is not shown in the image.

      Спросите у FixBot

      Добавить комментарий

    4. Dopo Double Power 7 Digitizer Replacement: шаг 10, изображение 1 из 1
      • The back of the digitizer is attached along the edge by 12 plastic clips.

      Спросите у FixBot

      Добавить комментарий

    5. Dopo Double Power 7 Digitizer Replacement: шаг 11, изображение 1 из 1
      • The best way to remove the digitizer is to use a plastic tool and pull back the clips so that it can lift out.

      • Be gentle and be sure not to break any of the clips.

      Спросите у FixBot

      Добавить комментарий

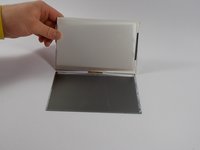
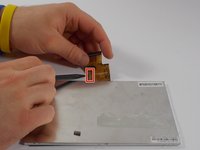
    6. Dopo Double Power 7 Digitizer Replacement: шаг 12, изображение 1 из 2 Dopo Double Power 7 Digitizer Replacement: шаг 12, изображение 2 из 2
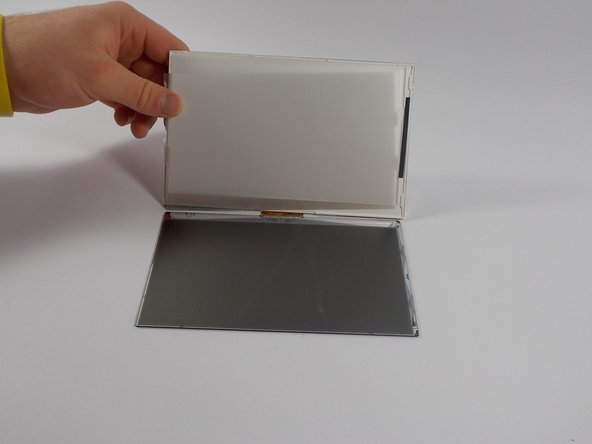
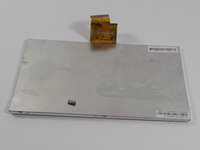
      • The digitizer can now be removed and replaced.

      Спросите у FixBot

      Добавить комментарий

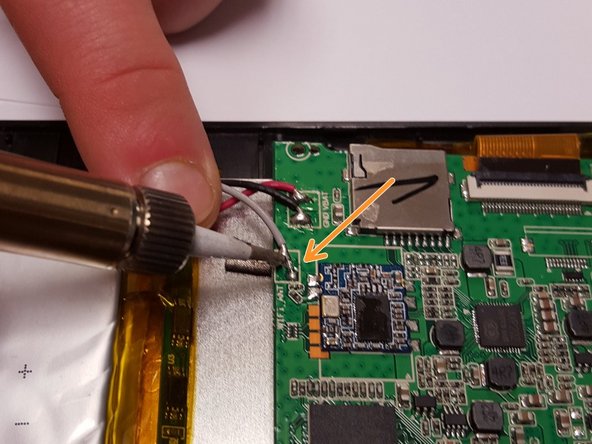
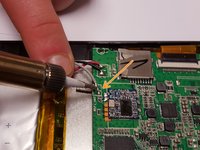
    7. Dopo Double Power 7 Digitizer Replacement: шаг 13, изображение 1 из 2 Dopo Double Power 7 Digitizer Replacement: шаг 13, изображение 2 из 2
      • Soldering will be required to connect the new digitizer.

      • Any remaining wire left from the old digitizer will need to be removed from the motherboard.

      • Take care not to burn yourself or damage the motherboard, wires, or new digitizer while soldering.

      • Solder the new digitizer to the soldering point shown within the image.

      • Using wire strippers, strip the end of the gray wire connected to the new digitizer about a 1/8".

      • Solder the gray wire to the soldering point on the motherboard as shown within the image.

      Спросите у FixBot

      Добавить комментарий

Заключение

To reassemble your device, follow these instructions in reverse order.

Отменить: Я не выполнил это руководство.

2 человек успешно провели ремонт по этому руководству.

mike pelosi

Участник с: 10/30/15

682 Репутация

Автор 6 руководств

Команду

UMass Dartmouth, Team 1-2, Miles Fall 2015 Участник UMass Dartmouth, Team 1-2, Miles Fall 2015

UMASSD-MILES-F15S1G2

4 членов

Автор 72 руководств

0 Комментарии к руководству

Добавить комментарий

Статистика просмотров:

За последние 24 часов: 1

За последние 7 дней: 17

За последние 30 дней: 84

За все время: 1,046