Эта версия возможно содержит некорректные исправления. Переключить на последнюю проверенную версию.
Выберете то, что вам нужно
-
Этот шаг не переведен. Помогите перевести
-
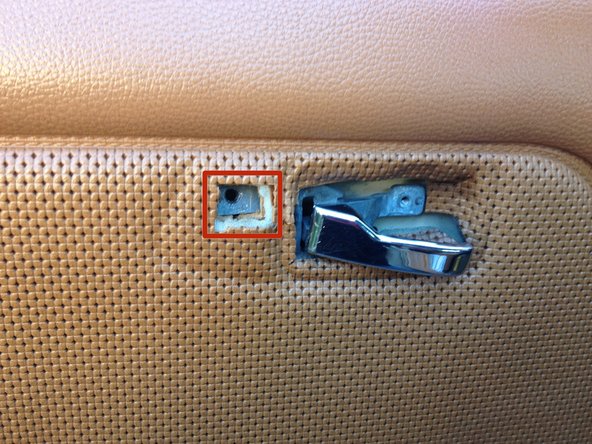
Carefully pry out insert using the small gaps at the front. You can use a small flat screwdriver to do this.
-
Remove the phillips screw and put the trim and insert aside.
-
-
Этот шаг не переведен. Помогите перевести
-
Remove the two screws under the armrest. These are often extremely overtightened and may be hard to remove.
-
-
-
Этот шаг не переведен. Помогите перевести
-
Position new armrest on door, tighten screws if you need too (optional). Where the upper screw portion of the armrest is, trace around it with pencil. Then remove the armrest. Place the new trim in the door and make sure the outline is centered in the opening of the trim.
-
Very carefully cut a small X inside the outline you drew in step 3. If you push in on the area, you should feel it give in a little around the bracket behind the panel. Start in the center and work your way out to make sure you do not cut too far. The panel is just fiberboard and is easy to cut through.
-
The hole should allow the upper bracket of the armrest to go inside the panel and rest against the bracket in the door.
-
Here’s what it looks like behind that panel.
-
-
Этот шаг не переведен. Помогите перевести
-
Insert the trim piece on the armrest and carefully slide out of the way. Attach the armrest using the two lower screws, but do not tighten them fully yet. Picture shows upper screw already attached, please disregard.
-
Attach the upper screw and tighten down. You may need to flex the armrest slightly to align it.
-
Tighten the bottom two screws. Make sure you tighten these down well, without stripping them.
-
-
Этот шаг не переведен. Помогите перевести
-
Attach the trim piece into position (this requires you maneuver the handle through it, take your time, some cars are easier than others).
-
Screw the trim piece down.
-
Snap the insert into place.
-


Отменить: Я не выполнил это руководство.
6 участников успешно повторили данное руководство.

2 Комментариев
I need total restoration of my Marsdeez 123 model 1978 it's cost I like to know