Этот документ имеет более свежие изменения. Перейти к последней непроверенной версии.
Введение
Use this guide to replace or fix any buttons on the Dualshock 4 controller.
Выберете то, что вам нужно
-
-
Using the Phillips #00 Screwdriver, remove the four 6.0 mm screws securing the rear cover to the controller.
-
-
-
Beginning with the left handle:
-
Pinch the left handle of the controller to introduce an opening.
-
Wedge a plastic opening tool into the opening and slide it up towards the joystick.
-
Pull down on tool to pry open the casing.
-
Repeat these steps for the right handle.
-
-
-
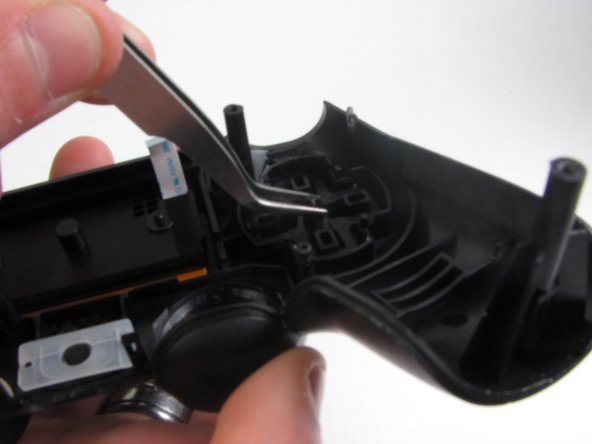
Wedge a plastic opening tool into the case-splittings and pull down to crack open the casing near the following buttons:
-
Share button
-
Options button
-
Split the plastic covers of the controller apart, taking note that they will still be attached by circuit board ribbons.
-
2 Trigger Springs
-
1 Grey Reset Button Extension
-
-
-
Use tweezers or your fingers to grab and disconnect the head of the battery cable from the motherboard.
-
-
-
-
Remove the single 6.0 mm Phillips screw found below the battery retainer with the Phillips #00 Screwdriver.
-
-
-
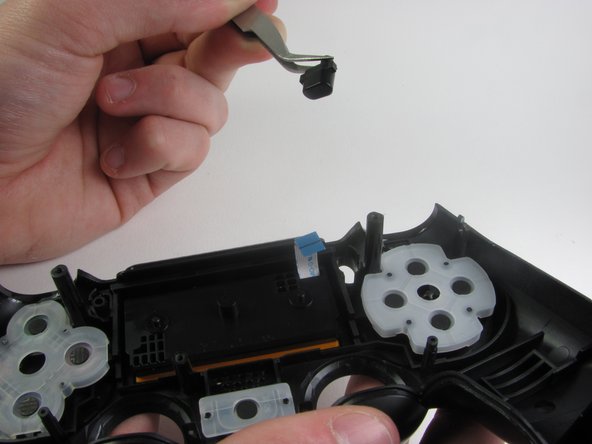
Gently detach the touchpad ribbon connected to the motherboard using the blunt forceps. The touchpad ribbon is connected to the motherboard by a connector that flips to tighten and loosen. During reassembly, to reattach the ribbon, the plastic tray will need to be gently removed from the motherboard and the flip-lock flipped up.
-
-
-
Carefully dislodge the motherboard assembly from the front cover.
-
Vibration motors are loosely attached to the motherboard assembly. Provide support at the two ends to ease the separation.
-
-
-
Successful disassembly of the controller will result in the following three parts, respectively:
-
Motherboard Assembly
-
Front Cover
-
Rear Cover
-
-
-
Remove the rubber covering concealing the buttons with your fingers.
-
Use the metal tweezers to then remove the button from its slot.
-
-
-
To remove the arrow key buttons, use the same process you used for the control buttons by removing the rubber cover and pulling the button out with metal tweezers.
-
-
-
For the share and options buttons, use the metal tweezers to grasp and remove them.
-
-
-
In order to remove the PS button on the controller, you must first remove the rubber cover with your fingers.
-
Then using the metal tweezers, remove the PS button.
-


To reassemble your device, follow these instructions in reverse order.
To reassemble your device, follow these instructions in reverse order.
Отменить: Я не выполнил это руководство.
119 участников успешно повторили данное руководство.

Команда

Cal Poly, Team 6-21, Maness Winter 2014 Участник Cal Poly, Team 6-21, Maness Winter 2014
CPSU-MANESS-W14S6G21
4 членов
Автор 40 руководств
23 Комментариев
I pulled out my touch pad along with the motherboard when it was still attached how can I put this back in
Pull out the ribbon the way the tutorial says and then you can place the touchpad back correctly. It needs to be put in from the inside of the controller, not the outside.
This guide could be enhanced by showing the L1/L2, R1/R2 button cluster in some photos. I needed to replace the silicone grommet underneath the buttons due to Sony's design flaw of having R2/L2 press on the silicone with a blade shaped extension.
What to do If after cleaning some buttons no longer work? I was very careful when disassembling and reassembling the remote.