Перейти к основному содержанию

DualShock 4 CHU-ZCT2U Buttons Replacement

Архивированное руководство
Это руководство сохранено для исторических целей. Используйте его обновлённую версию, чтобы выполнить ремонт.

Выберете то, что вам нужно

  1. DualShock 4 CHU-ZCT2U Buttons Replacement, Outer Shell: шаг 1, изображение 1 из 3 DualShock 4 CHU-ZCT2U Buttons Replacement, Outer Shell: шаг 1, изображение 2 из 3 DualShock 4 CHU-ZCT2U Buttons Replacement, Outer Shell: шаг 1, изображение 3 из 3
    • Unscrew the four 6.5mm screws, using a Phillips-Head screwdriver.

    • Pry the two halves of the shell apart using a plastic opening tool.

    • Be careful, as there will be a ribbon connecting the inner workings of the controller. It will not separate into two parts just by pulling apart the shell.

  2. DualShock 4 CHU-ZCT2U Buttons Replacement: шаг 2, изображение 1 из 3 DualShock 4 CHU-ZCT2U Buttons Replacement: шаг 2, изображение 2 из 3 DualShock 4 CHU-ZCT2U Buttons Replacement: шаг 2, изображение 3 из 3
    • Pull the ribbon cable out of the motherboard port to fully separate the two halves, using a pair of tweezers.

  3. DualShock 4 CHU-ZCT2U Buttons Replacement, Battery: шаг 3, изображение 1 из 3 DualShock 4 CHU-ZCT2U Buttons Replacement, Battery: шаг 3, изображение 2 из 3 DualShock 4 CHU-ZCT2U Buttons Replacement, Battery: шаг 3, изображение 3 из 3
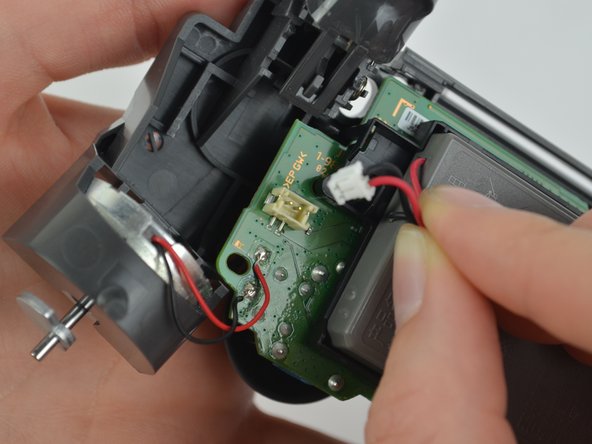
    • Unplug the black and red wires from the power port located on the motherboard.

    • Remove the old battery from the controller.

  4. DualShock 4 CHU-ZCT2U Buttons Replacement: шаг 4, изображение 1 из 2 DualShock 4 CHU-ZCT2U Buttons Replacement: шаг 4, изображение 2 из 2
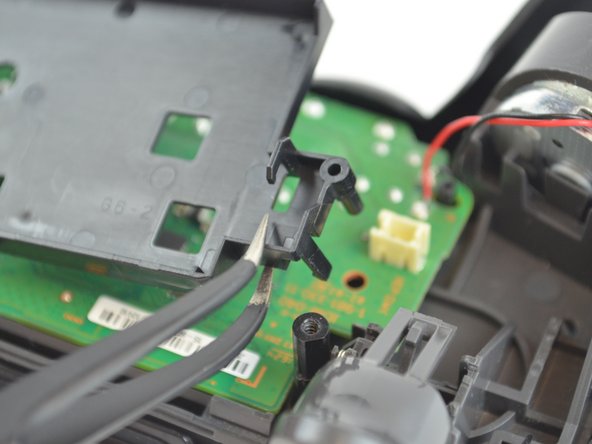
    • Remove the 6.43mm screw connecting the motherboard to the inner workings of the controller, using a Phillips-Head screwdriver.

  5. DualShock 4 CHU-ZCT2U Buttons Replacement: шаг 5, изображение 1 из 3 DualShock 4 CHU-ZCT2U Buttons Replacement: шаг 5, изображение 2 из 3 DualShock 4 CHU-ZCT2U Buttons Replacement: шаг 5, изображение 3 из 3
    • Unhook the battery case from the motherboard, and pull it off.

  6. DualShock 4 CHU-ZCT2U Buttons Replacement, Buttons: шаг 6, изображение 1 из 3 DualShock 4 CHU-ZCT2U Buttons Replacement, Buttons: шаг 6, изображение 2 из 3 DualShock 4 CHU-ZCT2U Buttons Replacement, Buttons: шаг 6, изображение 3 из 3
    • Pull out the second ribbon cable to separate the inner workings from the top of the outer shell.

  7. DualShock 4 CHU-ZCT2U Buttons Replacement: шаг 7, изображение 1 из 3 DualShock 4 CHU-ZCT2U Buttons Replacement: шаг 7, изображение 2 из 3 DualShock 4 CHU-ZCT2U Buttons Replacement: шаг 7, изображение 3 из 3
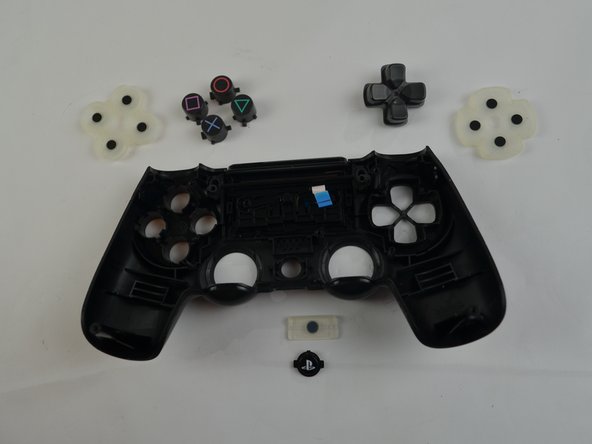
    • Remove the rubber pads that secure the buttons in place for the arrow buttons, shape buttons, and Playstation Home button.

    • Do not turn the front shell cover upside down after completing this step, because some of the buttons may fall out.

  8. DualShock 4 CHU-ZCT2U Buttons Replacement: шаг 8, изображение 1 из 2 DualShock 4 CHU-ZCT2U Buttons Replacement: шаг 8, изображение 2 из 2
    • Remove the old buttons, and replace them with new ones using a pair of tweezers.

Заключение

To reassemble your device, follow these instructions in reverse order.

41 участников успешно повторили данное руководство.

Michelle Joseph

Участник с: 10/09/17

1 762 Репутация

Автор 3 руководств

Команда

USF Tampa, Team S1-G5, Leahy Fall 2017 Участник USF Tampa, Team S1-G5, Leahy Fall 2017

USFT-LEAHY-F17S1G5

3 членов

Автор 22 руководств

2 Комментариев

Where can I buy cuh zct2e spares from please

Paramdeep Dhaliwal - Ответить

Can’t see an updated guide, and this one worked perfectly fine. Used to replace the buttons on a knock-off DualShock 4 from AliExpress. Construction was largely the same, only devoid of a screw anchoring the battery cradle. Would argue this was an extremely easy repair!

Casey - Ответить

Добавить комментарий

Просмотр статистики:

За последние 24часов: 15

За последние 7 дней: 54

За последние 30 дней: 340

За всё время: 28,059