Введение
This guide is to replace all the fuel lines, grommet, fuel filter, ventilator, purge bulb and gas cap vent gasket. All of these parts come in a Echo Fuel Line Repower Kit. This repair is necessary when there is cracking in the purge valve, the fuel tank grommet is leaking, or the purge bulb is pulling excess air or no fuel when depressed. The ethanol that exists in fuel will eventually cause this repair to be necessary at least once during the lifetime of the trimmer. The ethanol will crack the fuel lines and purge bulb, as well as causing the fuel tank grommet to expand and become improperly sealed. No special skills are required for this repair and should be very straightforward. This repair is also applicable to many models of Echo trimmers and leaf blowers.
NOTE: ethanol-free fuel is available at most hardware stores in pre-mixed cans and will prolong the life of the fuel system components
Выберете то, что вам нужно
-
-
Disconnect fuel lines from carburetor by pulling firmly. Lines may be gently pried off of carburetor if stuck.
-
After lines are disconnected, pry grommet from the gas tank. This can be done with a flat head screwdriver as shown or a pair of pliers.
-
-
-
-
It is going to be a tight fight so be sure to oil or grease the perimeter of the grommet to ease installation
-
Insert the fuel filter through small hole in the gas tank.
-
Use fingers to reset grommet into the fuel tank. It can be tough but it will squeeze in with enough effort.
-
-
-
Attach the black line firmly to the hose attachment towards the inside.
-
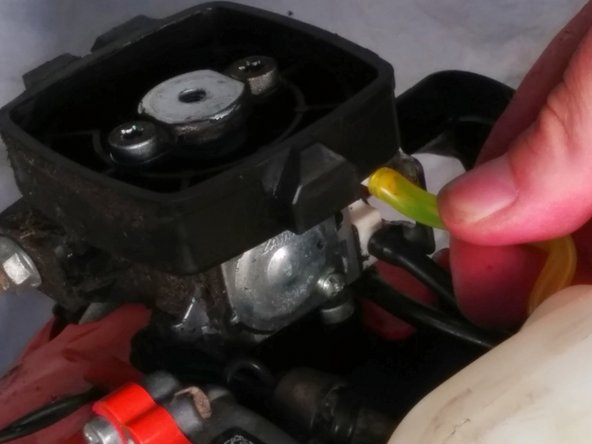
Attach the yellow line firmly to the outer hose attachment.
-
The black hose with the white attachment slides right into the area circled in the picture. As this is just a vent cap, it is not imperative that it be placed in this spot if you are not able to. Just be sure that the vent hose is not kinked.
-
-
-
Loosen the two screws holding on the carburetor with a T27 Torx bit turning it counter clockwise.
-
Remove the four screws holding on the old purge bulb by turning counter clockwise.
-
Remove plate holding on purge bulb.
-
The old purge bulb should come right out and replace it with the new. Be sure the rim of the new purge valve is properly seated when reinstalling
-
Reinstall the purge bulb plate and securely tighten the four screws. Be sure not to overtighten these screws as they can easily strip
-
Now reinstall the air filter housing, carburetor, and gasket in the same manner they were removed. Finally, reinstall the air filter and air housing cover.
-
-
-
Unscrew and remove gas cap. The plastic piece bends that keeps it attached and will pull out of tank.
-
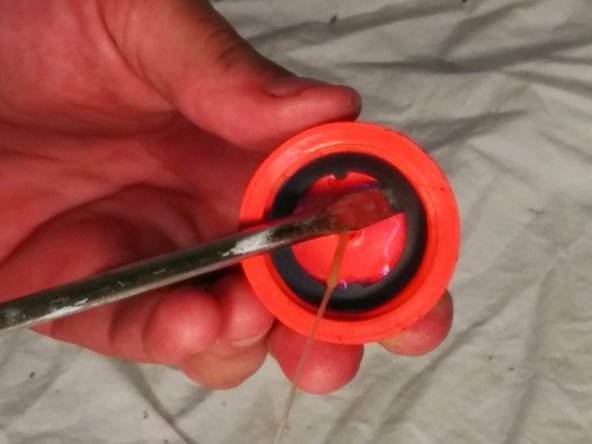
Pry old gasket out with screw driver or needle nose pliers.
-
Replace with new gasket using fingers to position it.
-


To reassemble your device, follow these instructions in reverse order. Be sure all re-used gaskets are in good shape and reinstalled in the same manner as they were removed.
To reassemble your device, follow these instructions in reverse order. Be sure all re-used gaskets are in good shape and reinstalled in the same manner as they were removed.
Отменить: Я не выполнил это руководство.
7 участников успешно повторили данное руководство.
Команда

USF Tampa, Team 1-20, Donnelly Fall 2014 Участник USF Tampa, Team 1-20, Donnelly Fall 2014
USFT-DONNELLY-F14S1G20
1 член
Автор 1 руководств
3 Комментариев
Really good information thanks.
all but,.... how long are the fuel lines need to be? Because they can't all be the same length