Перейти к основному содержанию

Eco X Gear Cone Replacement

Выберете то, что вам нужно

  1. Eco X Gear Cone Replacement, Frame: шаг 1, изображение 1 из 1
    • Disconnect any power source and/or turn off device.

  2. Eco X Gear Cone Replacement: шаг 2, изображение 1 из 1
    • Remove the 15 rubber plugs from the cavities using needle nose pliers.

  3. Eco X Gear Cone Replacement: шаг 3, изображение 1 из 1
    • Use a phillips head screwdriver to remove the fifteen 6.4mm screws.

  4. Eco X Gear Cone Replacement: шаг 4, изображение 1 из 1
    • Carefully separate the two sections of the frame.

    • Wires still connect the two sections. Be cautious to avoid damaging the wires, terminals, and electronics.

  5. Eco X Gear Cone Replacement, Cone: шаг 5, изображение 1 из 1
    • Disconnect the wiring to improve accessibility to the cones.

  6. Eco X Gear Cone Replacement: шаг 6, изображение 1 из 2 Eco X Gear Cone Replacement: шаг 6, изображение 2 из 2
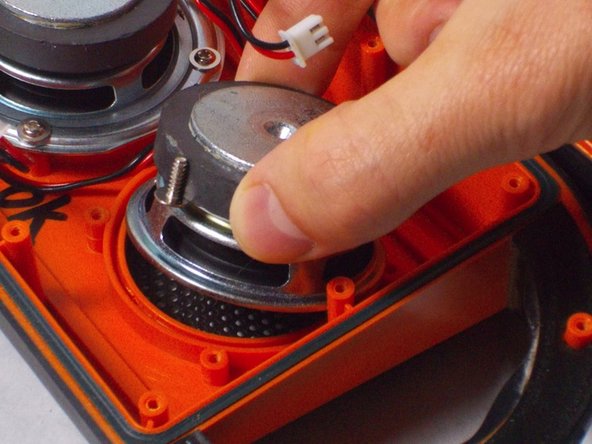
    • Remove the four screws which hold down the speaker. Then, pry up the speaker from the frame.

  7. Eco X Gear Cone Replacement: шаг 7, изображение 1 из 1
    • To replace the cone, remove the existing one by peeling it off of the speaker with needle nose pliers.

Заключение

To reassemble your device, follow these instructions in reverse order.

James Lipsett

Участник с: 03/20/17

625 Репутация

Автор 6 руководств

Команда

UMass Dartmouth, Team S9-G3, Martin Spring 2017 Участник UMass Dartmouth, Team S9-G3, Martin Spring 2017

UMASSD-MARTIN-S17S9G3

2 членов

Автор 6 руководств

0 Комментариев

Добавить комментарий

Просмотр статистики:

За последние 24часов: 0

За последние 7 дней: 1

За последние 30 дней: 1

За всё время: 136