Перейти к основному содержанию

Ematic Genesis Speaker Replacement

Выберете то, что вам нужно

  1. Ematic Genesis Speaker Replacement, Ematic Genesis Casing: шаг 1, изображение 1 из 3 Ematic Genesis Speaker Replacement, Ematic Genesis Casing: шаг 1, изображение 2 из 3 Ematic Genesis Speaker Replacement, Ematic Genesis Casing: шаг 1, изображение 3 из 3
    • Unscrew the two (2) 1.3mm Phillips #00 screws found on the bottom edge of the tablet, where the power and volume buttons are located.

  2. Ematic Genesis Speaker Replacement: шаг 2, изображение 1 из 3 Ematic Genesis Speaker Replacement: шаг 2, изображение 2 из 3 Ematic Genesis Speaker Replacement: шаг 2, изображение 3 из 3
    • Insert plastic opening tool into the edge between the screen plate and the back plate to create a separation between the casings.

    • Insert the flat end of the spudger next to the plastic opening tool and carefully pry the edges apart. Continue this all around the edges until the casings separate.

    • There may be cracking sounds when prying them apart. If carefully done, this is only the locks coming apart and is not harmful.

    • Be careful when separating the two plates as they are connected by the speaker wires and could be disconnected during this process.

  3. Ematic Genesis Speaker Replacement: шаг 3, изображение 1 из 1
    • Remove back plate from screen plate and lay both down flat next to each other.

    • Be careful when separating the two plates as they are connected by the speaker wires and could be disconnected during this process.

  4. Ematic Genesis Speaker Replacement, Speaker: шаг 4, изображение 1 из 1
    • Once panels are separated, disconnect speaker wires from motherboard.

    • Make sure device is completely turned off before doing this to avoid a potential electric shock.

  5. Ematic Genesis Speaker Replacement: шаг 5, изображение 1 из 2 Ematic Genesis Speaker Replacement: шаг 5, изображение 2 из 2
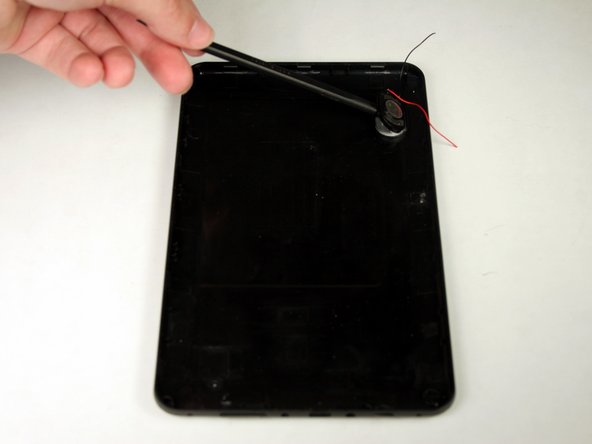
    • Insert the flat end of the spudger between the casing and the speaker. Push inwards to pry the speaker from the casing.

Заключение

To reassemble your device, follow these instructions in reverse order.

Justin Rohrman

Участник с: 03/23/15

745 Репутация

Автор 6 руководств

Команда

Baylor, Team 4-3, Williams Spring 2015 Участник Baylor, Team 4-3, Williams Spring 2015

BU-WILLIAMS-S15S4G3

3 членов

Автор 12 руководств

Один комментарий

This help us alot, thanks for posting troubleshooting

wikirichard - Ответить

Добавить комментарий

Просмотр статистики:

За последние 24часов: 1

За последние 7 дней: 4

За последние 30 дней: 9

За всё время: 200