Перейти к основному содержанию

Envizen V100M Battery Replacement

Выберете то, что вам нужно

  1. Envizen V100M Battery Replacement, Back Cover: шаг 1, изображение 1 из 2 Envizen V100M Battery Replacement, Back Cover: шаг 1, изображение 2 из 2
    • Remove the two screws on the side of the tablet that hold the back cover in place using the ifixit PH00 screwdriver.

    • The two screws for the back cover are: 1.5mm diameter x 3.5mm long

  2. Envizen V100M Battery Replacement: шаг 2, изображение 1 из 3 Envizen V100M Battery Replacement: шаг 2, изображение 2 из 3 Envizen V100M Battery Replacement: шаг 2, изображение 3 из 3
    • Pry along the edge of the device to separate the back cover from the device.

    • The speakers are attached to the back cover and motherboard assembly so remove carefully.

  3. Envizen V100M Battery Replacement, Battery: шаг 3, изображение 1 из 3 Envizen V100M Battery Replacement, Battery: шаг 3, изображение 2 из 3 Envizen V100M Battery Replacement, Battery: шаг 3, изображение 3 из 3
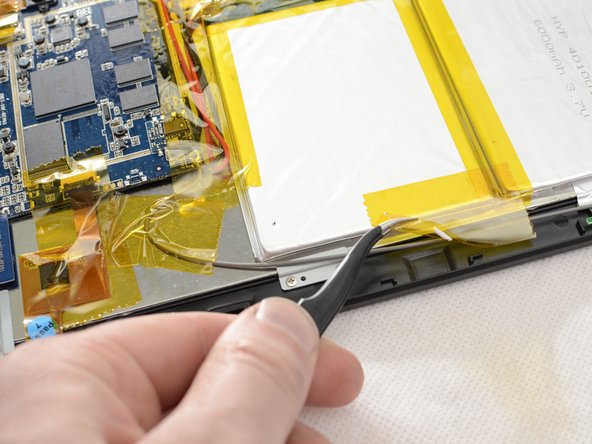
    • Remove the non-conductive tape located on the battery and motherboard assembly.

  4. Envizen V100M Battery Replacement: шаг 4, изображение 1 из 3 Envizen V100M Battery Replacement: шаг 4, изображение 2 из 3 Envizen V100M Battery Replacement: шаг 4, изображение 3 из 3
    • Slide the ifixit spudger under the battery, and work down the side of the battery, releasing it from the adhesive holding it down.

    • Remove battery from the Envizen V100M.

  5. Envizen V100M Battery Replacement: шаг 5, изображение 1 из 1
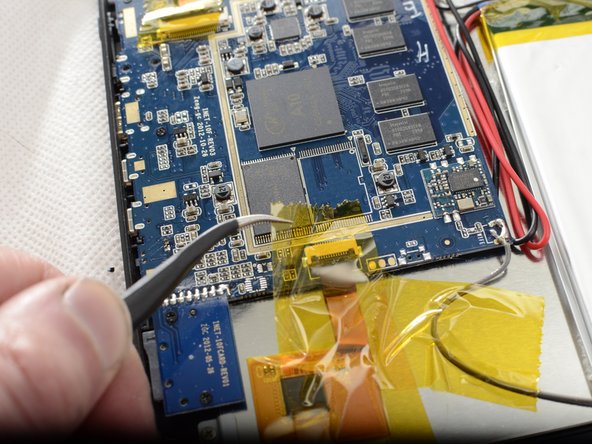
    • Remove the solder from the red and black wires from the battery attached to the motherboard. Here is a guide on how to solder.

    • Remove the red and black wire from the motherboard using tweezers. If tweezers are unable to remove the wires, heat can be used to loosen the solder allowing for the wires to be removed.

  6. Envizen V100M Battery Replacement: шаг 6, изображение 1 из 1
    • Remove the black and white wires from the motherboard. These wires power the LCD screen. Remove the black and white wires by first trying tweezers and if difficult use heat to loosen the solder allowing for the removal of the wires.

    • Note during final installation remember to match the location of the black and white wires to the picture

Заключение

To reassemble your device, follow these instructions in reverse order.

Еще один человек закончил это руководство.

nbach

Участник с: 03/23/15

663 Репутация

Автор 6 руководств

Команда

UMass Dartmouth, Team 3-2, Duarte Spring 2015 Участник UMass Dartmouth, Team 3-2, Duarte Spring 2015

UMASSD-DUARTE-S15S3G2

4 членов

Автор 12 руководств

0 Комментариев

Добавить комментарий

Просмотр статистики:

За последние 24часов: 0

За последние 7 дней: 0

За последние 30 дней: 0

За всё время: 1,593