Введение
This guide will instruct you on how to remove the speaker from the projector. The speaker on the Epson VS250 allows the projector to display sound. There are many troubleshooting solutions to fix the sound without having to physically replace the speaker. The speaker should only be removed as a last resort to fix any sound issues. First ensure that the projector’s volume settings are turned on before concluding that the speaker must be replaced. Also check the audio cable connections between the projector and video source before moving on to replacing the speaker.
Выберете то, что вам нужно
-
-
Place the projector on a flat surface.
-
Orient the projector so that the the word "Epson" is facing you.
-
Using the Phillips #1 screwdriver, to loosen the screw on the top right corner of the projector. The screw only needs to be loosened.
-
-
-
Using a Phillips #1 screwdriver, remove the three 6 mm screws that hold the side portion of the projector in place.
-
Use the same Phillips #1 screwdriver to remove the single 10 mm screw that is holding the side cover of the projector in place.
-
-
-
Use a Phillips #1 screwdriver to remove the two 10 mm screws that are holding the side cover of the projector in place.
-
-
-
-
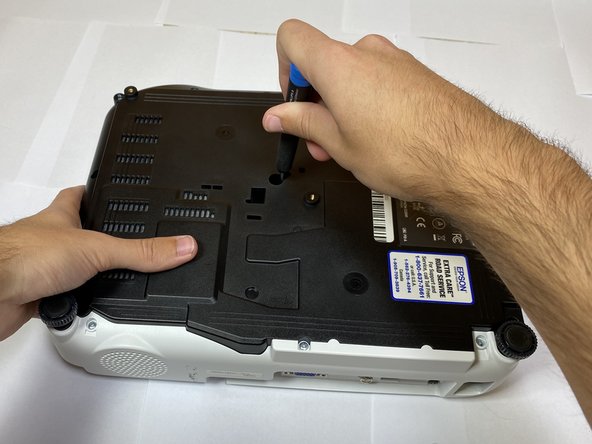
Flip the projector so that it lays upside down.
-
Using a Phillips #1 screwdriver, remove the eight 10 mm screws that secure the side portion of the projector.
-
-
-
Slowly lift up the top shell up and out of the device.
-
Disconnect the ribbon cable from the motherboard and remove the shell from the device.
-
-
-
Use a Phillips #1 screwdriver to remove the two 10 mm screws holding the speaker in place.
-
-
-
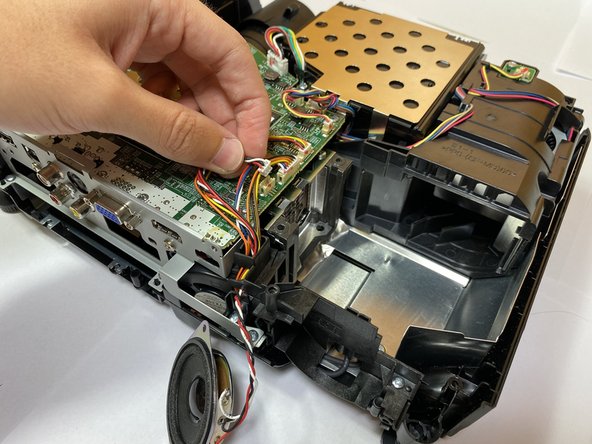
Pinch and unplug the speaker cable from the motherboard.
-
Remove the speaker from the device.
-


To reassemble your device, follow these instructions in reverse order.
To reassemble your device, follow these instructions in reverse order.

Команда

Clemson, Team 4-2, Hunter Fall 2021 Участник Clemson, Team 4-2, Hunter Fall 2021
CLEM-HUNTER-F21S4G2
5 членов
Автор 5 руководств