Эта версия возможно содержит некорректные исправления. Переключить на последнюю проверенную версию.
Выберете то, что вам нужно
-
Этот шаг не переведен. Помогите перевести
-
With the plastic opening tool, remove labels from the Flip Mino HD. 2 small black screws should appear.
-
With the Phillips Screwdriver 000, unscrew the 2 screws and set aside in a safe place.
-
-
Этот шаг не переведен. Помогите перевести
-
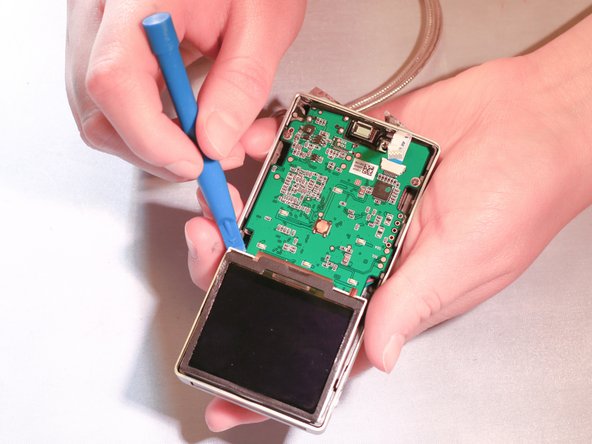
With the plastic opening tool, gently pry the front casing away from the device by carefully running the tool around each edge and lifting.
-
Once case is loose, flip up and over the device. Note that casing is still connected to the device.
-
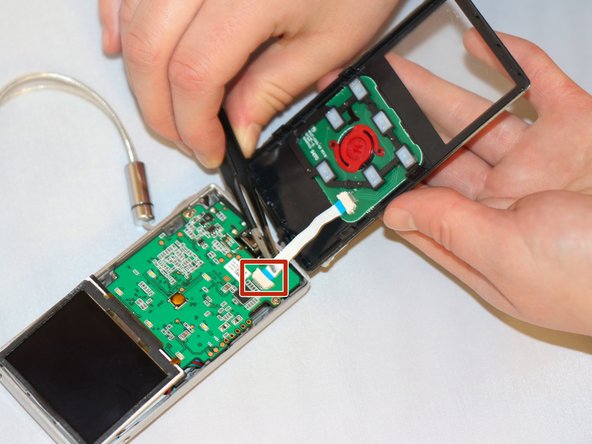
Using tweezers, pull connecting strip to disconnect it from its socket on the logic board.
-
-
-
Этот шаг не переведен. Помогите перевести
-
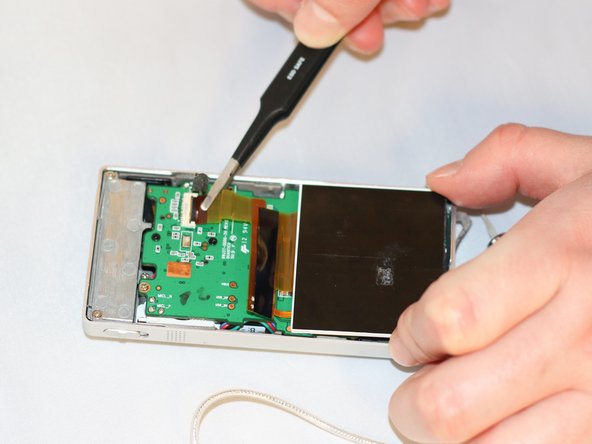
Using tweezers, pull connecting strip away from its socket on the logic board.
-
With the plastic opening tool, take the display screen out of its socket by gently lifting each corner. Flip the screen up towards the logic board that it is still connected to.
-
With the spudger, gently lift the film underneath the display bracket and peel away. Set aside.
-
With the plastic opening tool, gently pry open metal display bracket to remove from logic board.
-
Using fingernail, pry black tape up from zif socket to remove the partially attached display screen.
-
-
Этот шаг не переведен. Помогите перевести
-
Now your display screen is liberated and ready to replace. To install a new one, follow these steps backwards.
-


Отменить: Я не выполнил это руководство.
Еще один человек закончил это руководство.

Команда

Eastern Washington University, Team 2-1, Andersen Winter 2016 Участник Eastern Washington University, Team 2-1, Andersen Winter 2016
EWU-ANDERSEN-W16S2G1
4 членов
Автор 10 руководств