Эта версия возможно содержит некорректные исправления. Переключить на последнюю проверенную версию.
Выберете то, что вам нужно
-
Этот шаг не переведен. Помогите перевести
-
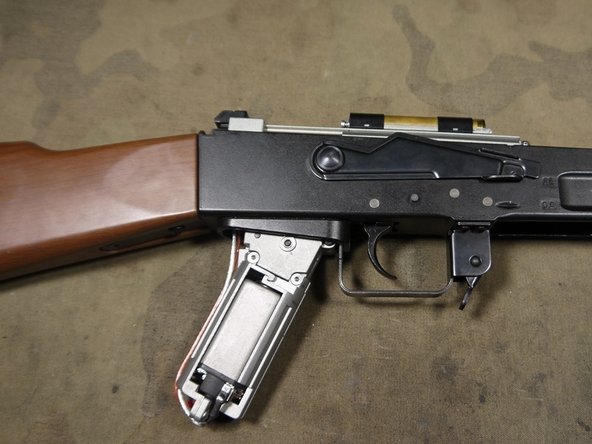
Before disassemble dry fire the AEG twice on semi auto and then remove the battery.
-
First step of disassemble is to remove the dust cover by pressing in the button at back of the gun.
-
Now lift off the dust cover from the back.
-
-
Этот шаг не переведен. Помогите перевести
-
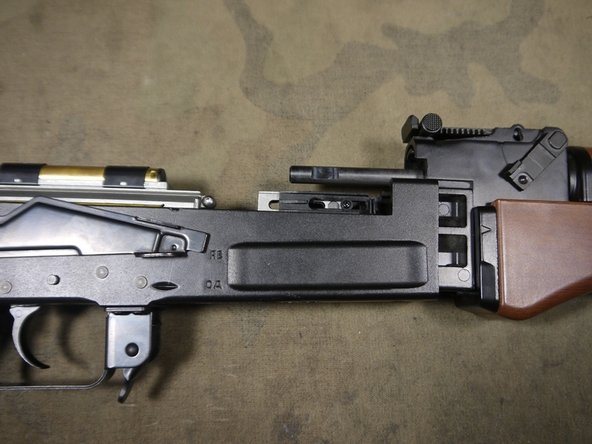
The fallowing step can be don at almost any time.
-
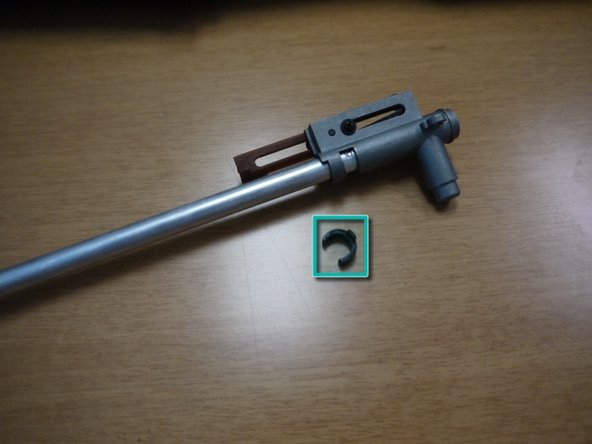
Start removing the bolt by taking of the C-clip shown bellow.
-
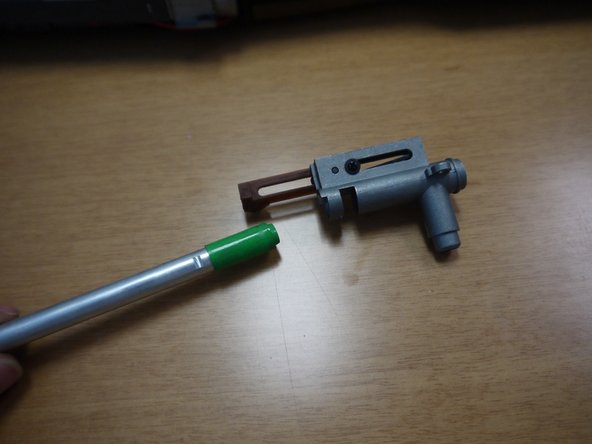
Now remove bolt by slide it back and then off.
-
-
Этот шаг не переведен. Помогите перевести
-
Begin by removing the Philips screw at the very bottom of the grip.
-
Now slide of the pistol grip by pulling it downward once the screw is removed.
-
-
Этот шаг не переведен. Помогите перевести
-
Now remove the four 2mm hex screws found at the bottom of the receiver.
-
Now the front half of the receiver can slide forward and off the other half.
-
-
Этот шаг не переведен. Помогите перевести
-
To remove the hop-up and inner barrel remove the screws shown.
-
With hop-up and inner barrel out you can separate the hop-up from the barrel. First slide the hop-up to it's lowest setting. Now removing the plastic clip piece.
-
Slide off the hop-up to expose a green rubber seal piece called the bucking.
-
-
-
Этот шаг не переведен. Помогите перевести
-
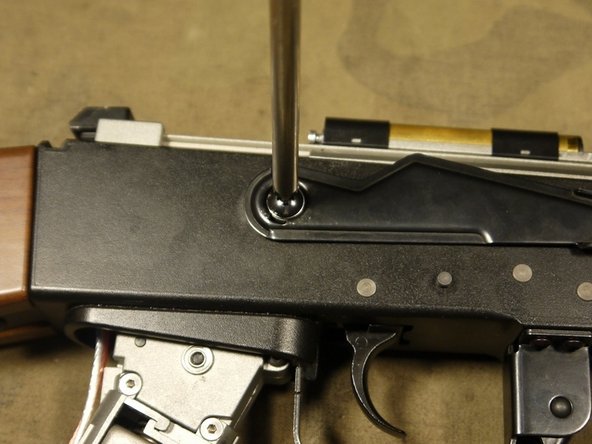
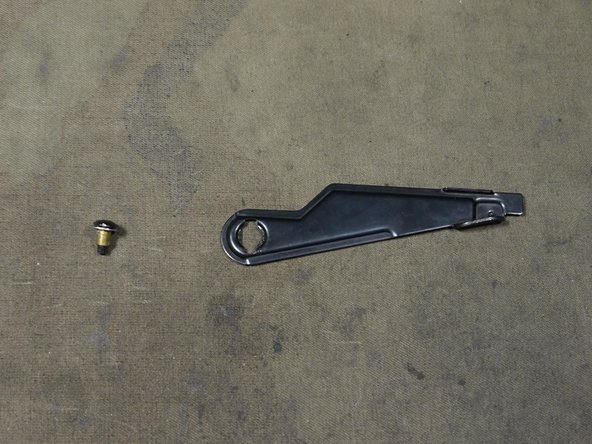
Now use a flat head screw driver to pry off the cap on the selector.
-
Remove the screw that was directly underneath the cap.
-
The selector leaver can now be taken off.
-
-
Этот шаг не переведен. Помогите перевести
-
Underneath the selector is a circular metal piece. This can be removed with pliers and is the last thing hold the gearbox in place. Often times this piece will come off when the leaver is removed which is works as well.
-
-
Этот шаг не переведен. Помогите перевести
-
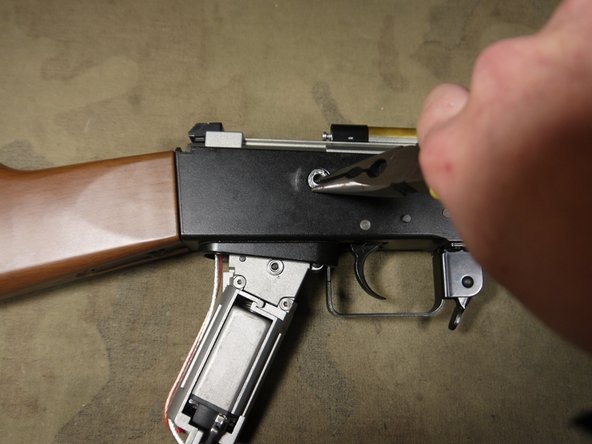
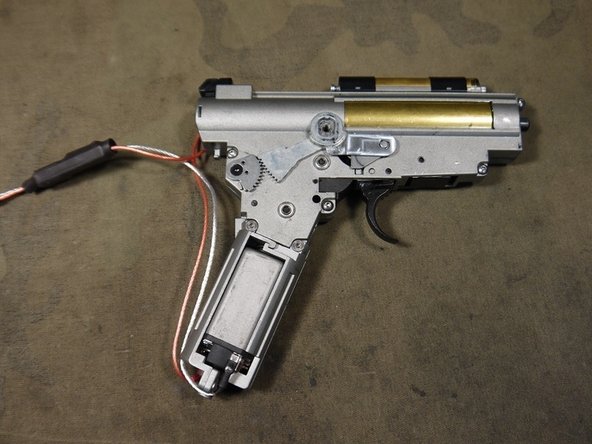
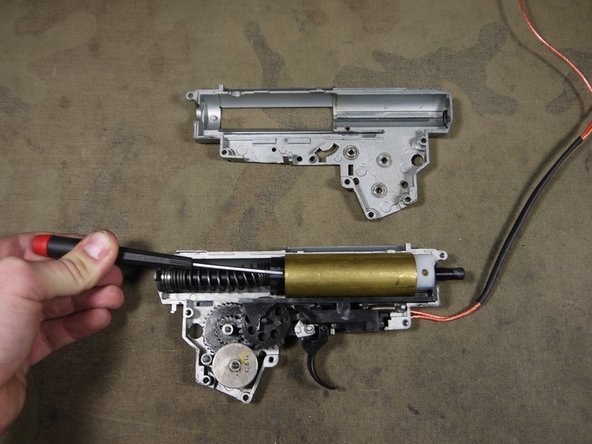
Now wile making sure not let the rear wiring get caught on anything slowly pole the gearbox out of the receiver.
-
The best way to get the gearbox moving is by pushing from the bottom up.
-
-
Этот шаг не переведен. Помогите перевести
-
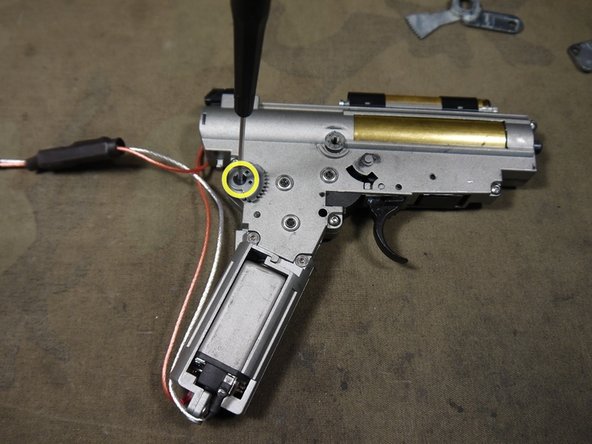
Now remove the selector pieces on the right side of the gearbox.
-
To take off the last piece on the left remove the 2mm hex screw shown.
-
Now flip the gearbox over and remover the piece shown.
-
-
Этот шаг не переведен. Помогите перевести
-
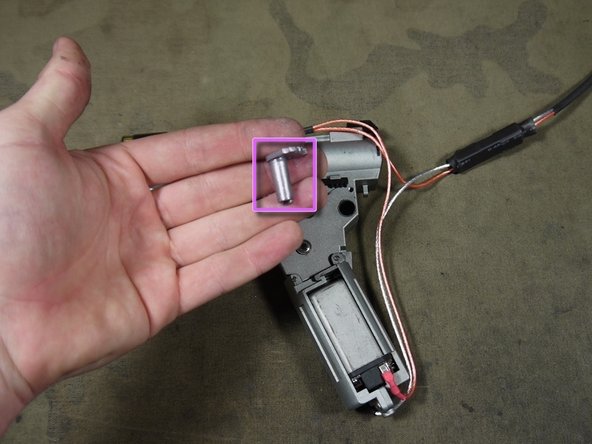
Remove the screws holding the motor cage.
-
Pull off motor connectors on either side of the motor.
-
Now the motor and cage and be put to the side.
-
-
Этот шаг не переведен. Помогите перевести
-
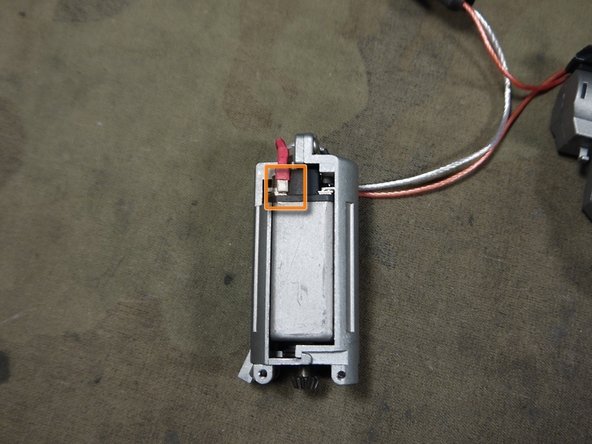
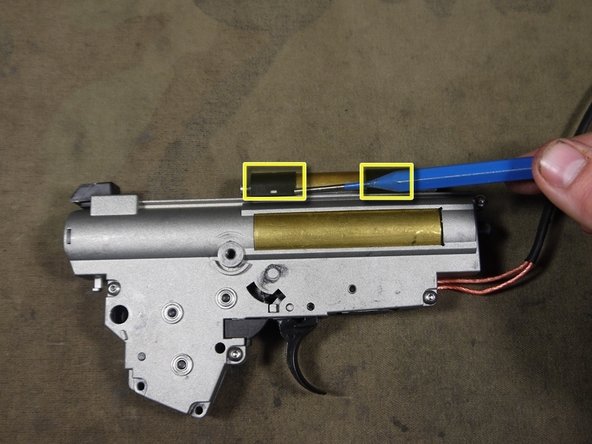
Take pull the wire out of place in the area shown.
-
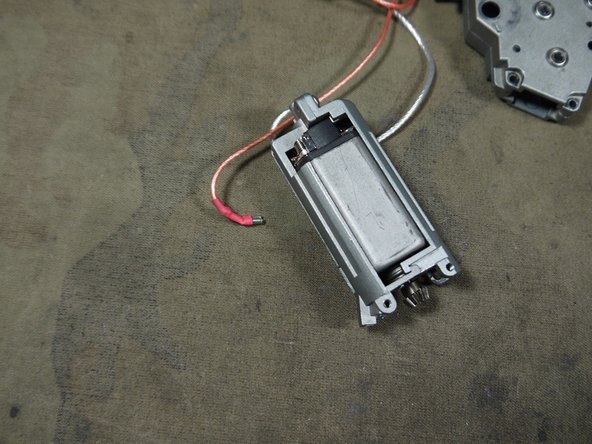
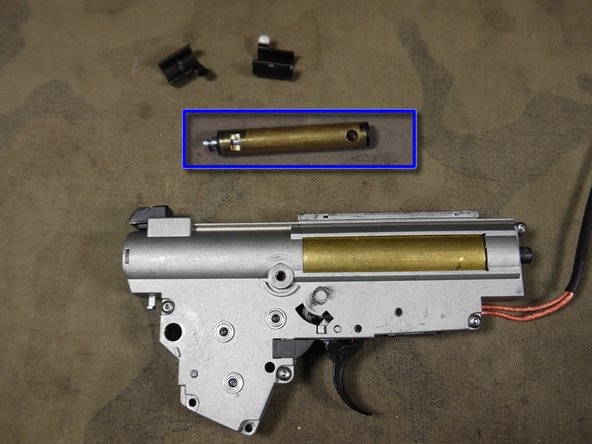
Now use a punch to remove the 2 retainer straps hold the blow-back cylinder in place.
-
Once the straps are removed you can take the blow back cylinder out.
-
-
Этот шаг не переведен. Помогите перевести
-
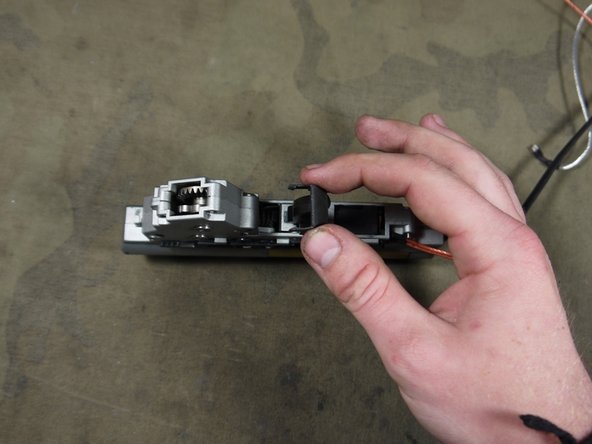
Remove the plastic piece behind the trigger. You should be able to pry it off with your fingernails or in extreme cases a Flathead screw driver.
-
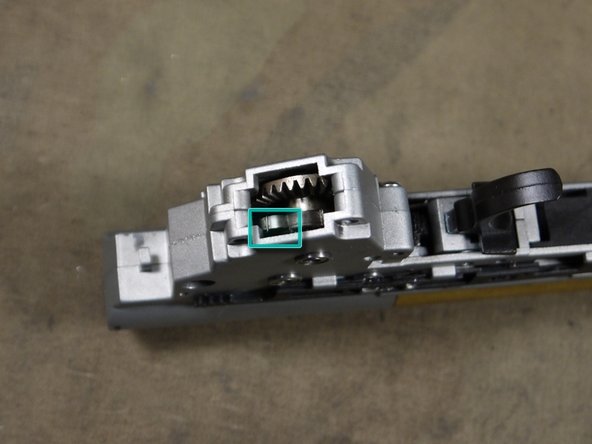
If you did not fire the gun in semi auto before disassemble or the piston didn't reset properly you can use a tool with a hook or needle nose pliers to release the anti-reversal latch shown hear.
-
-
Этот шаг не переведен. Помогите перевести
-
Now remove the screws shown
-
Start cracking open the gearbox starting from the back end. Wile doing so hold down the piston cylinder and spring to prevent part from flying around.
-
Once the top half of the shell is off quickly remove the spring guide and spring so you no longer risk pieces flying out.
-
-
Этот шаг не переведен. Помогите перевести
-
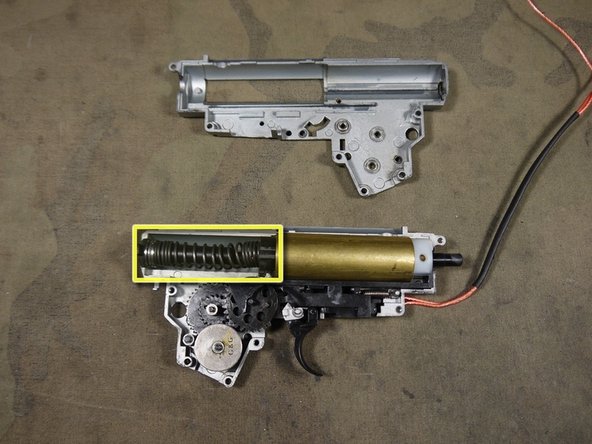
Detach the spring shown from the post of the gearbox shell.
-
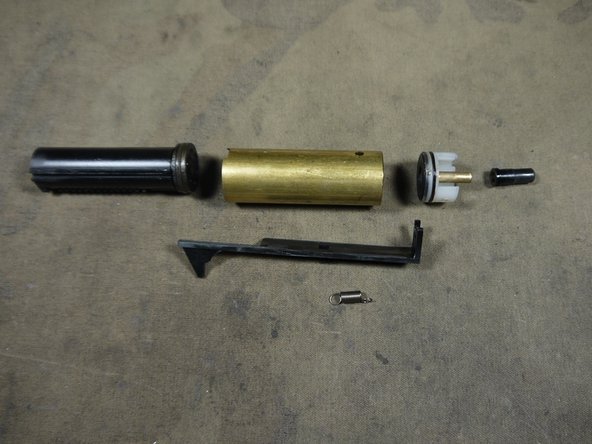
Now remove the cylinder and all the parts attached (shown in the second picture) to gain access to the gears.
-
-
Этот шаг не переведен. Помогите перевести
-
If you wish to remove the gears remember not to loose any the of the shims (little washer looking things) unless you already know how to shim.
-
Hear is a guide for G&G AEG Shimming Guide Airsoft
-
If you have no reason for removing the trigger it is easiest to leave it in place. It can be tricky sometimes to get into place. However if you need remove it it can just simple be poled out.
-