Введение
Follow this guide to learn how to replace the battery of your GPD Win. Be sure to power off your device prior to starting the guide.
Выберете то, что вам нужно
-
-
-
Carefully insert the pry tool between the keyboard and case.
-
Move the tool around the edge until every clip is released.
-
Carefully lift the back half of the case.
-
You'll see a small ribbon connector on the right. Use your pry tool to remove it by lifting up.
-
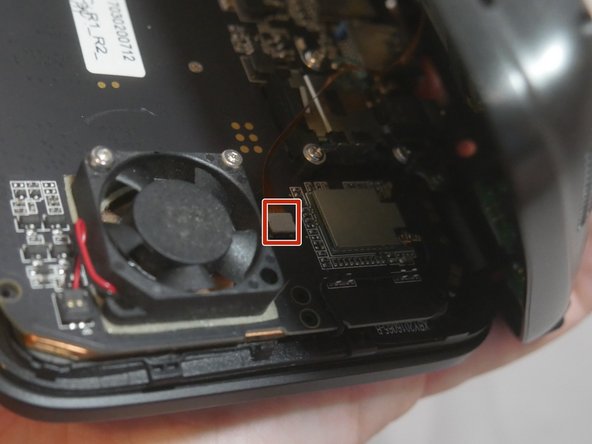
On the right, you'll see another white connector going to the battery. Use the pry tool and pull back on the connector to release it.
-
-
-
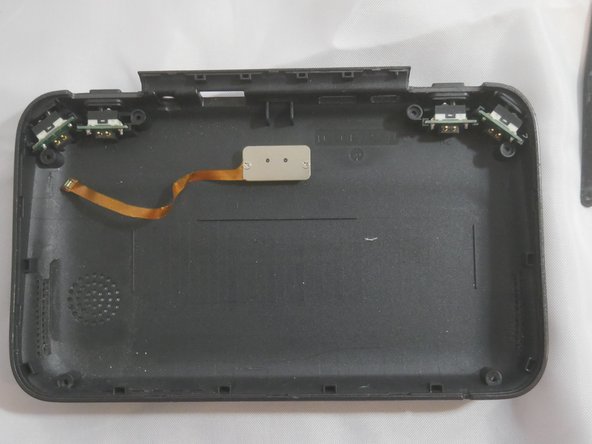
Separate the two halves of the device.
-
Use the pry tool and slowly and carefully separate the adhesive from the back of the case.
-
Remove old battery.
-
-
-
Use two to three strips of the double sided tape and apply it to the back of the battery.
-
Line up the battery with the lines on the case and the connector on the right.
-


To reassemble your device, follow these instructions in reverse order.
To reassemble your device, follow these instructions in reverse order.
Отменить: Я не выполнил это руководство.
3 участников успешно повторили данное руководство.
Команда

University of Advancing Technology, Team S1-G9, Beam Summer 2020 Участник University of Advancing Technology, Team S1-G9, Beam Summer 2020
UAT-BEAM-SU20S1G9
1 член
Автор 2 руководств
Один комментарий
At the moment, the Shenzhen Zero Five Battery Company replacement comes with two wires crossed. You'll need a small metal pick to pry the clips open enough to pull the conductors out and swap them over. It should be red, yellow, black. I've performed the modification and can confirm it works after switching the contacts.