Перейти к основному содержанию

Gamestop G3 Gamecube Left and Right Trigger Replacement

Выберете то, что вам нужно

  1. Gamestop G3 Gamecube Left and Right Trigger Replacement, Back Panel: шаг 1, изображение 1 из 3 Gamestop G3 Gamecube Left and Right Trigger Replacement, Back Panel: шаг 1, изображение 2 из 3 Gamestop G3 Gamecube Left and Right Trigger Replacement, Back Panel: шаг 1, изображение 3 из 3
    • First, remove the 6 screws in the back panel and pull the back panel off.

    • Separate the halves of the controller. However, be careful when separating due to the little wires that could get mixed up.

  2. Gamestop G3 Gamecube Left and Right Trigger Replacement: шаг 2, изображение 1 из 3 Gamestop G3 Gamecube Left and Right Trigger Replacement: шаг 2, изображение 2 из 3 Gamestop G3 Gamecube Left and Right Trigger Replacement: шаг 2, изображение 3 из 3
    • Next, remove the rumble motor by unscrewing the 2 screws connecting it.

  3. Gamestop G3 Gamecube Left and Right Trigger Replacement: шаг 3, изображение 1 из 3 Gamestop G3 Gamecube Left and Right Trigger Replacement: шаг 3, изображение 2 из 3 Gamestop G3 Gamecube Left and Right Trigger Replacement: шаг 3, изображение 3 из 3
    • Finally remove the screws holding in the right and left triggers. It's easiest to hold the trigger together as shown in the third picture. Remove both the left and right trigger, and then you have successfully removed your back panel.

  4. Gamestop G3 Gamecube Left and Right Trigger Replacement, Left and Right Trigger: шаг 4, изображение 1 из 2 Gamestop G3 Gamecube Left and Right Trigger Replacement, Left and Right Trigger: шаг 4, изображение 2 из 2
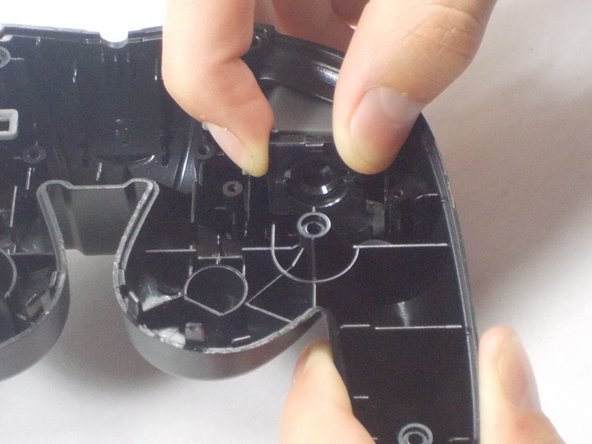
    • Remove the screws holding the plastic bumper cover in place and remove it.

  5. Gamestop G3 Gamecube Left and Right Trigger Replacement: шаг 5, изображение 1 из 3 Gamestop G3 Gamecube Left and Right Trigger Replacement: шаг 5, изображение 2 из 3 Gamestop G3 Gamecube Left and Right Trigger Replacement: шаг 5, изображение 3 из 3
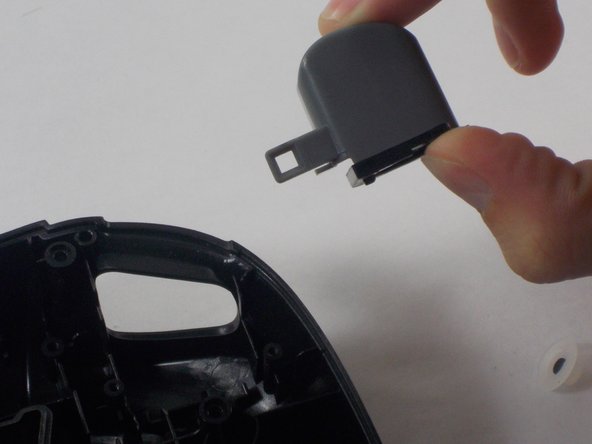
    • At this point you should be able to remove the bumper along with its spring from the controller.

    • Clean thoroughly underneath the bumper and remove any dirt or debris before reattaching.

    • To reassemble the device, follow these steps in reverse order.

Заключение

To reassemble your device, follow these instructions in reverse order.

John Harrison

Участник с: 10/28/16

213 Репутация

Автор 2 руководств

Команда

UMass Dartmouth, Team 3-5, Isaacson Fall 2016 Участник UMass Dartmouth, Team 3-5, Isaacson Fall 2016

UMASSD-ISAACSON-F16S3G5

3 членов

Автор 10 руководств

0 Комментариев

Добавить комментарий

Просмотр статистики:

За последние 24часов: 1

За последние 7 дней: 2

За последние 30 дней: 10

За всё время: 317