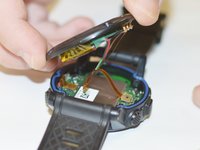
Перейти к основному содержанию

Garmin Fenix 2 Display Replacement

Выберете то, что вам нужно

  1. Garmin Fenix 2 Display Replacement, Battery: шаг 1, изображение 1 из 3 Garmin Fenix 2 Display Replacement, Battery: шаг 1, изображение 2 из 3 Garmin Fenix 2 Display Replacement, Battery: шаг 1, изображение 3 из 3
    • Use a Torx T9 screwdriver to remove these four .8mm screws and seperate the housing.

  2. Garmin Fenix 2 Display Replacement: шаг 2, изображение 1 из 2 Garmin Fenix 2 Display Replacement: шаг 2, изображение 2 из 2
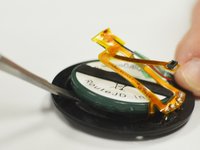
    • Use a spudger tool to disengage the power ribbon from the main board. Once the ribbon is disconnected you can separate the bottom piece of the housing that holds the battery.

  3. Garmin Fenix 2 Display Replacement: шаг 3, изображение 1 из 2 Garmin Fenix 2 Display Replacement: шаг 3, изображение 2 из 2
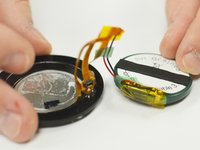
    • Use the spudger tool again and wedge it in between the battery and the housing, pry until the battery starts to separate from the adhesive holding it in place. Once you have the battery disconnected you are ready to replace it.

    • Despite the fact that the metal spudger is shown being used in this step, make sure to use a plastic opening tool or nylon spudger to pry up the battery. The metal spudger has a much larger chance of puncturing the battery, and thus should not be used.

  4. Garmin Fenix 2 Display Replacement, Motherboard: шаг 4, изображение 1 из 1
    • Use a spudger to pry open the power ribbon from the main board.

  5. Garmin Fenix 2 Display Replacement: шаг 5, изображение 1 из 1
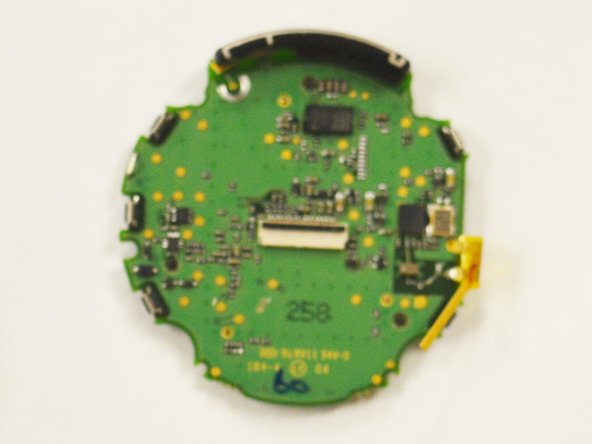
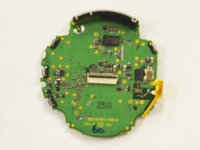
    • Use your Torx T9 screwdriver to remove the one .8mm screw that holds the main board to the watch housing.

  6. Garmin Fenix 2 Display Replacement: шаг 6, изображение 1 из 1
    • Use the spudger to pry the motherboard out of the housing.

  7. Garmin Fenix 2 Display Replacement: шаг 7, изображение 1 из 1
    • Once removed simply separate the digitizer from the main board.

  8. Garmin Fenix 2 Display Replacement: шаг 8, изображение 1 из 2 Garmin Fenix 2 Display Replacement: шаг 8, изображение 2 из 2
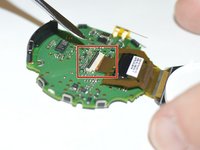
    • Lastly use your spudger tool to pry the data ribbon open from the motherboard. Once the ribbon is removed the board will be free and you can replace the board.

  9. Garmin Fenix 2 Display Replacement, Display: шаг 9, изображение 1 из 1
    • The display is also ready to be replaced.

Заключение

To reassemble your device, follow these instructions in reverse order.

Еще один человек закончил это руководство.

Brandon Barger

Участник с: 02/13/16

1 219 Репутация

Автор 5 руководств

Команда

IUPUI, Team 54-4, Wilson Spring 2016 Участник IUPUI, Team 54-4, Wilson Spring 2016

IUPUI-WILSON-S16S54G4

3 членов

Автор 6 руководств

Один комментарий

Do you know where I can buy a new screen?

Grzegorz Strzelecki - Ответить

Добавить комментарий

Просмотр статистики:

За последние 24часов: 0

За последние 7 дней: 3

За последние 30 дней: 18

За всё время: 2,738