Перейти к основному содержанию

Garmin nüvi 3590 LMT Glass Screen Replacement

Выберете то, что вам нужно

  1. Garmin nüvi 3590 LMT Glass Screen Replacement, Battery: шаг 1, изображение 1 из 1
    • Turn the device off by pressing and holding the power button on the top left of the device.

  2. Garmin nüvi 3590 LMT Glass Screen Replacement: шаг 2, изображение 1 из 1
    • Use the plastic opening tool to separate the tabs on the black back cover of the device by leveraging the tool against the frame around the perimeter of the device.

  3. Garmin nüvi 3590 LMT Glass Screen Replacement: шаг 3, изображение 1 из 1
    • Once all of the tabs are popped out, take the back cover off.

    • The back cover is a separate piece from the device.

  4. Garmin nüvi 3590 LMT Glass Screen Replacement: шаг 4, изображение 1 из 2 Garmin nüvi 3590 LMT Glass Screen Replacement: шаг 4, изображение 2 из 2
    • Using the plastic spudger, carefully remove the white tab connected to the battery from the device by pulling the tab in the opposite direction from which it is connected.

  5. Garmin nüvi 3590 LMT Glass Screen Replacement: шаг 5, изображение 1 из 3 Garmin nüvi 3590 LMT Glass Screen Replacement: шаг 5, изображение 2 из 3 Garmin nüvi 3590 LMT Glass Screen Replacement: шаг 5, изображение 3 из 3
    • Use the plastic spudger to lift the battery up and away from the device.

    • Do not puncture or bend the battery. Serious health complications could occur.

  6. Garmin nüvi 3590 LMT Glass Screen Replacement, Glass Screen: шаг 6, изображение 1 из 2 Garmin nüvi 3590 LMT Glass Screen Replacement, Glass Screen: шаг 6, изображение 2 из 2
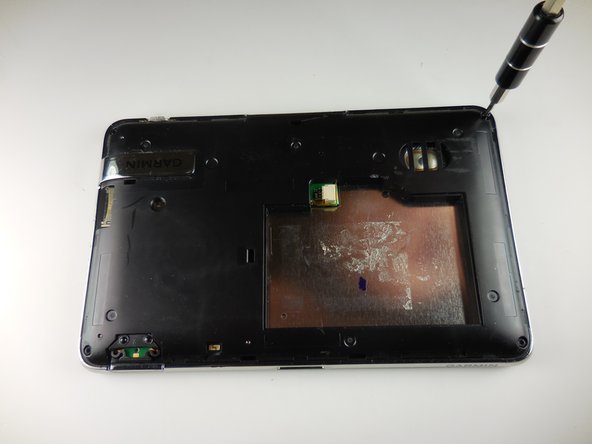
    • Using the T5 bit, unscrew the four 5.7mm screws in the four corners on the back of the device.

  7. Garmin nüvi 3590 LMT Glass Screen Replacement: шаг 7, изображение 1 из 3 Garmin nüvi 3590 LMT Glass Screen Replacement: шаг 7, изображение 2 из 3 Garmin nüvi 3590 LMT Glass Screen Replacement: шаг 7, изображение 3 из 3
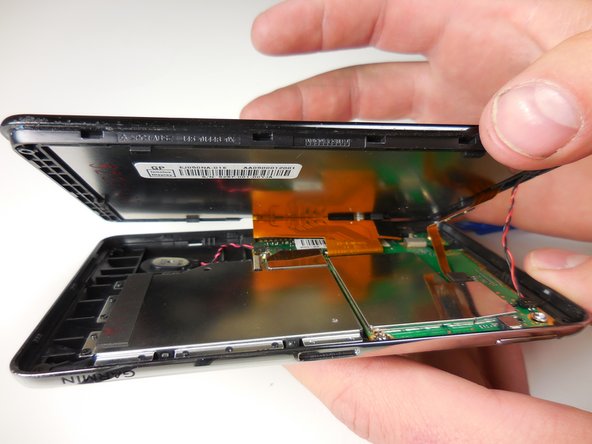
    • Use the plastic opening tool to leverage up on the tabs between the black screen and the metal frame.

    • Do not forcibly separate the two pieces after the tabs have been popped. There are connections between the two pieces that could be torn.

  8. Garmin nüvi 3590 LMT Glass Screen Replacement: шаг 8, изображение 1 из 2 Garmin nüvi 3590 LMT Glass Screen Replacement: шаг 8, изображение 2 из 2
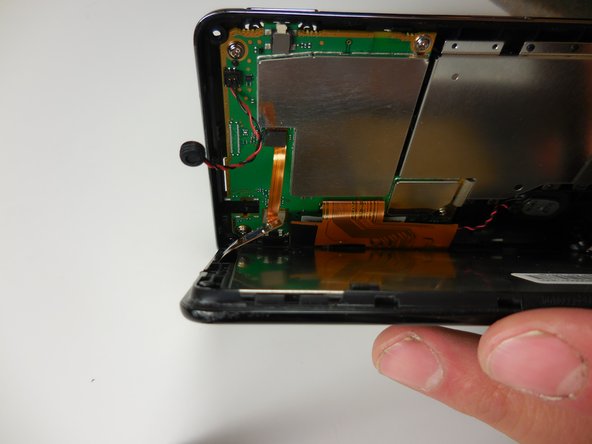
    • Using your fingers, pull up on the red and black wire from the back of the screen.

    • This wire is part of the speaker, so be careful not to damage it.

  9. Garmin nüvi 3590 LMT Glass Screen Replacement: шаг 9, изображение 1 из 2 Garmin nüvi 3590 LMT Glass Screen Replacement: шаг 9, изображение 2 из 2
    • Pull up on the smaller orange tab with your finger from the circuit board.

  10. Garmin nüvi 3590 LMT Glass Screen Replacement: шаг 10, изображение 1 из 3 Garmin nüvi 3590 LMT Glass Screen Replacement: шаг 10, изображение 2 из 3 Garmin nüvi 3590 LMT Glass Screen Replacement: шаг 10, изображение 3 из 3
    • For the larger orange connection, there is a white tab holding the connection to the circuit board.

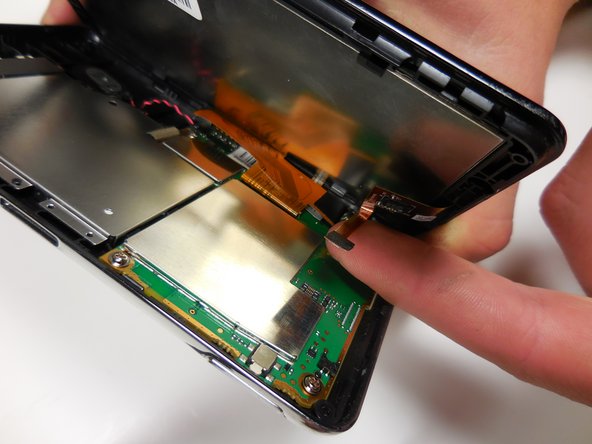
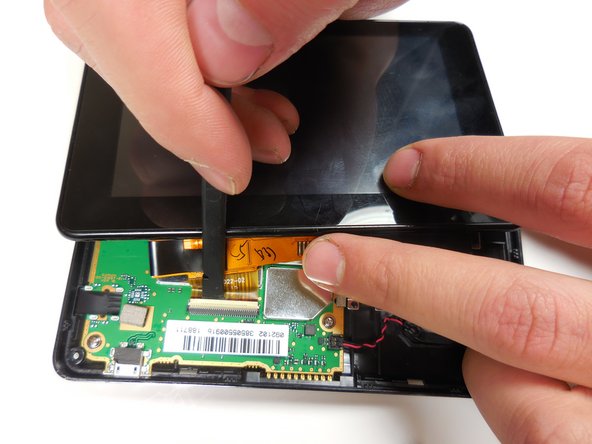
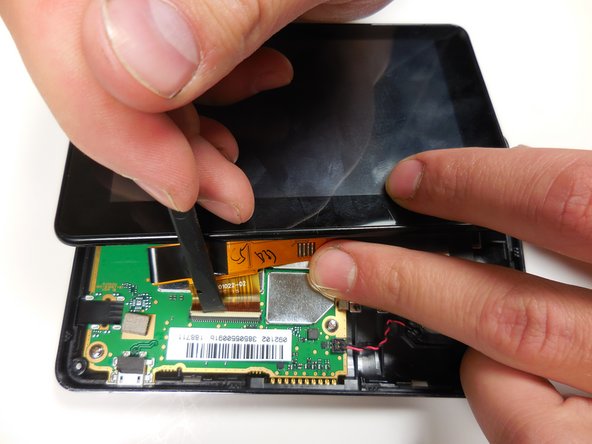
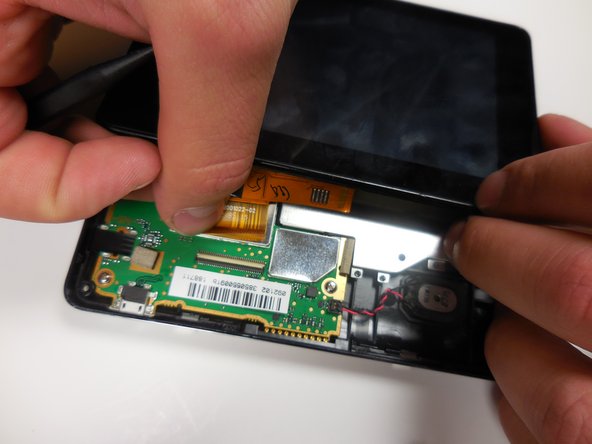
    • Lift the white tab gently with the plastic spudger and remove the orange connection from the circuit board.

  11. Garmin nüvi 3590 LMT Glass Screen Replacement: шаг 11, изображение 1 из 3 Garmin nüvi 3590 LMT Glass Screen Replacement: шаг 11, изображение 2 из 3 Garmin nüvi 3590 LMT Glass Screen Replacement: шаг 11, изображение 3 из 3
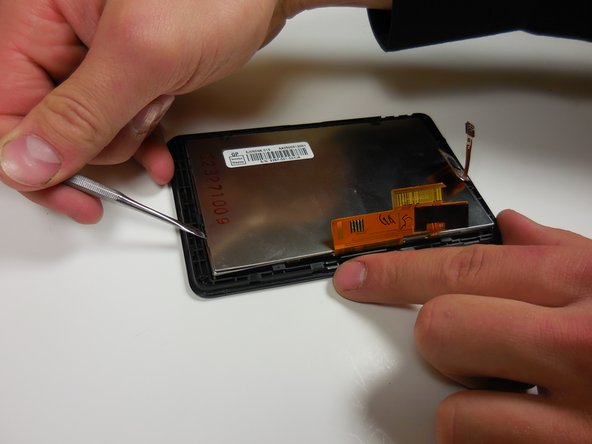
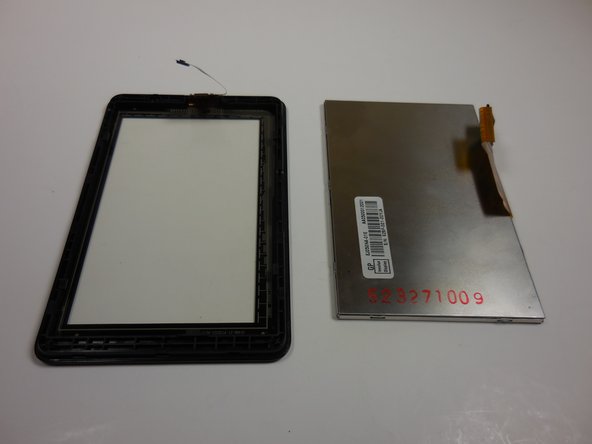
    • Use the metal spudger to leverage and lift the metal board from the glass paneling around the perimeter of the device.

    • Be careful to not damage any connections.

Заключение

To reassemble your device, follow these instructions in reverse order.

6 участников успешно повторили данное руководство.

Kayla Katz

Участник с: 03/11/15

576 Репутация

Автор 2 руководств

Команда

Colorado Springs, Team 4-1, Panko Spring 2015 Участник Colorado Springs, Team 4-1, Panko Spring 2015

UCCS-PANKO-S15S4G1

2 членов

Автор 5 руководств

2 Комментариев

Where can I buy the glass screen digitizer?

Bryan - Ответить

Thanks for instruction, it helped me a lot, but removing of battery in step 5 makes no sense. The battery stays on the metal plate and does not disturbs for next steps. Of course the cable must be disconnected from the board to make it powerless.

BR

Dennis

Dennis Kiel - Ответить

Добавить комментарий

Просмотр статистики:

За последние 24часов: 0

За последние 7 дней: 2

За последние 30 дней: 11

За всё время: 3,301