Перейти к основному содержанию

Gateway KAV60 LT2016U Netbook Cooling Fan Replacement

Архивированное руководство
Это руководство сохранено для исторических целей. Используйте его обновлённую версию, чтобы выполнить ремонт.

Выберете то, что вам нужно

  1. Gateway KAV60 LT2016U Netbook Cooling Fan Replacement, Battery: шаг 1, изображение 1 из 1
    • Unlock the button in the top left on the back of the laptop (So the red is showing).

  2. Gateway KAV60 LT2016U Netbook Cooling Fan Replacement: шаг 2, изображение 1 из 1
    • The battery should be able to be removed easily now.

  3. Gateway KAV60 LT2016U Netbook Cooling Fan Replacement, Cooling Fan: шаг 3, изображение 1 из 1
    • Start by first removing the battery of the device.

  4. Gateway KAV60 LT2016U Netbook Cooling Fan Replacement: шаг 4, изображение 1 из 1
    • Next remove the RAM, hard drive, and wifi card before continuing so they aren't damaged.

  5. Gateway KAV60 LT2016U Netbook Cooling Fan Replacement: шаг 5, изображение 1 из 2 Gateway KAV60 LT2016U Netbook Cooling Fan Replacement: шаг 5, изображение 2 из 2
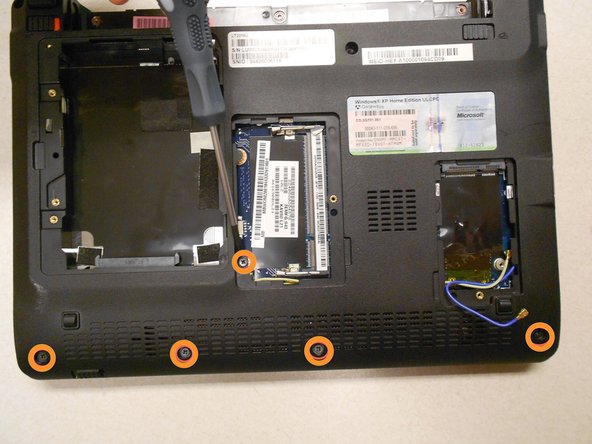
    • Remove all 11 of the screw shown on the bottom of the lap top using the specified screw driver.

  6. Gateway KAV60 LT2016U Netbook Cooling Fan Replacement: шаг 6, изображение 1 из 3 Gateway KAV60 LT2016U Netbook Cooling Fan Replacement: шаг 6, изображение 2 из 3 Gateway KAV60 LT2016U Netbook Cooling Fan Replacement: шаг 6, изображение 3 из 3
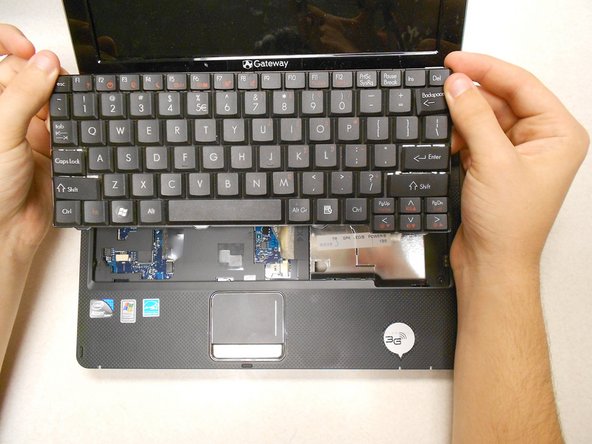
    • Lift off the keyboard by doing exactly what is shown in the first picture. Get the head of the plastic opening tool under and then wedge it out.

  7. Gateway KAV60 LT2016U Netbook Cooling Fan Replacement: шаг 7, изображение 1 из 3 Gateway KAV60 LT2016U Netbook Cooling Fan Replacement: шаг 7, изображение 2 из 3 Gateway KAV60 LT2016U Netbook Cooling Fan Replacement: шаг 7, изображение 3 из 3
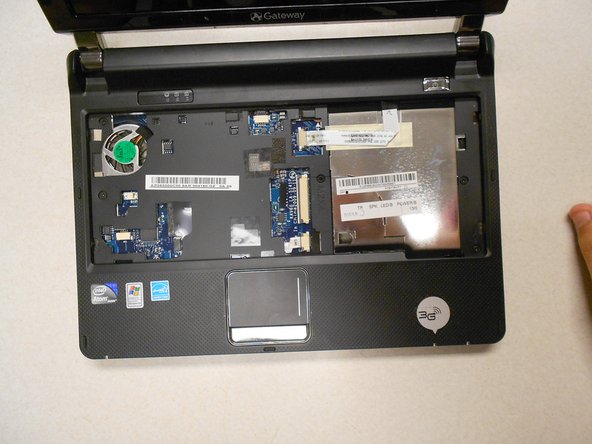
    • Remove the 5 circled screws with the Phillips #0 screw driver.

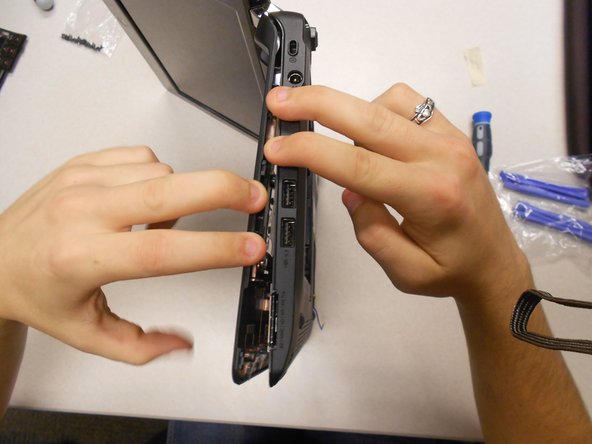
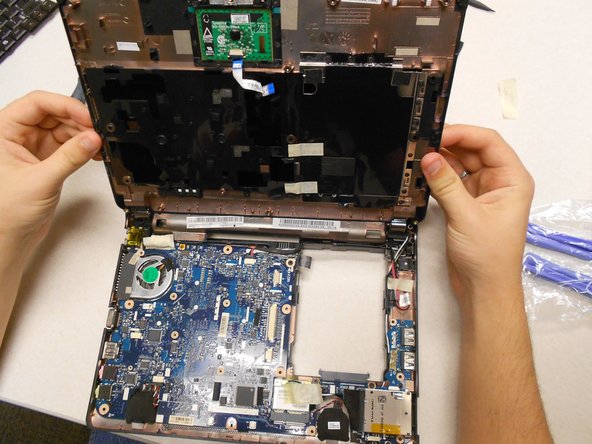
    • Carefully separate the back cover from the front either using your hands or a plastic opening tool.

  8. Gateway KAV60 LT2016U Netbook Cooling Fan Replacement: шаг 8, изображение 1 из 2 Gateway KAV60 LT2016U Netbook Cooling Fan Replacement: шаг 8, изображение 2 из 2
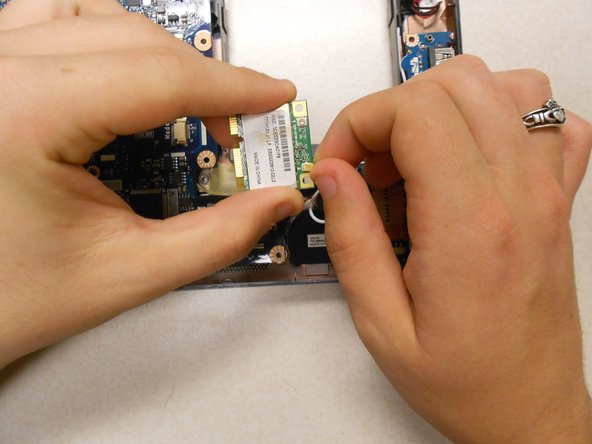
    • Unscrew this 1 screw to remove the wifi card.

    • Then unplug the wires it is attached to and take it out.

  9. Gateway KAV60 LT2016U Netbook Cooling Fan Replacement: шаг 9, изображение 1 из 2 Gateway KAV60 LT2016U Netbook Cooling Fan Replacement: шаг 9, изображение 2 из 2
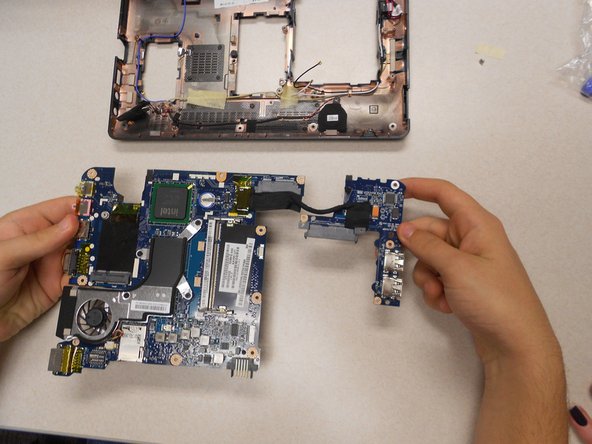
    • Use the phillps #00 screw driver to remove these 3 small scows so the motherboard can be removed.

    • Then remove it from the base of th computer.

  10. Gateway KAV60 LT2016U Netbook Cooling Fan Replacement: шаг 10, изображение 1 из 1
    • Use the Phillips #00 screw driver to remove the 4 circled screws.

  11. Gateway KAV60 LT2016U Netbook Cooling Fan Replacement: шаг 11, изображение 1 из 1
    • Disconnect the wires from the motherboard.

    • The fan should now be fully disconnected and ready to replace.

Заключение

To reassemble your device, follow these instructions in reverse order.

Еще один человек закончил это руководство.

Kyle

Участник с: 03/11/14

622 Репутация

Автор 3 руководств

Команда

UMass Dartmouth, Team 3-2, Calaway Spring 2014 Участник UMass Dartmouth, Team 3-2, Calaway Spring 2014

UMASSD-CALAWAY-S14S3G2

4 членов

Автор 6 руководств

0 Комментариев

Добавить комментарий

Просмотр статистики:

За последние 24часов: 0

За последние 7 дней: 0

За последние 30 дней: 1

За всё время: 109