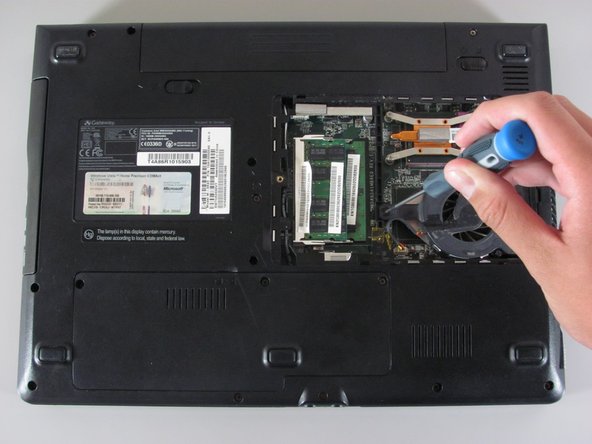
Перейти к основному содержанию

Gateway SA1 Cooling Fan Replacement

Выберете то, что вам нужно

  1. Gateway SA1 Cooling Fan Replacement, Battery: шаг 1, изображение 1 из 1
    • Move the latch to the right of the battery to unlock.

  2. Gateway SA1 Cooling Fan Replacement: шаг 2, изображение 1 из 1
    • Slide the latch on the left directly below the battery to unlock and pull out the battery as shown.

    • The latch must be held in position to remove the battery.

  3. Gateway SA1 Cooling Fan Replacement, Cooling Fan: шаг 3, изображение 1 из 2 Gateway SA1 Cooling Fan Replacement, Cooling Fan: шаг 3, изображение 2 из 2
    • Unscrew the indicated Philips screw.

    • Screw cannot be completely removed from cover.

  4. Gateway SA1 Cooling Fan Replacement: шаг 4, изображение 1 из 1
    • Use the spudger to pry open the cover.

    • There will be three tabs on each side except for the side with the screw.

  5. Gateway SA1 Cooling Fan Replacement: шаг 5, изображение 1 из 2 Gateway SA1 Cooling Fan Replacement: шаг 5, изображение 2 из 2
    • Unscrew the six indicated Philips screws.

    • These screws cannot be completely removed from the cooling fan component.

  6. Gateway SA1 Cooling Fan Replacement: шаг 6, изображение 1 из 1
    • Unplug the shown cable attaching the cooling fan to the computer.

  7. Gateway SA1 Cooling Fan Replacement: шаг 7, изображение 1 из 1
    • You are now able to remove the cooling fan.

Заключение

To reassemble your device, follow these instructions in reverse order.

6 участников успешно повторили данное руководство.

Diego Carteno

Участник с: 04/15/10

258 Репутация

Автор 7 руководств

Команда

Cal Poly, Team 24-20, Regan Spring 2010 Участник Cal Poly, Team 24-20, Regan Spring 2010

CPSU-REGAN-S10S24G20

4 членов

Автор 14 руководств

0 Комментариев

Добавить комментарий

Просмотр статистики:

За последние 24часов: 0

За последние 7 дней: 1

За последние 30 дней: 3

За всё время: 13,430