Перейти к основному содержанию

Gigabyte P35K Laptop Hard Drive Replacement

Выберете то, что вам нужно

  1. Gigabyte P35K Laptop Hard Drive Replacement, Hard Drive: шаг 1, изображение 1 из 3 Gigabyte P35K Laptop Hard Drive Replacement, Hard Drive: шаг 1, изображение 2 из 3 Gigabyte P35K Laptop Hard Drive Replacement, Hard Drive: шаг 1, изображение 3 из 3
    • Touch grounded metal objects occasionally with a clear path to the ground, such as a metal radiator, to ensure that static electricity does not build up and discharge, damaging electronic components.

    • Work on a clean hard surface to minimize static buildup.

    • Fully power off the laptop.

    • Close the lid.

    • Flip the laptop over.

  2. Gigabyte P35K Laptop Hard Drive Replacement: шаг 2, изображение 1 из 2 Gigabyte P35K Laptop Hard Drive Replacement: шаг 2, изображение 2 из 2
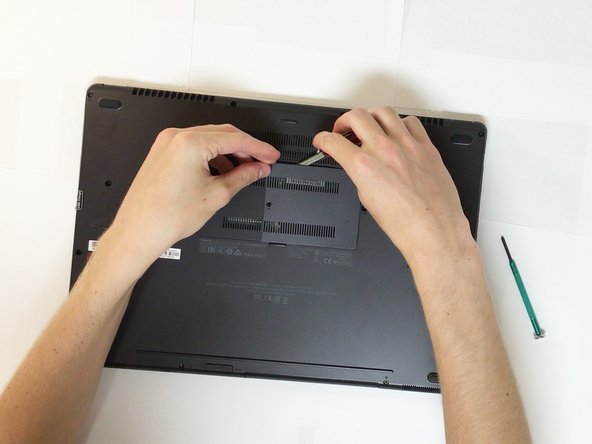
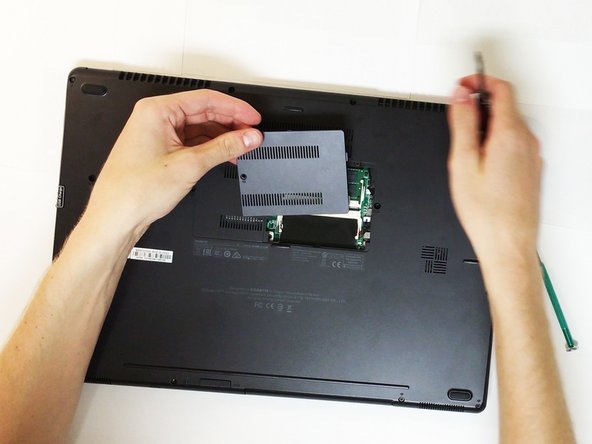
    • Locate the small plastic back plate.

    • Remove the small 4.0mm screw holding the small plastic back plate in place.

  3. Gigabyte P35K Laptop Hard Drive Replacement: шаг 3, изображение 1 из 3 Gigabyte P35K Laptop Hard Drive Replacement: шаг 3, изображение 2 из 3 Gigabyte P35K Laptop Hard Drive Replacement: шаг 3, изображение 3 из 3
    • Remove the small plastic back plate.

    • Use a small flat head tool or knife to lift the plastic back plate and then use your hands to gently remove the plastic plate.

  4. Gigabyte P35K Laptop Hard Drive Replacement: шаг 4, изображение 1 из 3 Gigabyte P35K Laptop Hard Drive Replacement: шаг 4, изображение 2 из 3 Gigabyte P35K Laptop Hard Drive Replacement: шаг 4, изображение 3 из 3
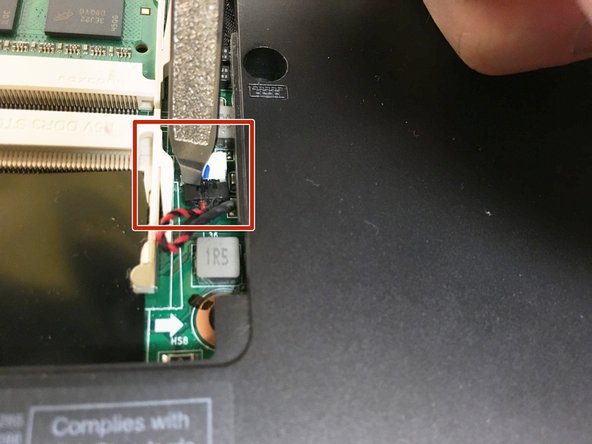
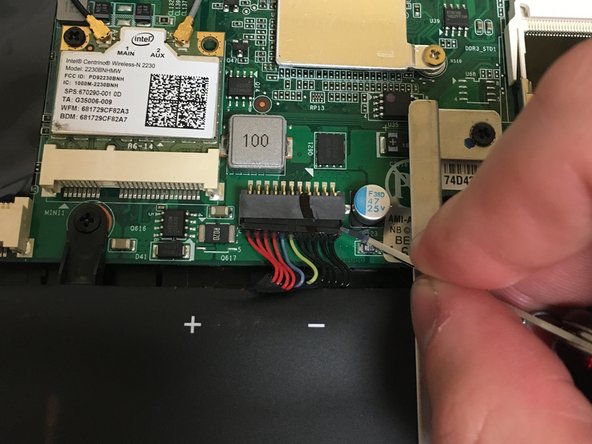
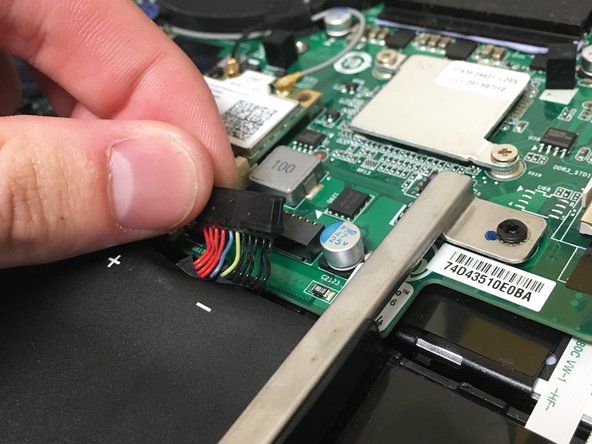
    • Disconnect the small red and black cord connecting motherboard to the case using a small flathead screwdriver.

    • This cord is located under the back panel which was removed in the previous step.

    • Do not pull directly on the wires, instead gently pry the connector apart.

  5. Gigabyte P35K Laptop Hard Drive Replacement: шаг 5, изображение 1 из 2 Gigabyte P35K Laptop Hard Drive Replacement: шаг 5, изображение 2 из 2
    • Slide the switch on the base of the laptop from locked to open.

  6. Gigabyte P35K Laptop Hard Drive Replacement: шаг 6, изображение 1 из 2 Gigabyte P35K Laptop Hard Drive Replacement: шаг 6, изображение 2 из 2
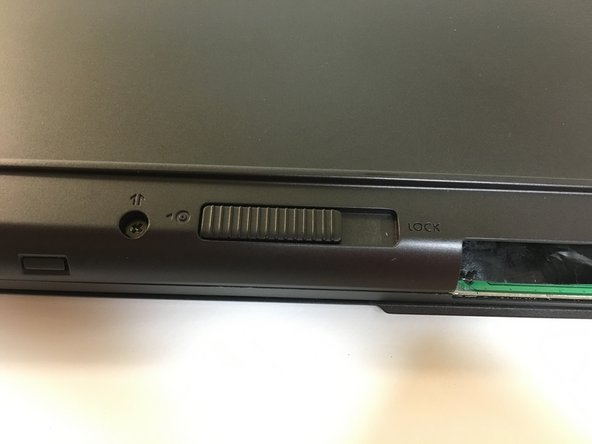
    • Remove the removable drive bay or CD drive, whichever one is currently present in the laptop.

  7. Gigabyte P35K Laptop Hard Drive Replacement: шаг 7, изображение 1 из 2 Gigabyte P35K Laptop Hard Drive Replacement: шаг 7, изображение 2 из 2
    • Remove the 8 longer 7.0mm screws from the top and bottom of the laptop.

    • Remove the 6 shorter 5.0mm screws from the middle of the laptop.

  8. Gigabyte P35K Laptop Hard Drive Replacement: шаг 8, изображение 1 из 3 Gigabyte P35K Laptop Hard Drive Replacement: шаг 8, изображение 2 из 3 Gigabyte P35K Laptop Hard Drive Replacement: шаг 8, изображение 3 из 3
    • Beginning from the hole created by removing the drive bay in step 6 and moving in a counterclockwise direction, begin separating the base by gently prying between the seam separating the base from the mother board, using either your fingernail or a small flathead tool.

    • During this process you may hear small pops which is just the plastic releasing from the motherboard.

  9. Gigabyte P35K Laptop Hard Drive Replacement: шаг 9, изображение 1 из 2 Gigabyte P35K Laptop Hard Drive Replacement: шаг 9, изображение 2 из 2
    • Carefully place base plate aside, ensuring not to disconnect the wire which runs from the motherboard to the baseplate.

    • There is no need to disconnect the cable connecting the motherboard to the base of the computer as it is long enough to not interfere with the rest of the guide.

  10. Gigabyte P35K Laptop Hard Drive Replacement: шаг 10, изображение 1 из 3 Gigabyte P35K Laptop Hard Drive Replacement: шаг 10, изображение 2 из 3 Gigabyte P35K Laptop Hard Drive Replacement: шаг 10, изображение 3 из 3
    • Disconnect the battery from the motherboard by gently prying the plastic connector apart

    • Do not pull directly on the battery wires, first disconnect the plastic connector.

    • You do not need to remove the battery from the laptop, just make sure the connector is disconnected.

    • This is done to avoid electric discharge and possible damage to internal component.

  11. Gigabyte P35K Laptop Hard Drive Replacement: шаг 11, изображение 1 из 1
    • Locate hard drive in the bottom right of the laptop.

  12. Gigabyte P35K Laptop Hard Drive Replacement: шаг 12, изображение 1 из 2 Gigabyte P35K Laptop Hard Drive Replacement: шаг 12, изображение 2 из 2
    • Remove the two screws holding the hard drive in the laptop.

    • There is still a SATA cable holding the hard drive in the laptop so be careful after removing the screws.

  13. Gigabyte P35K Laptop Hard Drive Replacement: шаг 13, изображение 1 из 3 Gigabyte P35K Laptop Hard Drive Replacement: шаг 13, изображение 2 из 3 Gigabyte P35K Laptop Hard Drive Replacement: шаг 13, изображение 3 из 3
    • Remove the SATA connector by gently prying the far right, and then the far left of the connector until it slides out of the hard drive.

  14. Gigabyte P35K Laptop Hard Drive Replacement: шаг 14, изображение 1 из 3 Gigabyte P35K Laptop Hard Drive Replacement: шаг 14, изображение 2 из 3 Gigabyte P35K Laptop Hard Drive Replacement: шаг 14, изображение 3 из 3
    • Remove the hard drive from the laptop by picking it up.

    • Un-screw the metal holder by removing two more screws, one on either side of the hard drive.

  15. Gigabyte P35K Laptop Hard Drive Replacement: шаг 15, изображение 1 из 1
    • If replacing with an identical hard drive, repeat all the steps backwards and if necessary, reinstall windows.

    • If replacing the hard drive with a solid state drive, there may be a small gap between the metal holder and the top of the SSD, but this is normal.

Заключение

To reassemble your device, follow these instructions in reverse order.

6 участников успешно повторили данное руководство.

Wilson Fletcher

Участник с: 09/29/15

281 Репутация

1 руководство автора

Команда

Cal Poly, Team 14-3, Green Fall 2015 Участник Cal Poly, Team 14-3, Green Fall 2015

CPSU-GREEN-F15S14G3

4 членов

Автор 5 руководств

0 Комментариев

Добавить комментарий

Просмотр статистики:

За последние 24часов: 3

За последние 7 дней: 10

За последние 30 дней: 27

За всё время: 8,478